Loading ...
Loading ...
Loading ...
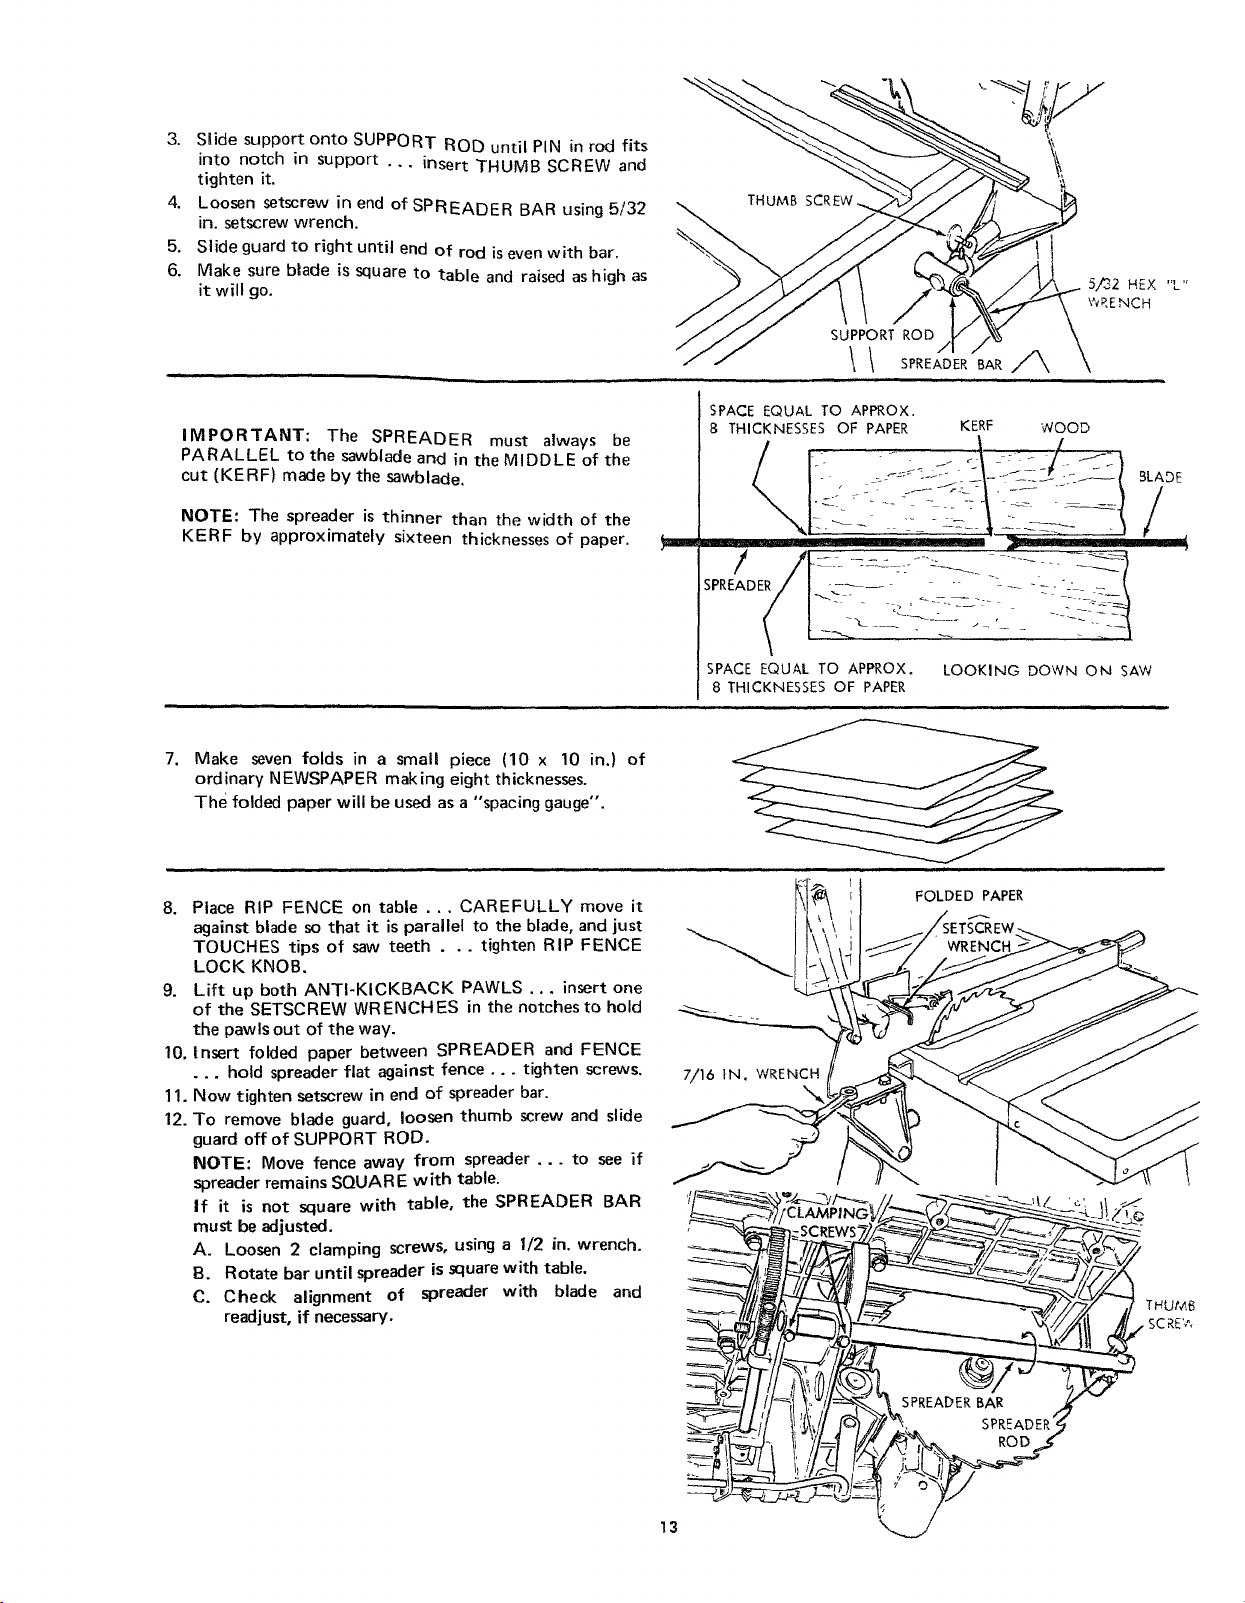
3. SHdesupportontoSUPPORTRODuntilPINinrodfits
intonotchin support... insertTHUMBSCREWand
tightenit.
4. LoosensetscrewinendofSPREADERBARusing5/32
in.setscrewwrench.
5. Slideguardtorightuntilendofrodisevenwithbar.
6. Makesurebladeissquareto tableandraisedashighas
it will go.
SUPPORT ROD
! I SPREADER BAR ,_
IMPORTANT: The SPREADER must always be
PARALLEL to the sawblade and in the MIDDLE of the
cut (KERF) made by the sawblade.
NOTE: The spreader is thinner than the width of the
KERF by approximately sixteen thicknesses of paper,
SPACE EQLJAL TO APPROX.
8 THICKNESSES OF PAPER KERF WOOD
SPACE EQUAL TO APPROX. LOOKING DOWN ON SAW
8 THICKNESSES OF PAPER
7. Make seven folds in a small piece (10 x 10 in.) of
ordinary NEWSPAPER making eight thicknesses.
The folded paper will be used asa "spacing gauge".
8. Place RIP FENCE on table ... CAREFULLY move it
against blade so that it is parallel to the blade, and just
TOUCHES tips of saw teeth . .. tighten RIP FENCE
LOCK KNOB.
9. Lift up both ANTI-KICKBACK PAWLS... insert one
of the SETSCREW WRENCHES in the notches to hold
the pawls out of the way.
10. Insert folded paper between SPREADER and FENCE
... hold spreader flat against fence.., tighten screws.
11. Now tighten setscrew in end of spreader bar.
12. To remove blade guard, loosen thumb screw and slide
guard off of SUPPORT ROD.
NOTE: Move fence away from spreader ... to see if
spreader remains SQUARE with table.
If it is not square with table, the SPREADER BAR
must be adjusted.
A. Loosen 2 clamping screws, using a 1/2 in. wrench.
B. Rotate bar until spreader is square with table.
C. Check alignment of spreader with blade and
readjust, if necessary.
FOLDED PAPER
7,/16 IN. WRENCH
, - _sCR[WS_ _/_----_ _PP-'-r-__-
___ SPREAD E_R/_'_ _
Loading ...
Loading ...
Loading ...