Loading ...
Loading ...
Loading ...
13
ENGLISH
removing/installing attachments or accessories.
An accidental start-up can causeinjury.
WARNING: Always use eye protection. All users and
bystanders must wear eye protection that conforms to
ANSI Z87.1 (CAN/CSA Z94.3).
WARNING: To ensure the blade path is clear of
obstructions, always make a dry run of the cut without
power before making any cuts on theworkpiece.
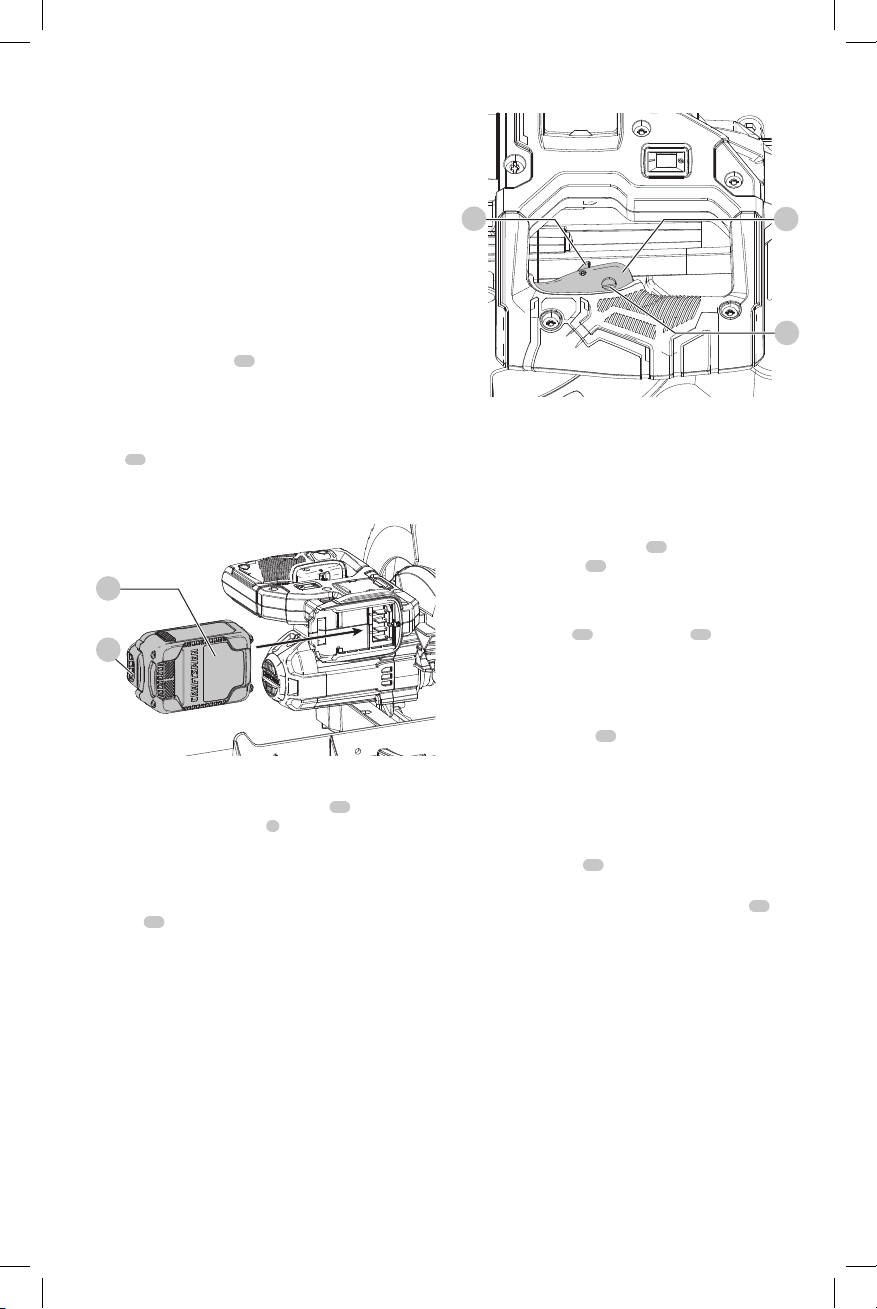
Installing and Removing the Battery Pack
(Fig. J)
NOTE: For best results, make sure your battery pack is
fullycharged.
To install the battery pack
13
into the tool handle, align the
battery pack with the rails inside the tool’s handle and slide
it into the handle until the battery pack is firmly seated in
the tool and ensure that it does notdisengage.
To remove the battery pack from the tool, press the release
button
38
and firmly pull the battery pack out of the tool
handle. Insert it into the charger as described in the charger
section of thismanual.
Fig. J
13
38
Trigger Switch (Fig. K)
To turn the saw on, push the lock-off lever
15
to the left,
then depress the trigger switch
1
. The saw will run while
the switch is depressed. Allow the blade to spin up to full
operating speed before making the cut. To turn the saw off,
release the switch. Allow the blade to stop before raising
the saw head. There is no provision for locking the switch
on. A hole
41
is provided in the trigger for insertion of a
padlock to lock the switchoff.
Your saw is not equipped with an automatic electric blade
brake, but the saw blade should stop within 5 seconds
of trigger release. This is not adjustable. If the stop time
repeatedly exceeds 5 seconds, have the tool serviced by an
authorized servicecenter.
Always be sure the blade has stopped before removing it
from thekerf.
Fig. K
15
1
41
Dust Extraction (Fig. A, L)
WARNING: To reduce the risk of serious personal
injury, turn tool off and remove the battery pack
before transporting, making any adjustments or
removing/installing attachments or accessories.
An accidental start-up can causeinjury.
Your saw has a built-in dust port
12
that allows either
the supplied dust bag
42
or a shop vacuum system to
beconnected.
To Attach the Dust Bag
1. Fit the dust bag
42
to the dust port
12
as shown in
FigureL1.
2. A vacuum tube can be fitted to the dust port rather than
the dust bag. This can be done by fitting your vacuum
tube in place of the dust bag.
3. Use the velcro strap
45
to hold your vacuum tube clear
from the sliding rails while operating the saw as shown
in FigureL2.
NOTE: The velcro strap is not a carrying handle and should
not be used to move or transport the saw.
To Empty the Dust Bag
1. Remove dust bag
42
from the saw and gently shake or
tap the dust bag toempty.
2. Reattach the dust bag back onto the dust port
12
.
You may notice that all the dust will not come free from the
bag. This will not affect cutting performance but will reduce
the saw's dust collection efficiency. To restore your saw's
dust collection efficiency, depress the spring inside the dust
bag when you are emptying it and tap it on the side of the
trash can or dustreceptacle.
CAUTION: Never operate this saw unless the dust
bag or dust extractor is in place. Wood dust may
create a breathinghazard.
Loading ...
Loading ...
Loading ...