Loading ...
Loading ...
Loading ...
8 49-1000640 Rev. 0
Starting the ice machine
,FHVFRRS
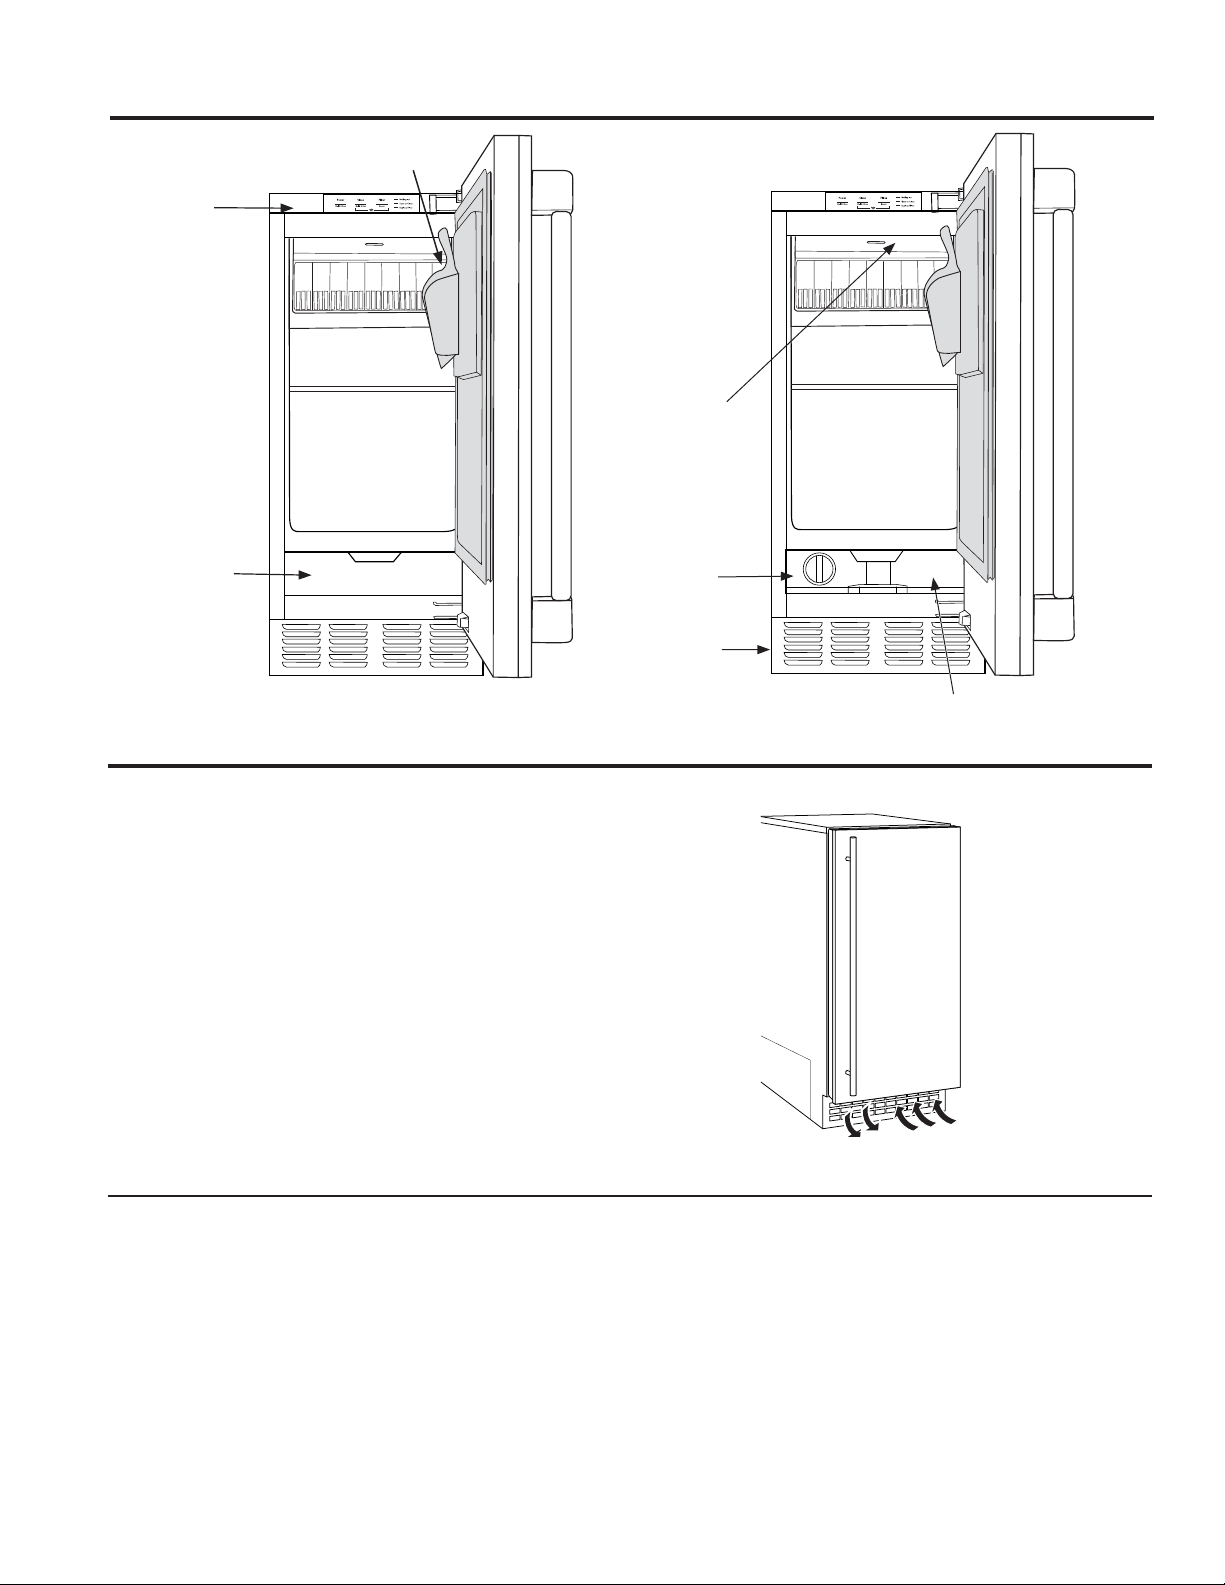
Light
Water filter
Kick Plate
&RQQHFWHG$SSOLDQFH,QIRUPDWLRQ/DEHO
Control panel
Water filter
access door
Initial Start Up
1. Turn on the water supply.
2. Switch on the electrical power.
3UHVVDQGKROG3RZHUIRUVHFRQGVWRVWDUWWKH
PDFKLQH7KH0DNLQJ,FHOLJKWZLOOWXUQRQ
4. Water will begin to flow into the unit. When the
reservoir is full, water will start to drain from the
machine. After a few minutes the compressor, water
pump and fan motor will begin to operate as the first
ice making cycle begins.
,QDSSUR[LPDWHO\PLQXWHVLFHZLOOIDOOLQWRWKHLFH
storage bin. The machine makes 24 cubes at a time.
,WLVQRUPDOIRUWKHILUVWEDWFKHVRILFHWRPHOWDVWKH
ELQFRROV,WZLOOWDNHKRXUVRIFRQWLQXRXVUXQ
time to fill the ice bin. When the ice bin is full, the ice
PDFKLQHZLOOVKXWRII,WZLOODXWRPDWLFDOO\UHVWDUWZKHQ
the ice level falls, either from use or normal meltage.
'LVFDUGWKHILUVWELQIXOORILFH
Features
USING THE ICE MACHINE: Features/ Starting the ice machine
This machine takes in room temperature air at the lower
right front and forces warm air out the lower left front.
Restricting the airflow or operating the machine in a hot
or cold environment will adversely affect the ability of the
ice machine to make ice.
When the door is opened, the control panel, ice making
area and ice storage bin are visible. The scoop is located
in a holder on the inside of the door.
This is a gravity drain model that must have a building
drain connection below the level of the drain tube at the
back of the cabinet. A pump can be installed, which can
force drain water up a maximum of 8 feet, allowing it
to be located where a gravity drain isn't available. See
Accessories on page 27 for more information on the
drain pump.
Warm Air Out
$LU,QWDNH
Loading ...
Loading ...
Loading ...