Loading ...
Loading ...
Loading ...
18 49-1000640 Rev. 0
PLUMBING - DRAIN PUMP
Drain Installation
A drain pump is available for this ice machine. The
GUDLQ SXPS NLW QXPEHU LV 83. DQG LV DYDLODEOH DW
GEApplianceparts.com or by calling GE
Appliances at ,Q &DQDGD YLVLW
GEAppliances.ca or call 800.661.1616.
PLUMBING - GRAVITY DRAIN
Drain Installation
NOTICE
Restrictions in the drain
system to the machine will cause water to back
up into the ice storage bin and melt the ice.
Gravity drain tubing must be vented, have no
kinks, and slope to the building drain. Air gaps
are typically required by local codes.
1. Place the ice machine in front of the installation
opening. Adjust leveling legs to the approximate
height.
,QVHUW GUDLQ WXEH WKURXJK WKH URXWLQJ KROH LQ WKH
back panel.
3. Remove the left side access panel for access to
drain connection.
NOTE: ,I WKH GUDLQ RSHQLQJ KDV EHHQ ORFDWHG LQ WKH
floor under the base pan according to the pre install
specifications, follow steps 4 through 6 to drain the
XQLW WKURXJK WKH EDVH ,I QRW SURFHHG WR VWHS
Installation Instructions
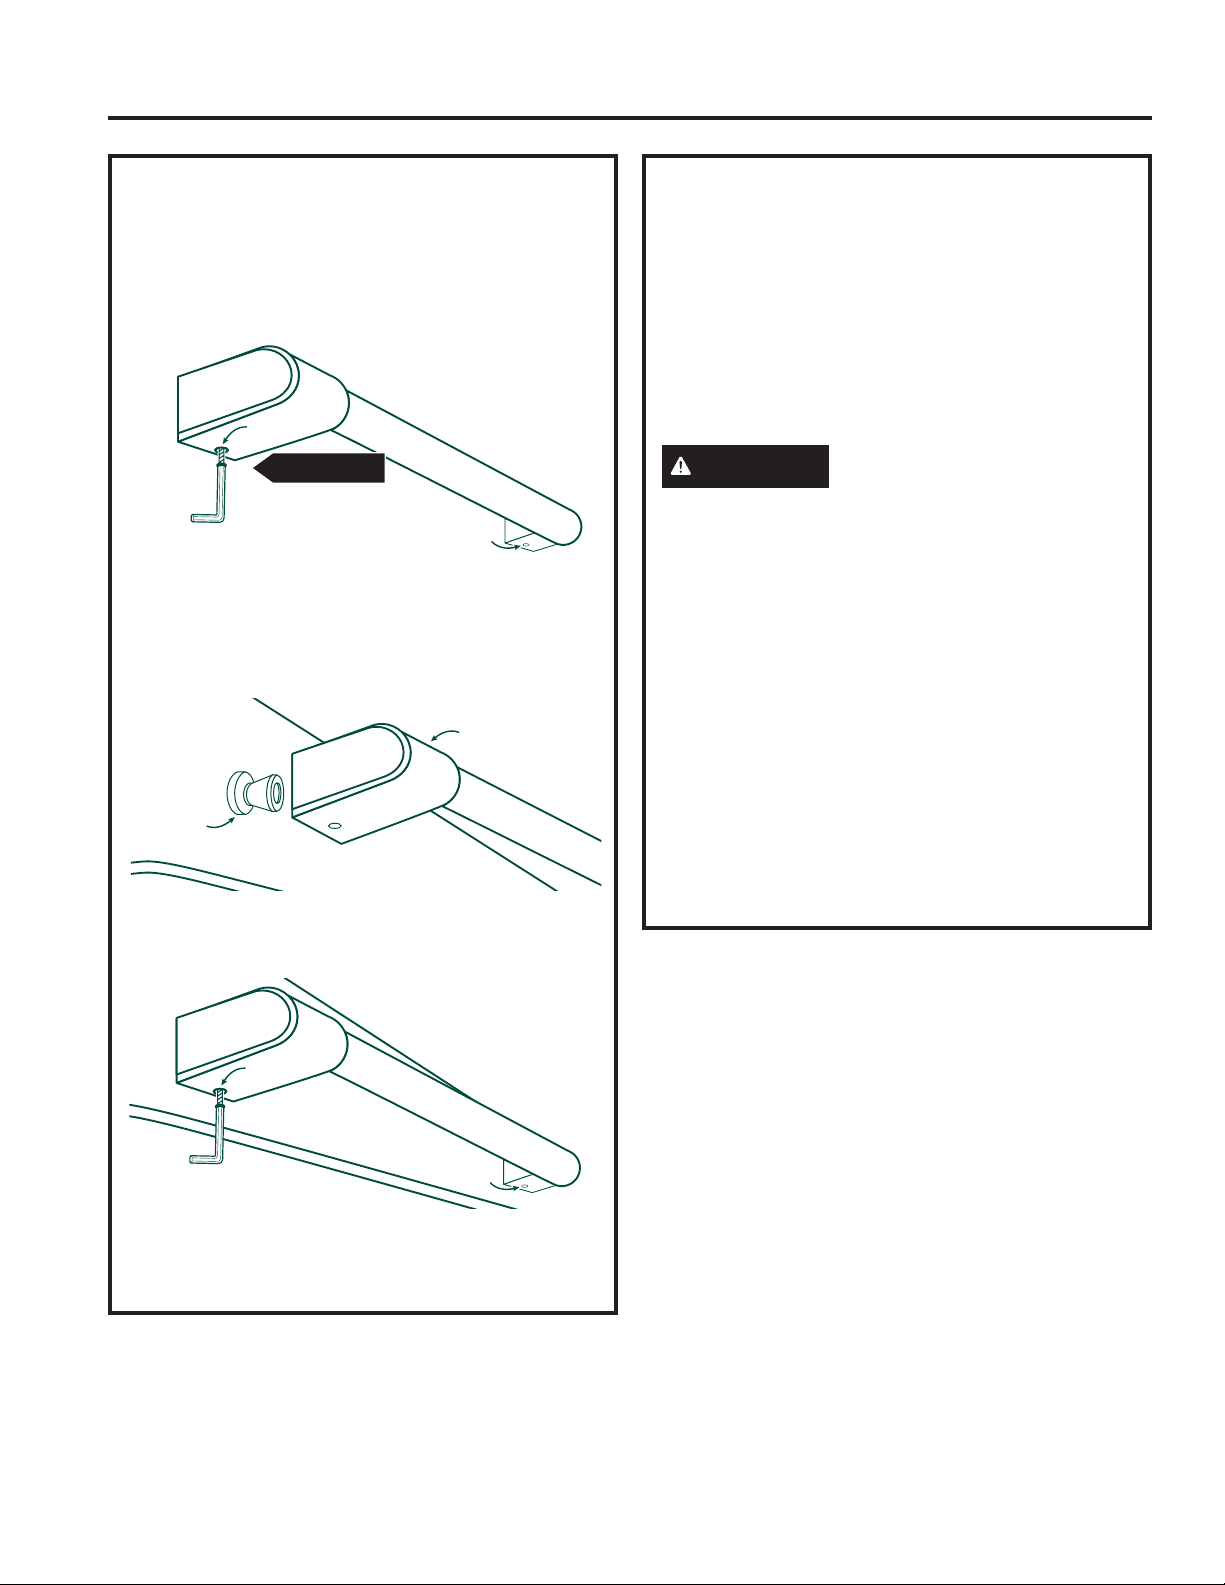
HANDLE REVERSING INSTRUCTIONS
1. Remove the allen wrench from the panel
installation screw kit envelope
2. Loosen the set screw using the allen wrench.
Remove the handle and flip it around so the logo is
facing the other way.
3. Place the handle caps over the fasteners of the
door. Take care to support the handle so it doesn’t
fall and scratch the appliance finish. Make sure
both handle caps are resting on the face of the
door.
4. Lock one end of the handle into position by
tightening the set screw in the handle cap with the
DOOHQ ZUHQFK SURYLGHG '2 127 RYHUWLJKWHQ
5. Keep supporting the handle as you lock the other
end of the handle into position by tightening the set
VFUHZ LQ WKH KDQGOH FDS '2 127 RYHUWLJKWHQ
LOOSEN
set screw
set screw
fastener
handle cap
set screw
set screw
INSTALLATION INSTRUCTIONS
Loading ...
Loading ...
Loading ...