Loading ...
Loading ...
Loading ...
49-1000640 Rev. 0 15
INSTALLING THE DOOR PANEL
The ice machine is supplied without a conventional
door covering, allowing the attachment of a door panel
or a custom panel.
NOTE:,IWKHGRRUVZLQJLVWREHFKDQJHGLWQHHGVWR
be done BEFORE attaching the door panel.
Door Panel
Finished door panels with handles are available from
GE Appliances for attachment to the ice machine. See
Accessories on page 27.
A custom panel of wood or other material not
exceeding 15 lbs can be used and must follow these
guidelines:
ZLGWK´
KHLJKWEHWZHHQ´DQG´
WKLFNQHVV´WR´
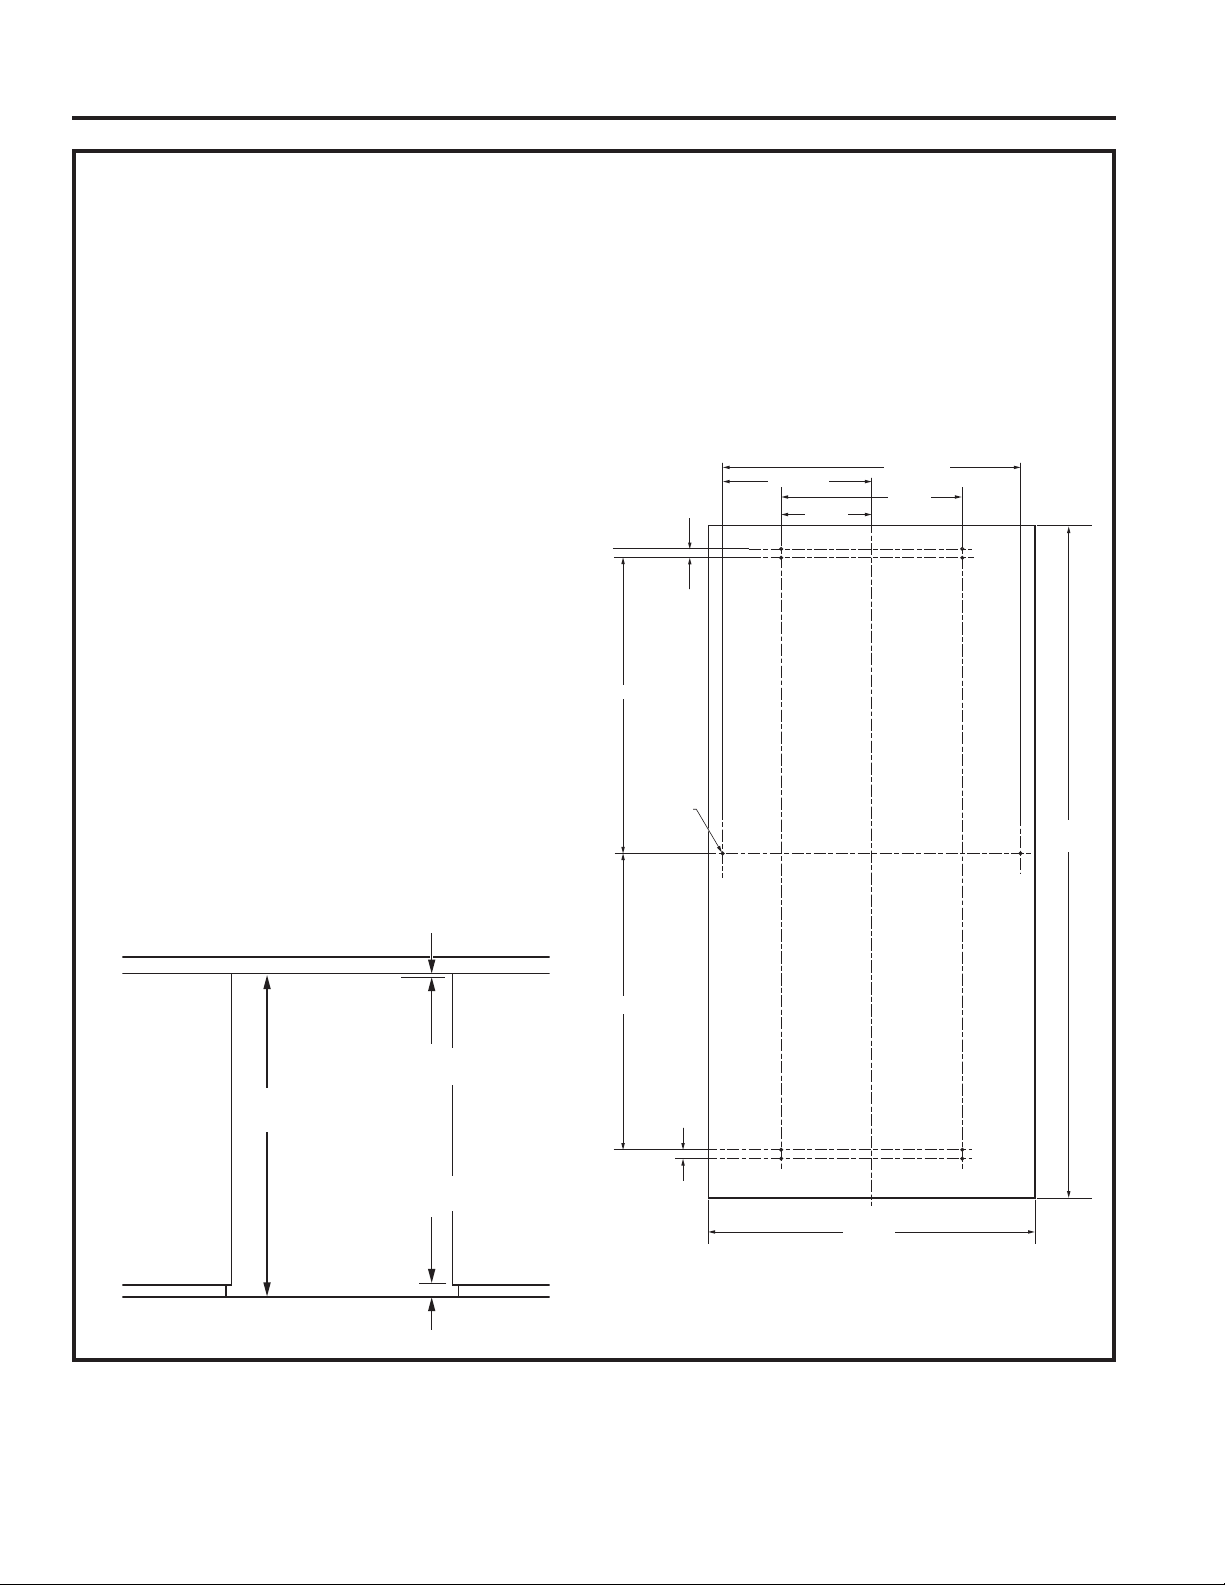
For Custom Panel:
1. Place product in opening and level by adjusting
leveling legs as needed.
2. Measure how much if any the custom panel needs
to extend above the inner door panel to match
any panels on either side. Note the clearance
between the top of the panel and the countertop
VKRXOGEHDWOHDVW´
3. Remove the door by removing the 4 hinge screws.
4. Cut panel to the specified width and desired
height.
5. Lay panel on a surface and align the door on top
of the panel so that it located as measured in step
2. The sides of the panel should align with the
sides of the door.
6. Mark locations of at least the 4 holes in the top
and bottom. Remove the door and measure and
mark any remaining holes per the diagram.
'ULOOSLORWKROHVRQWKHEDFNRIWKHSDQHODW\RXU
PDUNLQJV8VHDGULOOVWRSWRSUHYHQWGULOOLQJ
through the panel.
Cabinet
opening
´RUJUHDWHU
clearance
Toekick
height
´
´
´
´
´
´
Centerline
´
´
´
´
´
TYP (10)
Installation Instructions
INSTALLATION INSTRUCTIONS
Loading ...
Loading ...
Loading ...