Loading ...
Loading ...
Loading ...
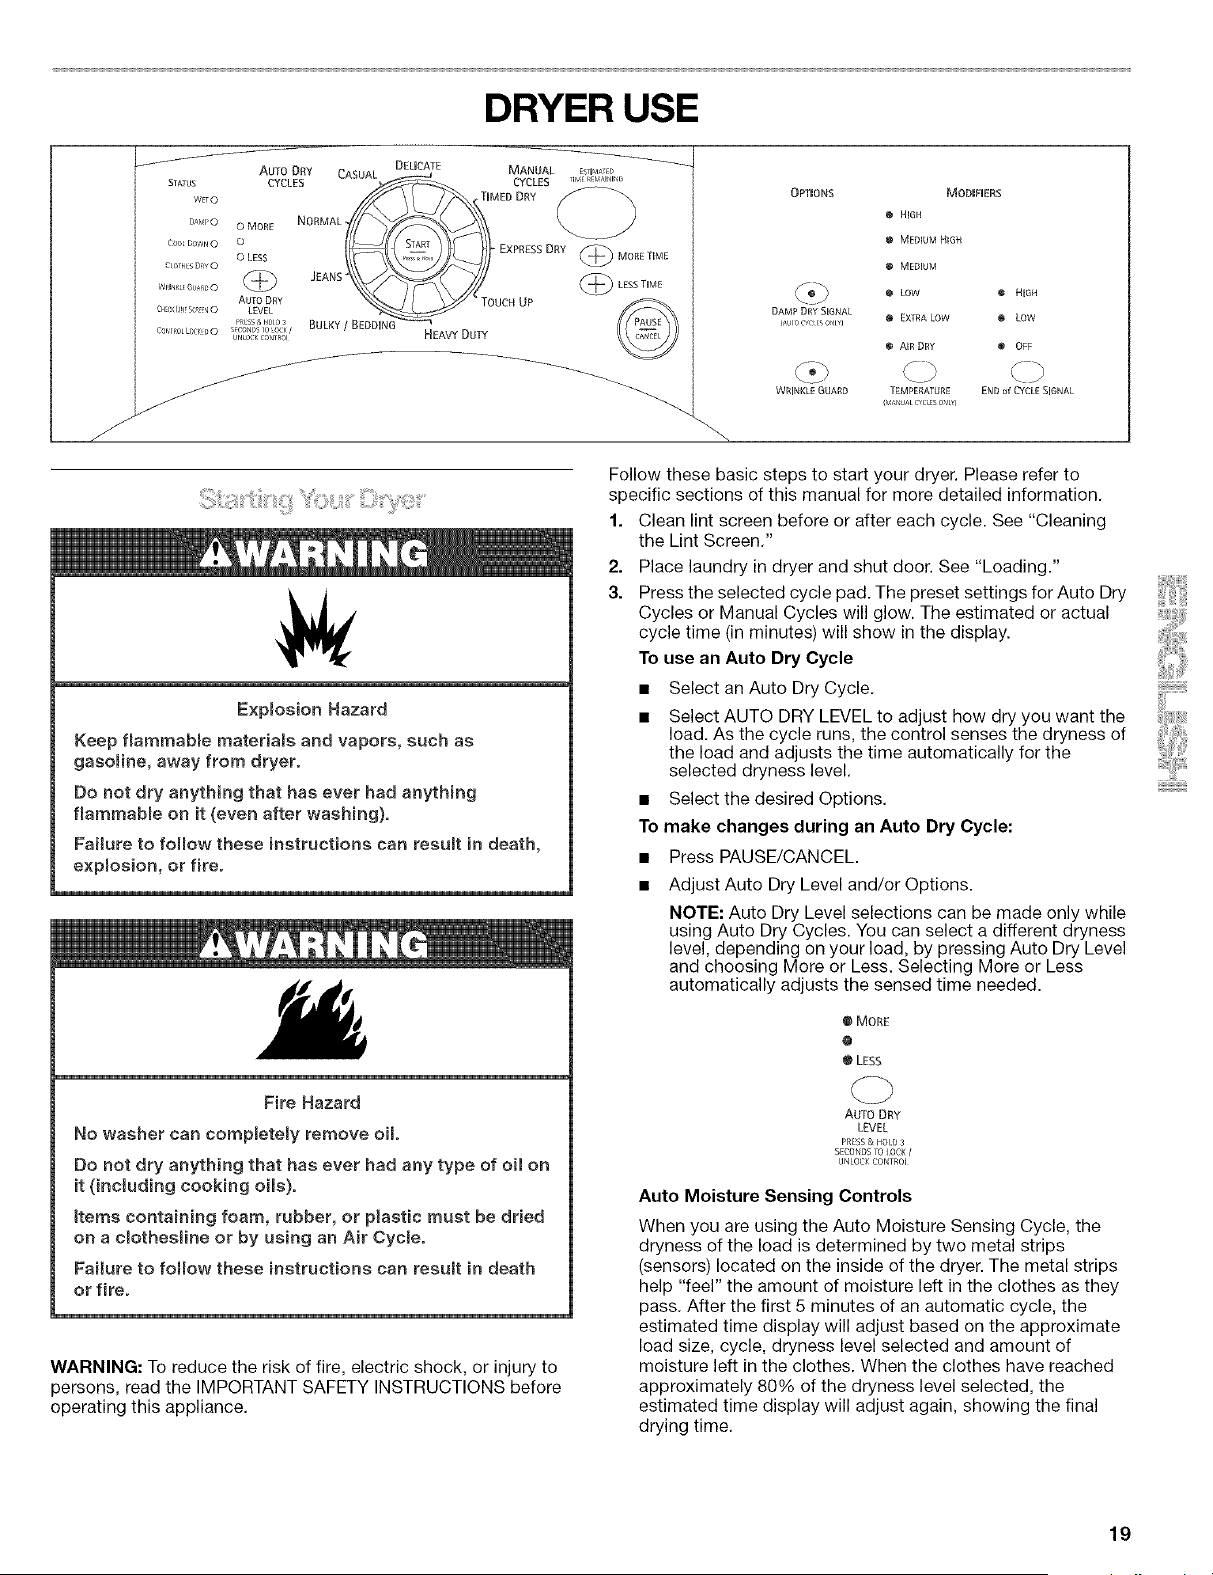
DRYER USE
/
/
AUTO DRY
_IATtISWETO CYCLES 14
DAr_I>O O MORE NORMAL
[oo[ DO,VNo o
0 LESS
cm _EsD_YO @ JEANS_
WlINKL_(iu_ o
AUTO DRY
CHE_II_4SC 0 LEVEL
PRESS& HOID3 BULKY / BEDDIN
CONIR0[LOCKDO s CONDS[0 LOCK/
UN£OCKCONTRq
DELICATE
CASUAL _ MANUAL ES]IM#_D
=_ CYCLES B_F REr_9_<U
IMED DRY
START EXPRESS DRY _! E TME
H E_3JY DUlY
OPTIONS MODIFIERS
O HIGH
O MEDIUM HiGH
O MEDIUM
O LOW
DAMP DRY SIGNAL
(ALIIOCYC SONIY ] _ EXTRA LOW
• AIR DRY
_J
WRINKLE GUARD TEMPERATUR£
(_A UA_C_CtSO_L_)
\
• HIGH
e LOW
@ OFF
END of CMCLE SIGNAL
Expmosion Hazard
Keep fiammabme materiaBs and vapors_ such as
gasomine, away from dryer.
Do not dry anything that has ever had anything
fiammabme on it (even after washing).
Failure to follow these instructions can resumt in death,
expmosion, or fire.
Fire Hazard
No washer can compmeteBy remove oil
Do not dry anything that has ever had any type of oil on
it (including cooking oils).
Items containing foam, rubber, or plastic must be dried
on a clothesline or by using an Air Cycme.
FaiJure to follow these instructions can resumt in death
or fire.
WARNING: To reduce the risk of fire, electric shock, or injury to
persons, read the IMPORTANT SAFETY INSTRUCTIONS before
operating this appliance.
Follow these basic steps to start your dryer. Please refer to
specific sections of this manual for more detailed information.
1. Clean lint screen before or after each cycle. See "Cleaning
the Lint Screen."
2. Place laundryin dryer and shut door. See "Loading."
3. Press the selected cycle pad. The preset settings for Auto Dry
Cycles or Manual Cycles will glow. The estimated or actual
cycle time (in minutes) will show in the display.
To use an Auto Dry Cycle
• Select an Auto Dry Cycle.
• Select AUTO DRY LEVEL to adjust how dry you want the
load. As the cycle runs, the control senses the dryness of
the load and adjusts the time automatically for the
selected dryness level.
• Select the desired Options.
To make changes during an Auto Dry Cycle:
• Press PAUSE/CANCEL
Adjust Auto Dry Level and/or Options.
NOTE: Auto Dry Level selections can be made only while
using Auto Dry Cycles. You can select a different dryness
level, depending on your load, by pressing Auto Dry Level
and choosing More or Less. Selecting More or Less
automatically adjusts the sensed time needed.
@ MORE
0
@ LESS
AUTO DRY
LEVEL
PRESS & HOID 3
SECONDS ro _OCK/
UNLOCKCDNTROJ
Auto Moisture Sensing Controls
When you are using the Auto Moisture Sensing Cycle, the
dryness of the load is determined by two metal strips
(sensors) located on the inside of the dryer. The metal strips
help "feel" the amount of moisture left in the clothes as they
pass. After the first 5 minutes of an automatic cycle, the
estimated time display will adjust based on the approximate
load size, cycle, dryness level selected and amount of
moisture left in the clothes. When the clothes have reached
approximately 80% of the dryness level selected, the
estimated time display will adjust again, showing the final
drying time.
19
Loading ...
Loading ...
Loading ...