
Loading ...
Loading ...
Loading ...
W415-1285 / L / 10.25.21
EN
46
finishing
A. Remove the main safety screen and door from the appliance, see
"main safety barrier removal / installation" and "main door removal /
installation" sections for detailed removal instructions.
HINT: For ease of installation, remove both main doors.
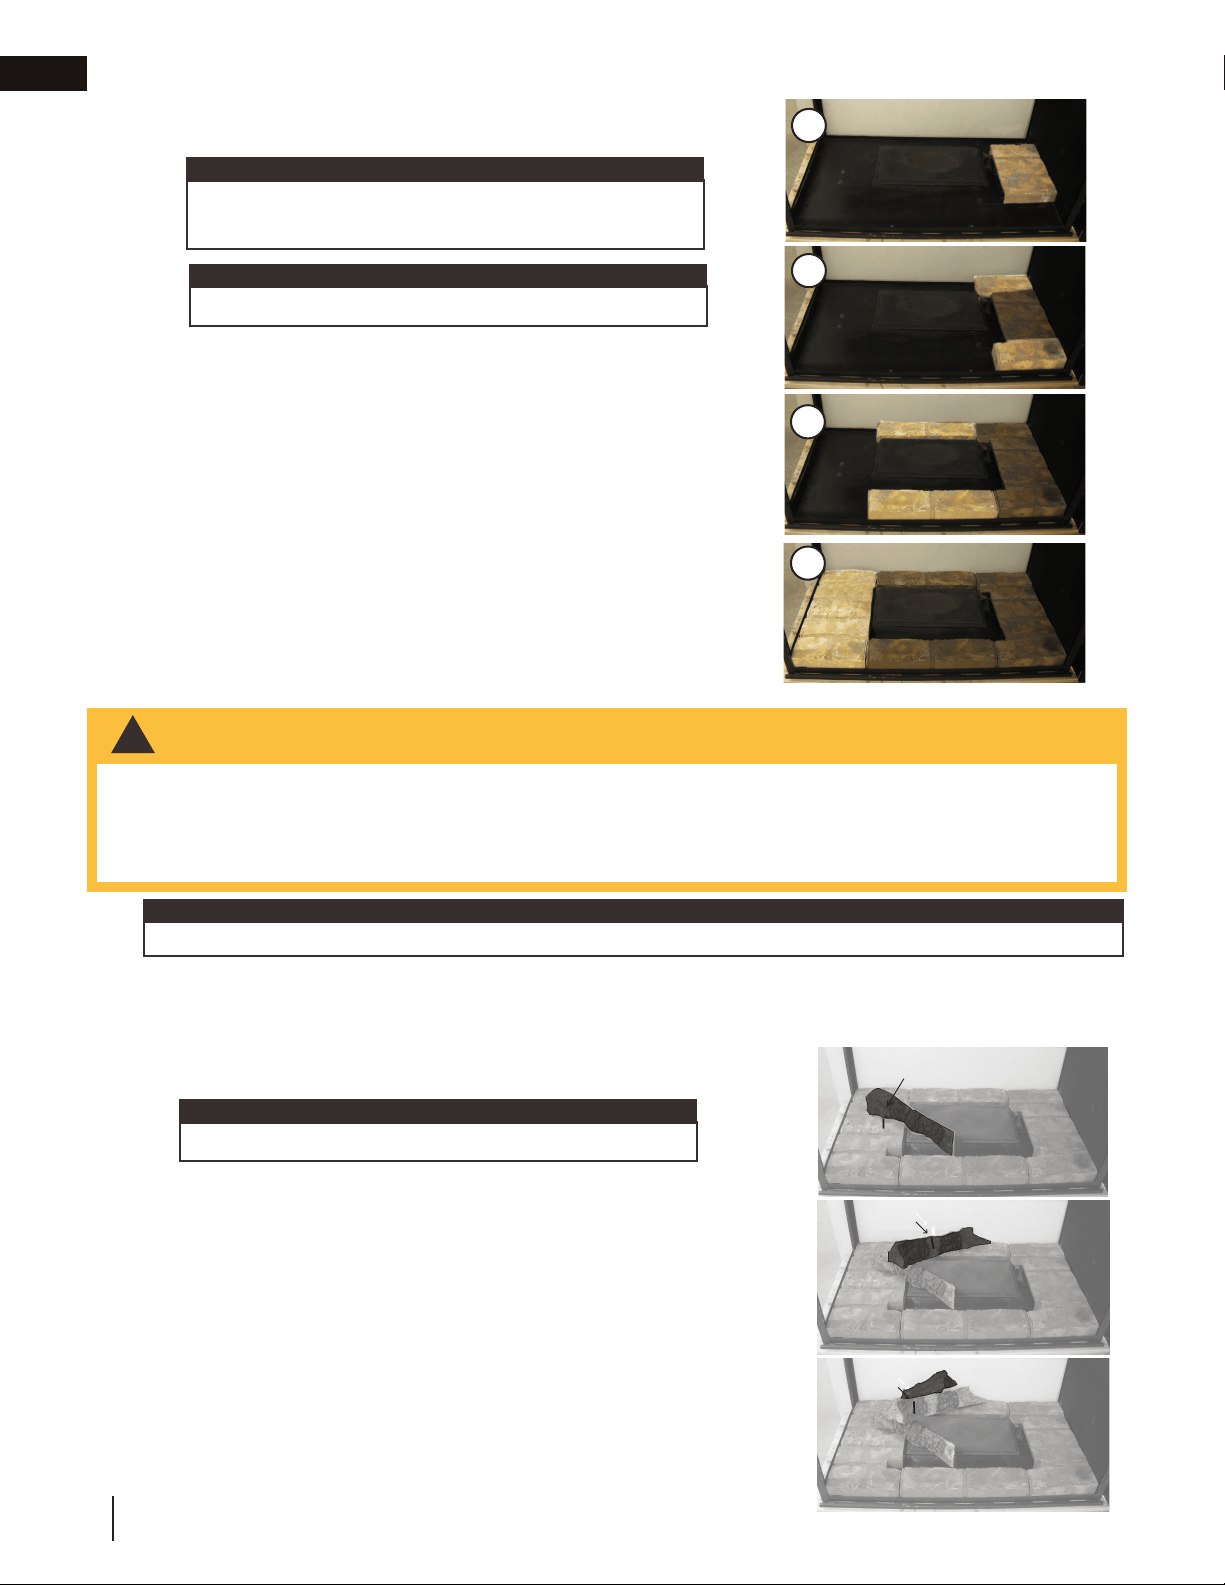
B. Place the #3 hearth pad on the pilot side of the burner, as shown in
Figure B.
C. Place the #1A hearth pad on the right side and the #1 hearth pad
on the left side of appliance, as shown in Figure C.
D. Place the two #2 hearth pads on the right and left sides, as shown
in Figure D.
E. Place the #4 hearth pad on the left end, as shown in Figure E.
B
C
D
E
11.10 hearth pad installation
Fig. 1
PIN
Fig. 3
PIN
Fig. 2
PIN
11.11 log placement
Phazer
TM
logs and glowing embers, exclusive to Wolf Steel Ltd., provide a unique and realistic glowing effect that
is different in every installation. During the initial use of the appliance, log colours may vary. During the initial use of
the appliance, the colours will become more uniform as colour pigments burn in during the heat activated curing
process.
Blocked burner ports can cause an incorrect flame pattern.
1. Remove the main safety screens and doors, see "main safety
barrier removal / installation" and "main door removal / installation"
sections for removal instructions.
2. Place a pin into the bottom of log #1 lining it up with the hole in the
hearth pad. Then place onto the screw and spacer located in the
corner of the burner, on the right side. Place a pin into the center of
log #1 (FIG.1).
3. Place log #2 onto the pin located in the log #1, it should rest in the
middle of the left side hearth pad as shown in Figure 2. Place one
pin into the middle of log #2 (FIG.2).
4. Place log #3 onto the pin located in log #2 and let it rest on log #2,
as shown in Figure 3 and in the left side view below. Place another
pin into log #2 (FIG.3).
!
WARNING
• Failure to position the logs in accordance with these diagrams or failure to use only logs specifi cally approved
with this appliance may result in property damage or personal injury.
• Logs must be placed in their exact location in the appliance. Do not modify the proper log positions, since
appliance may not function properly and delayed ignition may occur.
• The logs are fragile and should be handled with care.
48.1
The individual logs can be easily identified by the numbers cast on the underside of each log.
note:
The pilot is located on the right end in these instructions.
note:
The pilot is located on the right end in these instructions.
note:
The individual hearth pads can be easily identified by the
numbers cast on the underside of each pad.
note:
Loading ...
Loading ...
Loading ...