Loading ...
Loading ...
Loading ...
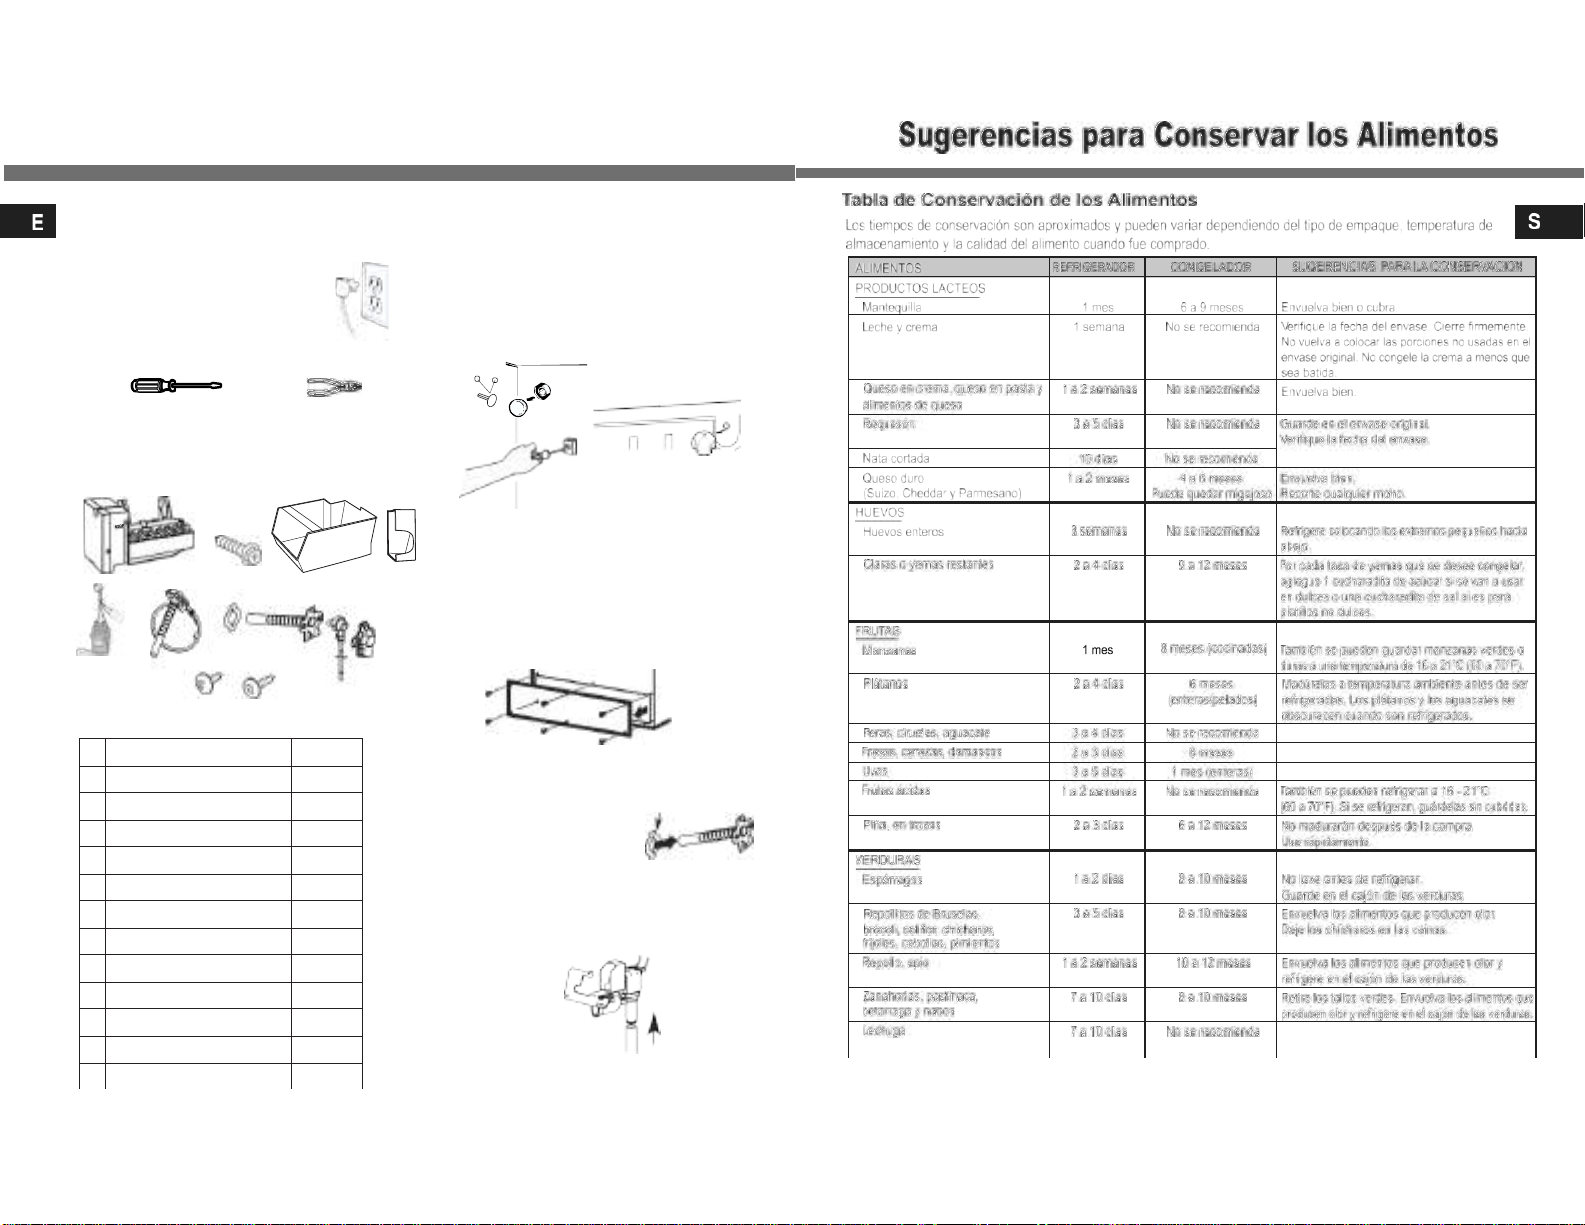
Icemaker Installation
17
34
Plastic
Pipe
Before you begin
Read each step thoroughly before proceeding.
CAUTION – Unplug the Refrigerator.
To eliminate the danger of electric shock
during installation, you must unplug the
refrigerator from its electrical outlet.
Tools you will need
Remove the outlet cover
Go to the back of the refrigerator. Find the small
label in the upper right corner and remove it
off. Then discard the label.
Remove the white connector from the upper left
corner of the bottom of the freezer.
Remove and discard the white plug
from the lower left back corner of
the freezer wall.
Flat blade and Phillips
screwdrivers
Parts Included
Pliers
1 2 3 4
Remove the cover
Use a Phillips head screwdriver to remove the
compressor compartment access cover. This
requires removing six screws which attach the
cover to the back of the refrigerator case.
Be sure to save the screws as the access cover must
be reinstalled later to ensure your refrigerator will
6-1
5
6
6-2
6-4
function properly.
7 8
6-3
Install Guide Cab W/Tube A1
Remove one side of the seal paper for
the water fill tube, slide the seal through
the tube and adhere it to the back edge
of the water tube inlet.
Connect the water line
Seal
Make sure there is enough plastic water line to
extend from the water valve to well into the
water tube inlet. Cut off any excess tubing.
Remove
plug
Remove
Cap screw
Remove
label
Side
Back
No.
Part Name Q’ty/Unit
1 CASE ICE MAKER 1
2 SPECIAL C/T BOLT 2
3 BOX ICE 1
4 GUIDE I/WATER 1
5 VALVE WATER AS 1
6 GUIDE CAB W/TUBE A1 AS 1
6-1
GUIDE CAB W/TUBE A1 1
6-2
SEAL W/TUBE A1 1
6-3
GUIDE CAB W/TUBE A2 AS 1
6-4
COVER GUIDE CAB W/TUBE 1
11
SCREW TAPPING
2
12
SCREW TAPPING
2
Loading ...
Loading ...
Loading ...