Loading ...
Loading ...
Loading ...
183
Front Panel≫ Rear Panel≫ Remote≫
Contents
≫
Connections
≫
Playback
≫
Setup
≫
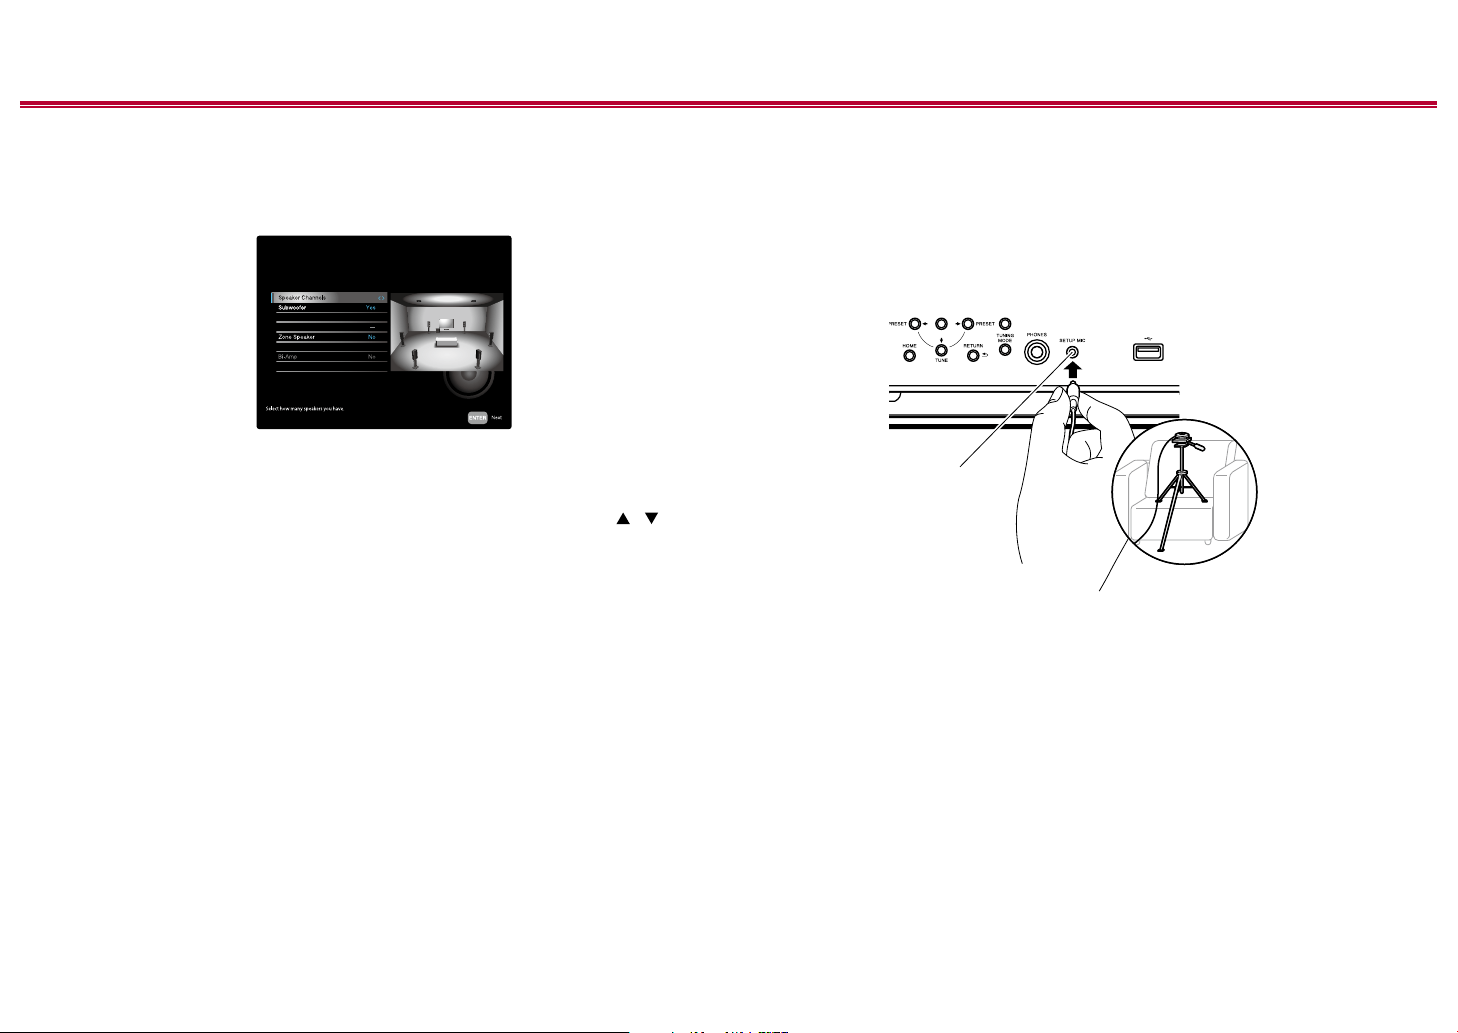
1. Speaker Setup
1. Select the connected speaker conguration, and press ENTER.
Note that the image on the screen changes each time you select the number
of channels in "Speaker Channels".
Speaker Setup
7.1.2 ch
Height 1 Speaker
Height 2 Speaker
Speaker Impedance 6 ohms or above
Zone 2 Preout
Zone 2
Top Middle
2. The speaker combination selected in step 1 is displayed. "Yes" is displayed for
the selected speakers. If the setting is correct, press ENTER.
3. Select "Next" and press ENTER. Then a test tone is output from each speaker
to conrm the connection. Selecting each speaker with the cursors / will
output the test tone. Press ENTER after conrmation.
4. If there is no problem with the speaker connection, select "Next" and press
ENTER. To return to "Speaker Setup", select "Back to Speaker Setup" and
press ENTER.
2. Full Auto MCACC
Place the supplied speaker setup microphone at the listening position. The unit
automatically measures the test tones output from each speaker, and sets the
optimum volume level for each speaker, the crossover frequencies, and the
distance from the listening position. This also reduces the eect of the standing
wave in accordance with the viewing environment and automatically adjusts the
equalizers for the speakers, and enables correction of sound distortion caused by
the acoustic environment of the room.
• It takes between 3 and 12 minutes for calibration to be completed. Each
speaker outputs the test tone at high volume during measurement, so be
careful of your surroundings. Also, keep the room as quiet as possible during
measurement.
• If you connect a subwoofer, check the power and volume of the subwoofer.
Set the subwoofer volume to more than half.
• If the power of this unit suddenly turns o, the wires in the speaker cables
have touched the rear panel or other wires, and the protection circuit is
working. Twist the wires again securely, and make sure they do not stick out of
the speaker terminals when connecting.
1. Place the supplied speaker setup microphone at the listening position, and
connect it to the SETUP MIC jack on the main unit.
SETUP MI
C
When placing the speaker setup microphone on a tripod, refer to the
illustration.
2. Conrm a test tone is output from the subwoofer and press ENTER.
3. Press ENTER. Then, test tones are output from each speaker, and the
connected speakers and the noise in the surrounding environment are
automatically measured.
4. The measurement results in step 3 are displayed. If there is no problem in
the detection result of the speaker, select "Next" and press ENTER to output
the test tone again to automatically set the settings such as volume level,
crossover frequency, etc., to their optimum. (The test tone is automatically
output when 10 seconds has elapsed without any operation.)
• When an error message is displayed or when the connected speakers
cannot be detected, perform re-measurement by selecting "Retry" and
pressing ENTER.
Loading ...
Loading ...
Loading ...