Loading ...
Loading ...
Loading ...

6
using the attachments
Refer to recommended speed chart for each attachment.
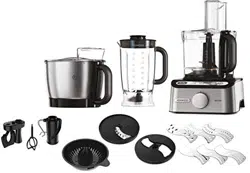
Processor bowl
c
knife blade
Follow the instruction under “to use your food processor”.
c
max capacity disc
1 Fit the drive shaft and bowl onto the power unit.
2 Fit the knife blade.
3 Add ingredients to be processed.
4 Fit the capacity disc over the top of the blade ensuring it sits
on the ledge inside the bowl
7
. Do not push down on
the capacity disc.
5 Fit the lid and switch on.
slicing/grating plates
–
1 Fit the detachable drive shaft and processor bowl onto the
power unit.
2 Select the desired plate and fit into the carrier with the
cutting side uppermost.
l
Locate one end of the plate under the rim and press the
other end into position
8
.
l
The French fry plate is not removable from the
carrier .
3 Fit the lid.
4 Put the food in the feed tube.
Choose which size feed tube you want to use. The pusher
contains a smaller feed tube for processing individual items
or thin ingredients.
To use the small feed tube - first put the large pusher inside
the feed tube.
To use the large feed tube - use both pushers together.
5 Switch on and push down evenly with the pusher - never
put your fingers in the feed tube.
citrus juicer
Use the citrus juicer to squeeze the juice from citrus fruits
(e.g. oranges, lemons, limes and grapefruits).
cone
sieve
to use the citrus juicer
1 Fit the detachable drive shaft and processor bowl onto the
power unit.
2 Fit the sieve into the bowl - ensuring the sieve handle is
locked into position directly over the bowl handle
bl
.
3 Place the cone over the drive shaft turning until it drops all
the way down
bm
.
4 Cut the fruit in half. Then switch on and press the fruit onto
the cone.
l
The citrus juicer will not operate if the sieve is
not locked correctly.
attachment storage box
Your food processor is supplied with a storage box for your
bowl attachments and plates.
1 Fit the knife blade, plates, whisk and creaming beater into
the storage box when not in use
bn
.
2 The storage box is fitted with a safety lock - close the lid to
lock. To open - push the tab in
bo
and lift up the lid
bp
.
metal mixing bowl
c
–
c
1 Fit the metal mixing bowl to the power unit by placing the
handle towards the right hand side and turn forward
bq
until
it locks.
2 Fit either the whisk
c
, creaming beater
cq
and
c
or
dough tool
c
over the bowl drive shaft.
using the whisk
1 Push the beater
br
securely into the drive head.
2 Fit the whisk over the In bowl drive.
3 Add the ingredients.
4 Fit the lid and switch on.
using the creaming beater
Fitting the wiper blade
l
The wiper blade is supplied already fitted and should always
be removed for cleaning.
1 Carefully fit the flexible wiper blade onto the tool by locating
the base of the wiper blade into the slot
bs
then fit one side
into the groove before gently hooking the end in place
bt
.
Repeat with the other side
ck
.
1 Push the creaming beater
cl
securely into the drive head.
2 Fit the beater over the In bowl drive.
3 Add the ingredients.
4 Fit the lid and switch on.
using the dough tool
Fit the dough tool over the in-bowl drive.
Loading ...
Loading ...
Loading ...