Loading ...
Loading ...
Loading ...
EN 10
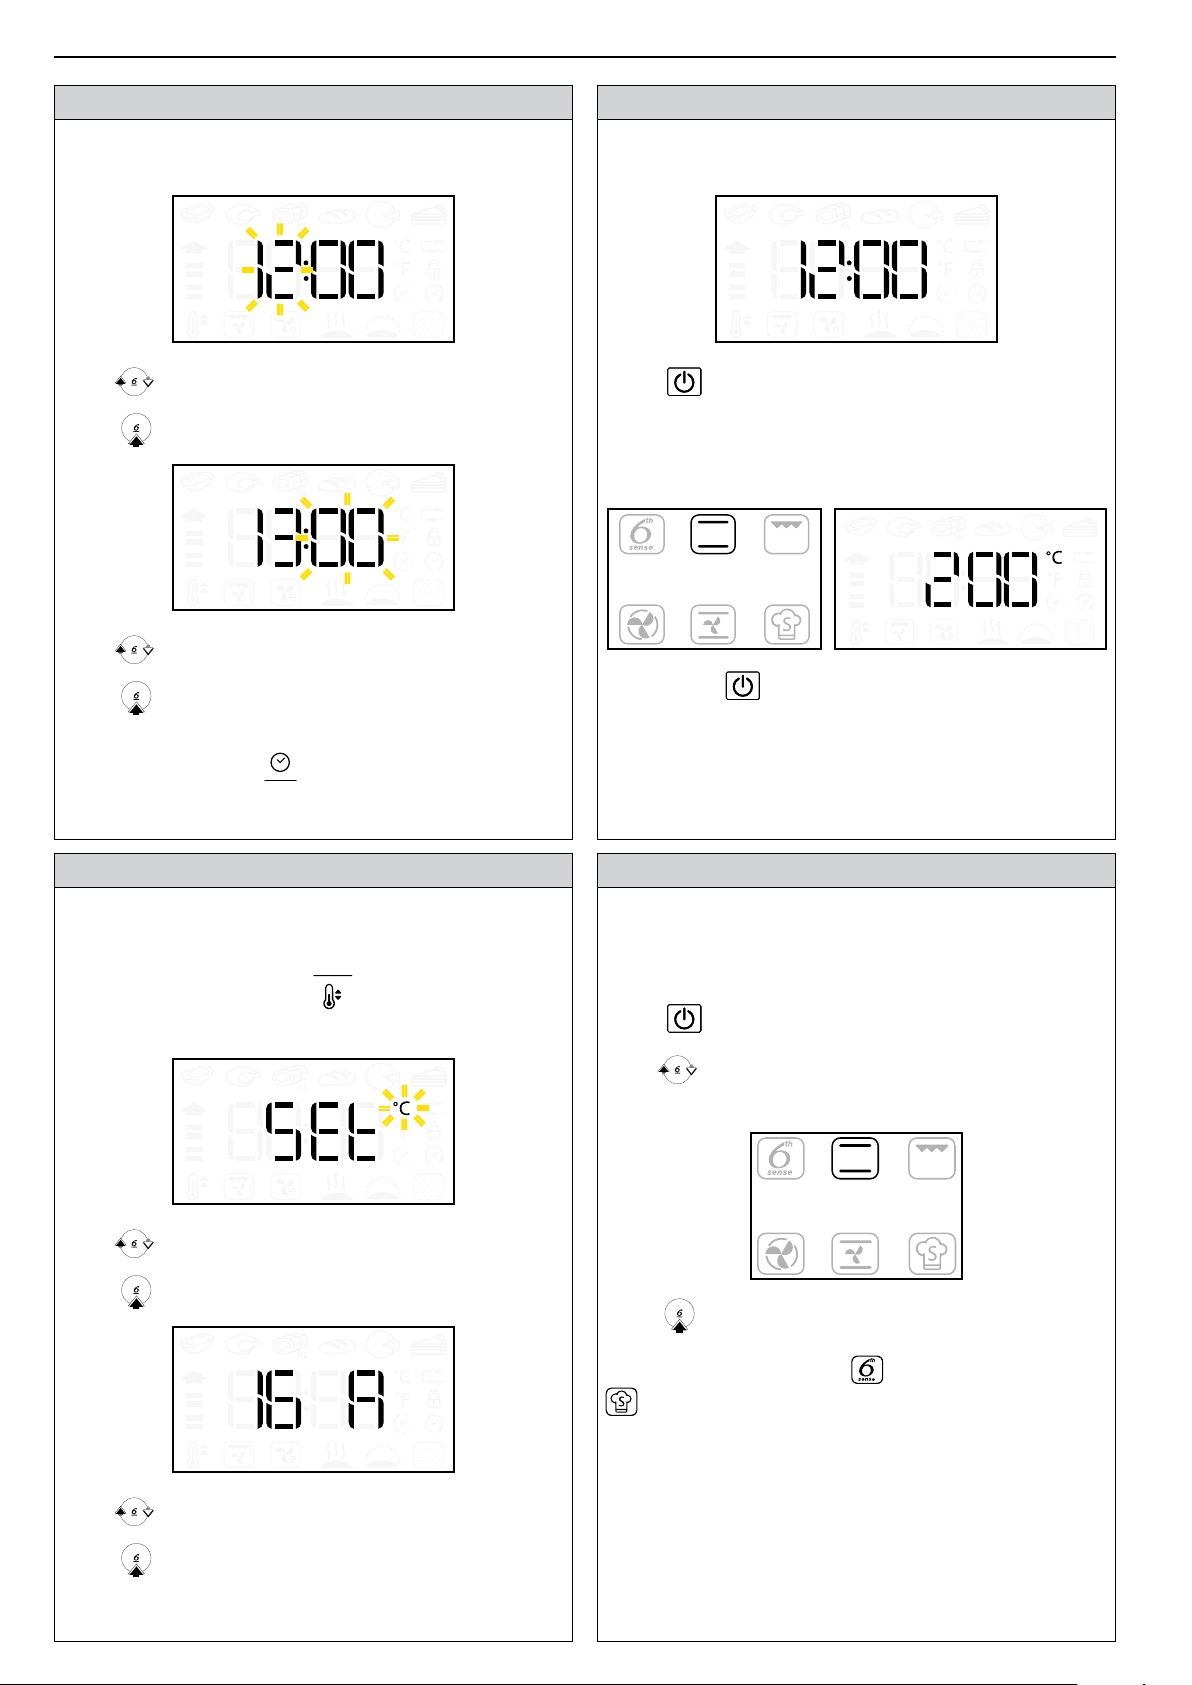
1.1 SETTING THE CLOCK
When the oven is switched ON for the rst time, the
clock must be set.
Turn to set hours.
Press
to conrm.
Turn to set minutes.
Press
to conrm.
NOTE: to change the time afterwards when the oven
is switched OFF, hold
for at least 1 second and
repeat the operations above. After a power failure the
clock needs to be re-set.
1.2 SETTINGS
If necessary the temperature units and electrical
power settings can be changed from the default
values (°C and 16A).
Hold for at least 5 seconds
when the oven is
switched OFF (see section 1.3).
Turn to select °C or °F.
Press
to conrm value.
Turn to select power (16A or 13A).
Press
to conrm value.
NOTE: after conrming settings, it may be necessary
to re-set the clock.
1.3 ON/OFF
When the appliance is turned o only the 24 hour
clock is displayed.
Press to switch the oven ON (hold for ½ sec).
When the oven is switched ON, both displays are
active.
The knob and all touch keys are fully functional.
NOTE: press to always ends an active cooking
cycle, turning OFF the appliance.
2 SELECTING A FUNCTION
To choose cooking cycles and further functions.
For descriptions, see the table on page 17 and
page 18.
Press
to switch the oven ON.
Turn
to select the main function: the
selectable function is displayed more brightly.
Press to conrm selection.
NOTE: select the 6
th
Sense or Special functions
to access the related cluster in the righthand
display (see the relevant section (7, 8) on page 13).
Proceed as indicated in the “quick start” section
(section 3), to run the cooking function
immediately or to go through the mode-setting
wizard as indicated in sections 4, 5, and 6.
USING THE OVEN
Loading ...
Loading ...
Loading ...