Owner's Guide Tools
AT A GLANCE
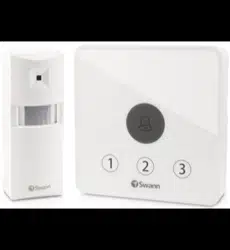
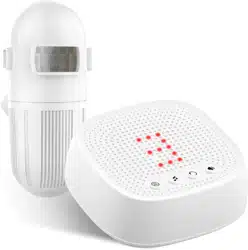
Getting to know your Indoor Alarm Receiver
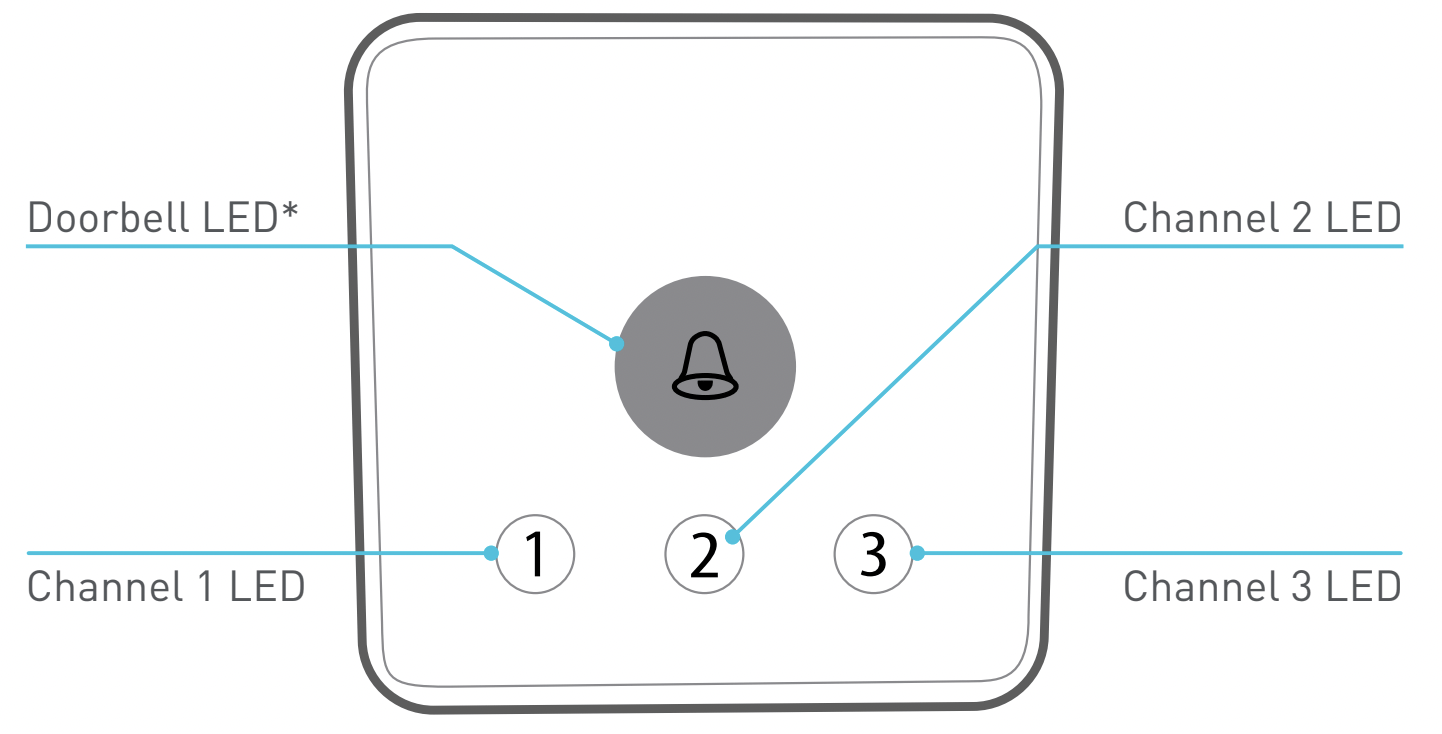
Your Alert Sensor is assigned to channel 1 by default.
Each channel is capable of supporting up to 15 sensor devices at a time.
Features denoted with * require separate purchase of an add-on Doorbell.
SETTING UP
Indoor Alarm Receiver
Installing batteries
The Indoor Alarm Receiver requires 3 x AA batteries (not included) to operate. To install batteries:
- Push the release tab and lift off battery compartment cover.
- Insert 3 new "AA" alkaline batteries, matching the polarity markings (+ and -) inside the battery compartment.
- Put the battery compartment cover back on by pressing down until the release tab clicks into place.
Placement
There is no requirement to mount the Indoor Alarm Receiver. As it is also completely freestanding, you may find it more convenient to place it on a shelf or table. One of the benefits of a battery operated wireless receiver is that if you have a large house, you can take the receiver with you. No more missing visitors because you were all the way at the back of the house or by the pool!
If you would like to mount the receiver, we've included all the gear (template, screws and wall plugs) you'll need to hang it on the wall. See the supplied template for instructions on mounting the Indoor Alarm Receiver.
Alert Sensor
Installing batteries
The Alert Sensor requires 3 x AAA batteries (not included) to operate. To install batteries:
- Use a small Phillips screwdriver to remove the screws from the battery compartment cover, and then lift up the cover.
- Insert 3 new "AAA" alkaline batteries, matching the polarity markings (+ and -) inside the battery compartment.
- Screw the battery compartment cover back into place.
Placement guide
The range of the wireless transmission for the Driveway Alert system is dependent on local environment (i.e., obstructions, weather, signal interferences, etc) and can be up to approximately 60 meters (around 196 feet) – take this into consideration when selecting positions for the Alert Sensor and make sure you test if the location is in range of the Indoor Alarm Receiver before fitting in place.
The Alert Sensor, under typical conditions, is designed to detect people and vehicles moving within an area of approximately 6 meters (around 20 feet) at a 100° angle from the sensor.
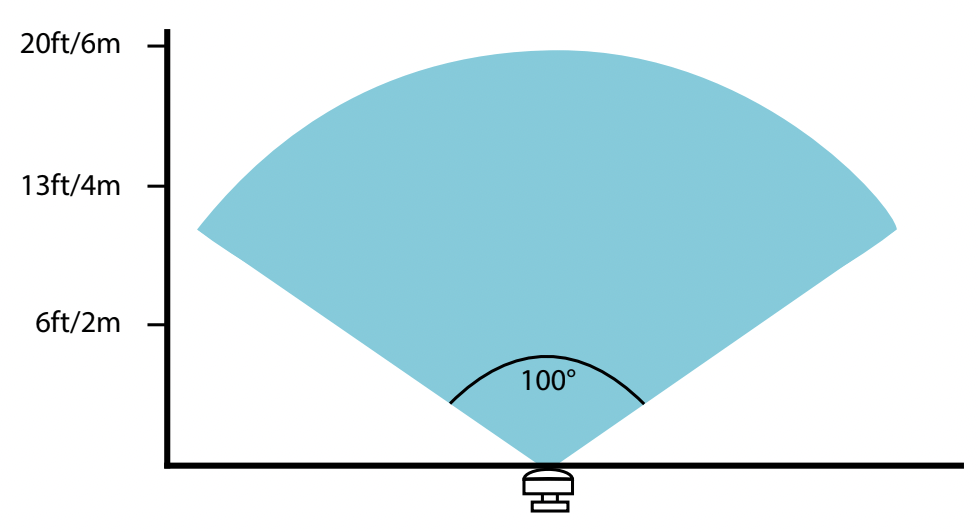
For best coverage and to maximize detection, place the Alert Sensor approximately 2m/6ft off the ground, pointing on a slightly downwards angle.
Tips
- Ideally, the Alert Sensor should only see the entry/exit point (e.g., your driveway), and the only moving objects in front of the sensor should be the cars or people you want to detect (i.e., no obstructions in the field of view).
- Avoid placing the Alert Sensor in an area where it will face direct or reflected sunlight, or where the environmental temperature may change suddenly (for example, near heat or cold producing devices such as heaters, air conditioners, or lamps).
- Any moving heat source can trigger the Alert Sensor. For example, a moving shadow on a sunny day may trigger the Alert Sensor, or the sun coming out from behind clouds. False triggers should be rare, but will occasionally occur.
- Wandering small animals (such as a cat or similar) can, under some circumstances, trigger the Alert Sensor. Therefore, we suggest that the Alert Sensor is not suited to areas where pets are routinely kept.
Mounting your Alert Sensor
- Attach the mounting bracket for the Alert Sensor to a wall using the supplied screws. You may need to use wall plugs depending on the surface.
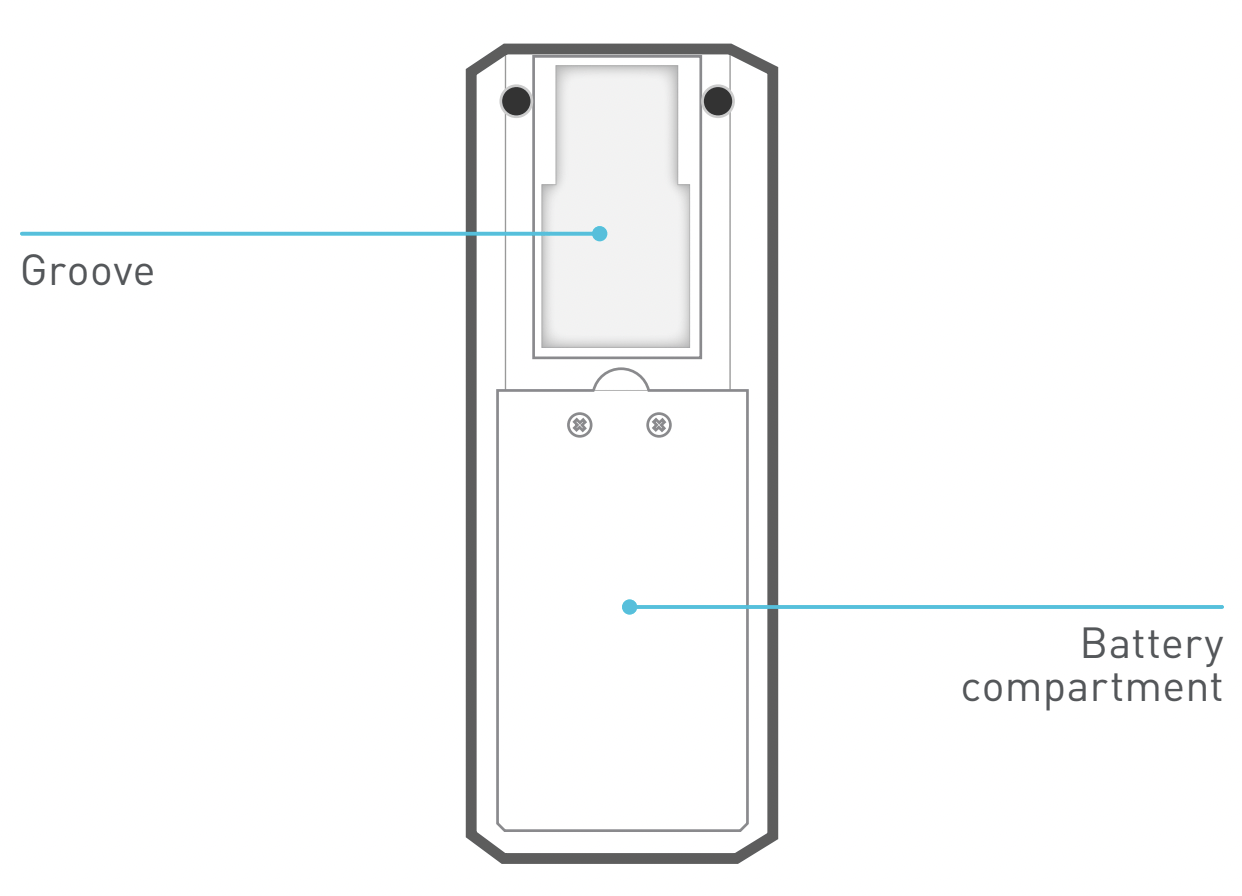
- Fit the tab on the mounting bracket into the groove on the back of the Alert Sensor. Slide the Alert Sensor down until it locks into place.
- Adjust the angle of the Alert Sensor accordingly.
OPERATING BASICS
Adjusting the alarm volume
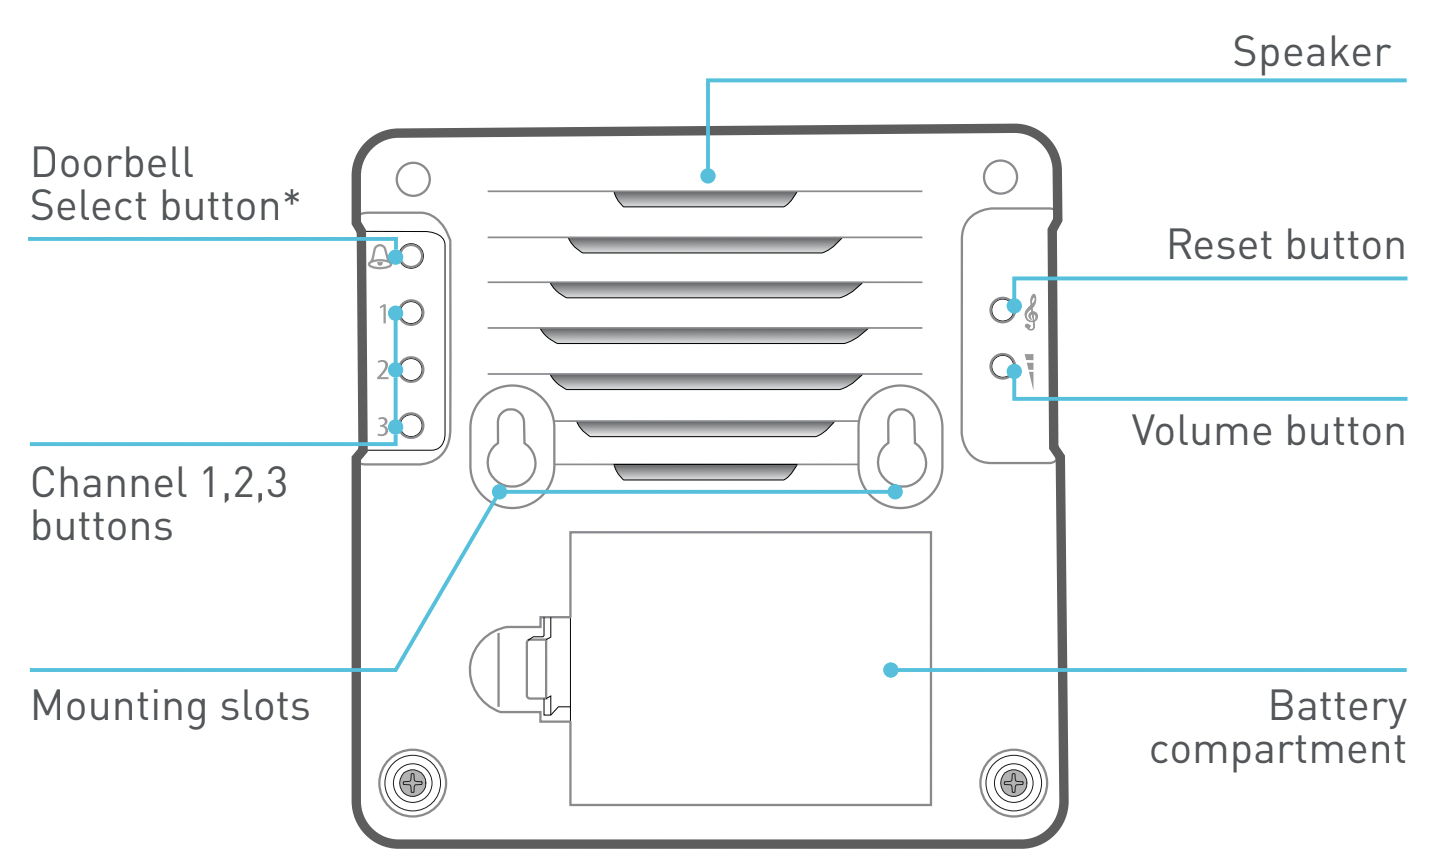
You can change the loudness of the Indoor Alarm Receiver using the Volume button on the back of the receiver.
Three volume levels are available: High, Medium and Low.
Silent mode
Like some peace and quiet for a period of time? You can put the alarm triggered by the Alert Sensor on “silent”. Simply press the Channel button that corresponds with the Alert Sensor that you want the alarm muted. The Indoor Alarm Receiver beeps twice, confirming the alarm has been turned off.
- If the Alert Sensor detects movement while the alarm is muted , you will still be visually alerted by the corresponding Channel LED indicator blinking on the Indoor Alarm Receiver.
- To unmute the alarm, press the corresponding Channel button again. You will hear a single confirmation beep from the Indoor Alarm Receiver.
Low battery warning
Your devices will notify you when battery power is running low.
- Install new batteries immediately for the Indoor Alarm Receiver when all 4 LED indicators start blinking at the same time.
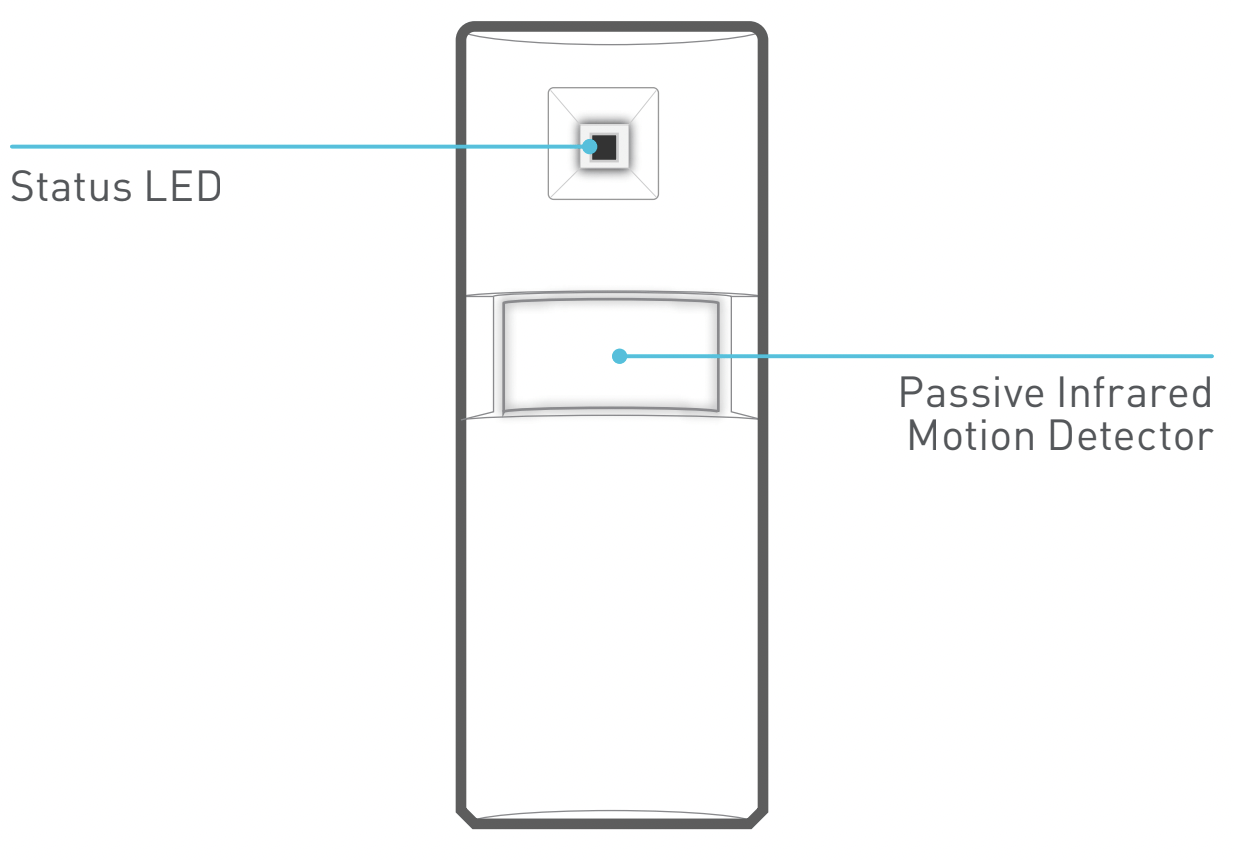
- Install new batteries immediately for the Alert Sensor when the status LED starts blinking continuously.
Pairing your Alert Sensor
The Alert Sensor and Indoor Alarm Receiver in your kit have already been paired so all you have to do is put batteries in and your devices are ready to use. If for some reason pairing is lost, here's how to pair them again:
- Place the Alert Sensor faced down to avoid triggering it.
- Press and hold the Reset button on the back of the Indoor Alarm Receiver until all the LED indicators light up. This resets the receiver.
- Decide which channel (1, 2 or 3) you want to assign your Alert Sensor to, and then press and hold the desired Channel button on the back of the Indoor Alarm Receiver until the LED indicator for that channel lights up.
- Within 10 seconds, trigger the Alert Sensor by lifting it up. The Indoor Alarm Receiver sounds the channel alarm and flashes the channel LED to confirm successful pairing.
Troubleshooting
Problem: I keep getting false alarms!
Solution:
- The Alert Sensor uses passive infrared to detect changes in temperature so check that there are no shifting heat sources in view of the sensor. This includes the obvious things, such as moving pets or people, but also things such as a moving shadow on a hot day (such as the shadow of a tree blowing in the wind). Sometimes reflected infrared heat from the sun is enough to trigger the sensor.
- If you’re using the system in an environment with a high level of radio ‘noise’ (that is, somewhere with multiple wireless devices in use) then these interfering signals might be interpreted by the system as alarm signals. This should, however, be a very rare occurrence.