Loading ...
Loading ...
Loading ...
Connections and Setup
-17
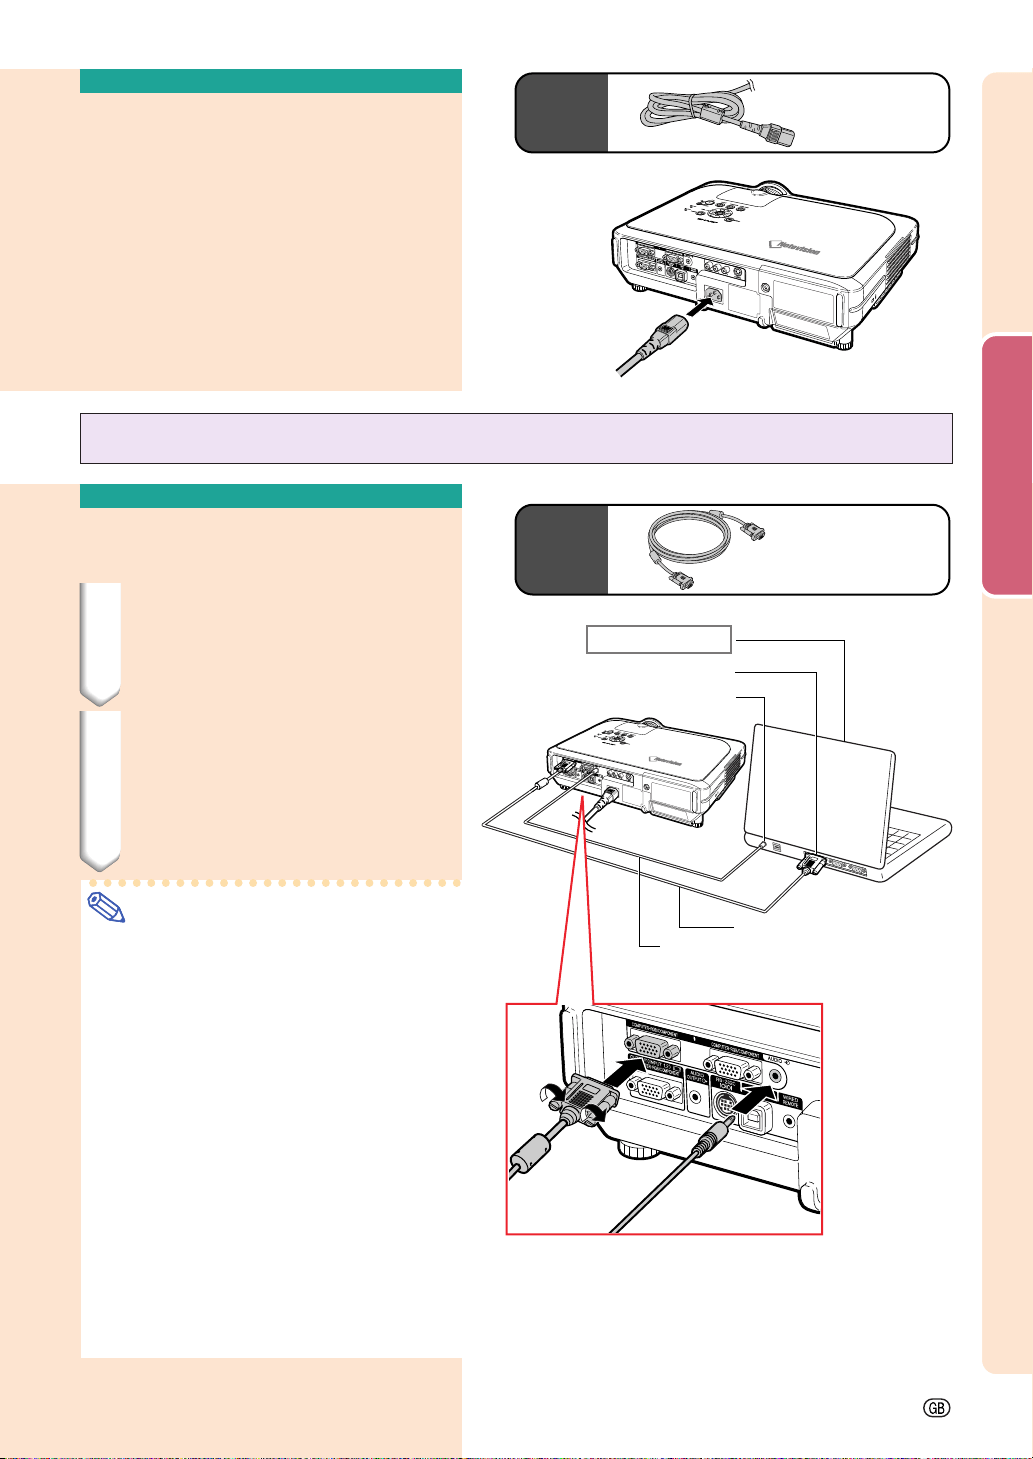
Connecting the Power
Cord
Plug in the supplied power cord into
the AC socket on the rear of the pro-
jector.
Power code
Supplied
accessory
Connecting the Projector to a Computer
Connecting to a Computer
Using the RGB Cable
1 Connect the projector to the
computer using the supplied
RGB cable.
• Secure the connectors by tightening
the thumbscrews.
2
To input audio signal, connect
the projector to the computer
using the computer audio cable
(commercially available or avail-
able as Sharp service part
QCNWGA038WJPZ).
Note
• See page 93 “Computer Compatibility
Chart” for a list of computer signals com-
patible with the projector. Use with com-
puter signals other than those listed may
cause some of the functions not to work.
• When connecting the projector to a com-
puter in this way, select “RGB” for “Signal
Type” in the “Picture” menu. See page 46.
• A Macintosh adaptor may be required for
use with some Macintosh computers. Con-
tact your nearest Macintosh
Dealer.
•
Depending on the computer you are using,
an image may not be projected unless the
computer’s external output port is switched
on. (e.g. Press “Fn” and “F5” keys
simultaneously when using a SHARP
notebook computer). Refer to the specific
instructions in your computer’s operation
manual to enable your computer’s external
output port.
Supplied
accessory
RGB cable
2
Computer audio cable (commercially
available or available as Sharp service
part QCNWGA038WJPZ)
To RGB output terminal
To audio output terminal
1
RGB cable
Notebook computer
Loading ...
Loading ...
Loading ...