Loading ...
Loading ...
Loading ...
13
> Before Start > Part Names > Install > Initial Setup >Playback
Advanced Setup | Firmware Update | Others
E
N
1. Full Auto MCACC
Place the supplied speaker setup microphone in the
listening position, measure the test tones emitted by the
speakers, then the unit automatically sets the optimum
volume level for each speaker, the crossover frequencies,
and the distance from the listening position. This also
automatically adjusts the equalizers for the speakers and
enables correction of distortion caused by the acoustic
environment of the room.
0 Calibration takes between 3 to 12 minutes to be
completed. The speakers emit the test tone at high
volume during measurement, so be careful of your
surroundings. Keep the room as quiet as possible during
measurement.
0 If the power of this unit suddenly turns off, the wires in the
speaker cables may have touch the rear panel or other
wires and tripped the protection circuit. Twist the wires
again properly and make sure they do not stick out of the
speaker terminals when connecting.
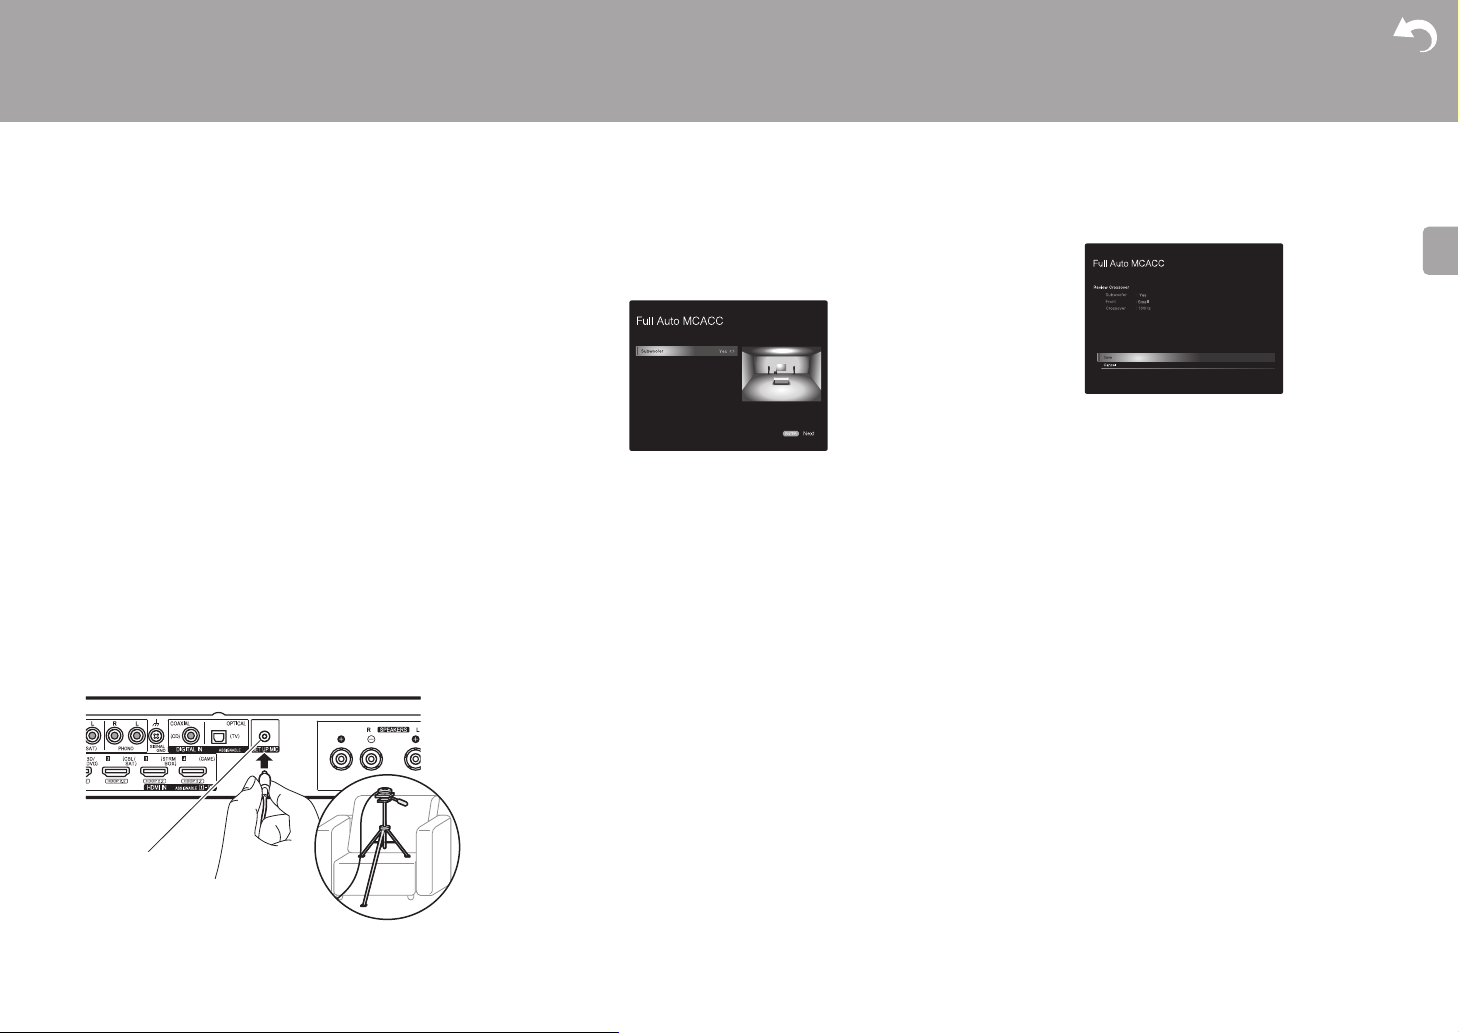
1. Place the supplied speaker setup microphone in the
listening position, and connect to the SETUP MIC jack on
the main unit.
When putting the speaker setup microphone on a tripod,
refer to the illustration when putting it in place.
0 To cancel Full Auto MCACC partway through,
disconnect the speaker setup microphone.
2. Select whether a subwoofer is connected.
The image on the screen changes as you choose the
number of channels in "Speaker Channels", so refer to it
when performing the settings. Also use this screen to
select whether you have connected a subwoofer.
0 If you have connected a subwoofer, check the power
and volume of the subwoofer. The low frequencies
played by the subwoofer may not be discernible, so
set its volume to at least halfway.
3. Test tones are emitted by the speakers, and firstly the
unit detects the speakers connected and the noise in the
environment.
4. After the results of the above measurements are
displayed, select "Next", press ENTER on the remote
controller, and the test tones are emitted again, and the
unit automatically makes settings such as the optimum
volume level and the crossover frequency.
5. When the measurement is completed, the measurement
result is displayed.
Press the cursors w/x on the remote controller to check
the settings. Press ENTER when "Save" is selected to
save the settings.
6. Disconnect the speaker setup microphone.You cannot
use any other menu options while it is connected.
2. Source Connection
Check that each input source is connected correctly. Follow
the guidance, select the input you want to confirm, start play
of the selected player, and confirm that the images appear
on the TV and that sound is played.
3. Network Connection
Set up Wi-Fi connection with an access point such as a
wireless LAN router. There are the following two methods of
connecting by Wi-Fi:
"Scan Networks": Search for an access point from this
unit. Find out the SSID of the access point beforehand.
"Use iOS Device (iOS7 or later)": Share the iOS device's
Wi-Fi settings with this unit.
If you select "Scan Networks", there are a further two
choices of connection method. Check the following.
0 "Enter Password": Enter the password (or key) of the
access point to connect.
0 "Push Button": If the access point has an automatic
connection button, you can connect without entering a
password.
0 If the SSID of the access point is not displayed, then in
the screen listing the SSIDs, select "Other..." with the x
SETUP MIC
Specifies whether the subwoofer is connected or not.
Loading ...
Loading ...
Loading ...