Loading ...
Loading ...
Loading ...
Wireless cooking sensor en
19
2.
Attach the cooking onto the silicone patch so that it
fits perfectly.
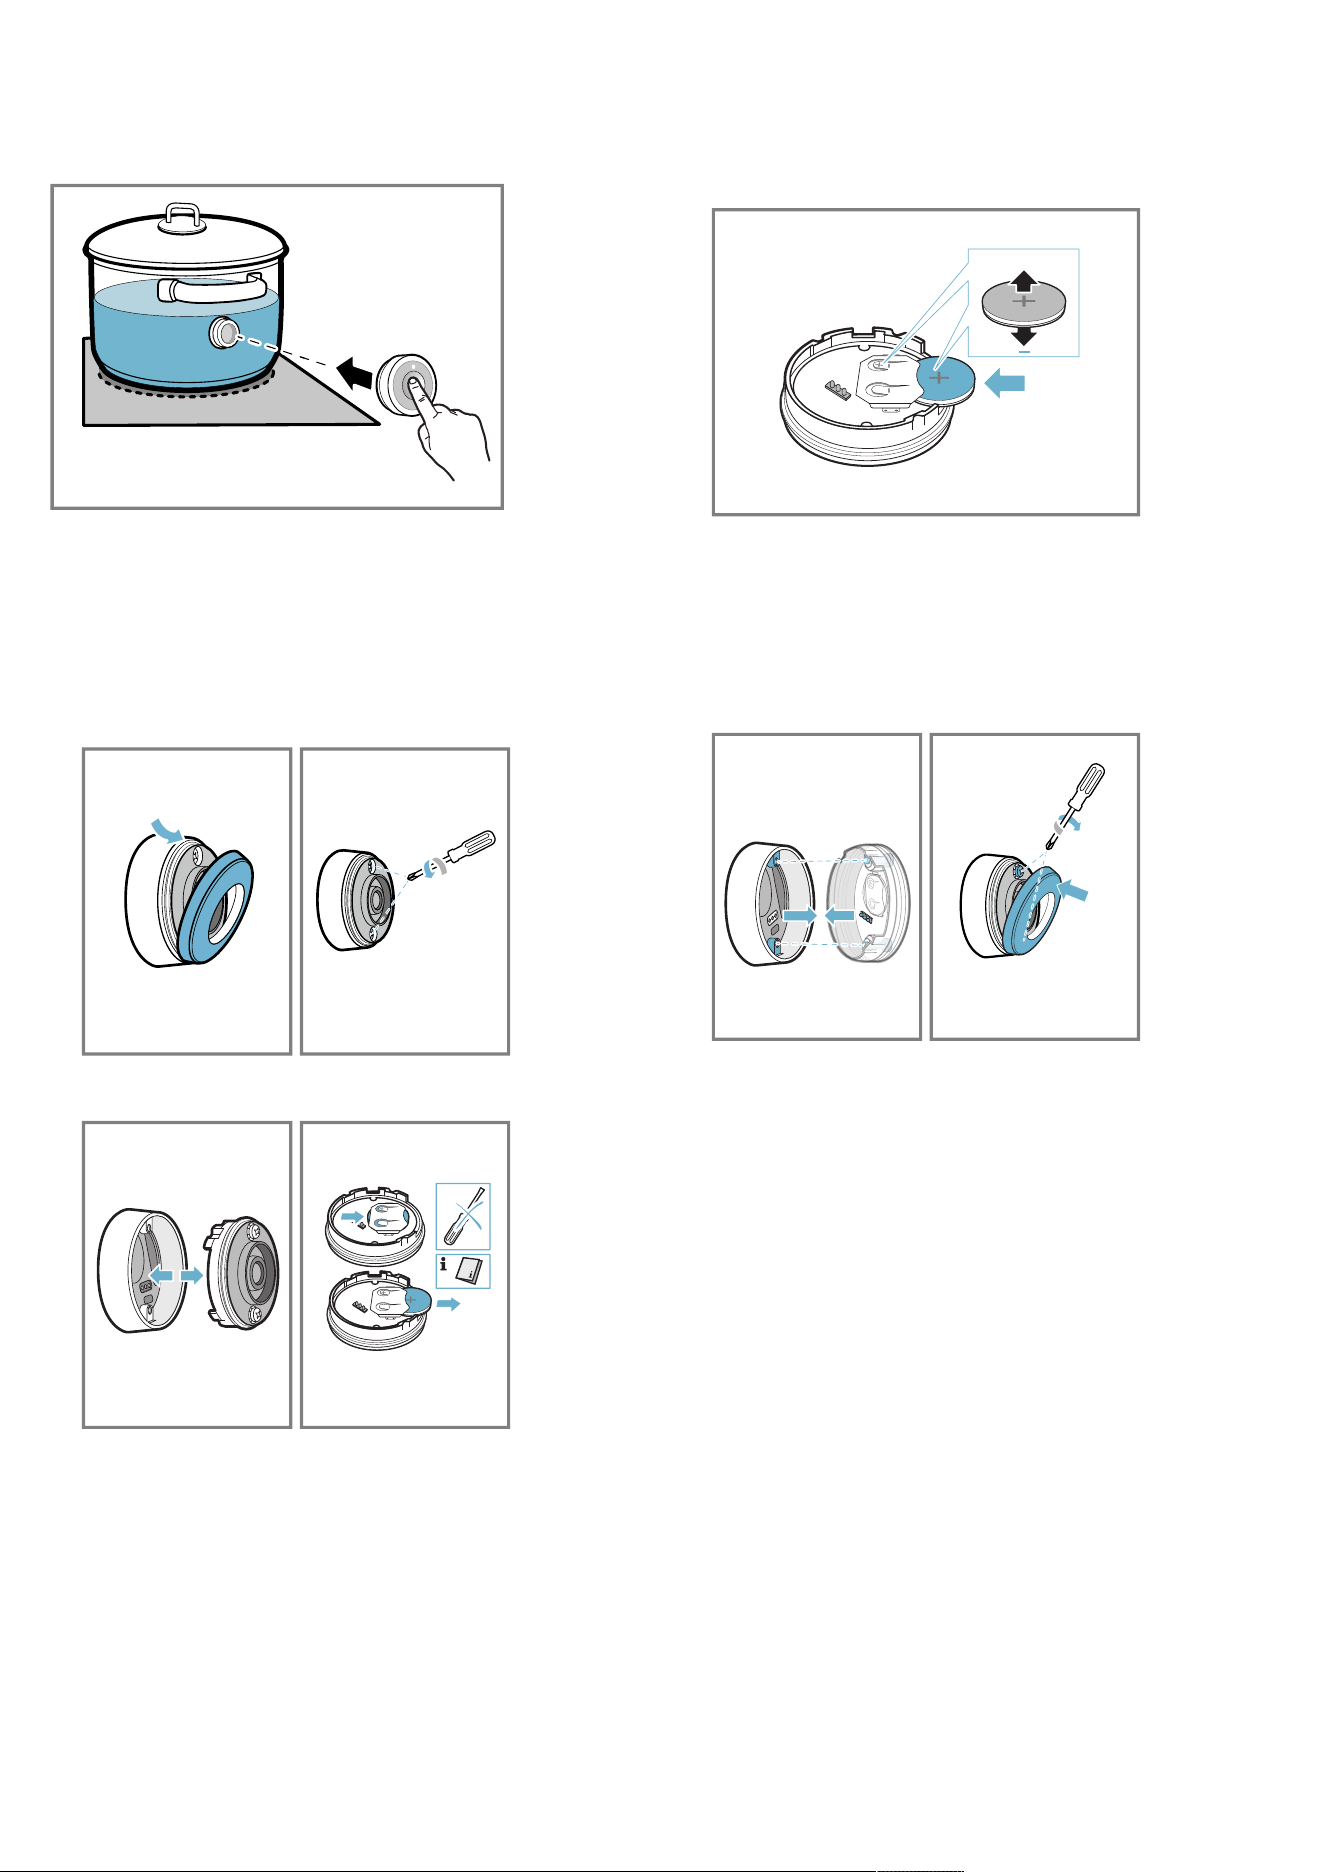
17.4 Replacing the battery
If the LED on the wireless cooking sensor does not
light up when pressed, the battery is discharged. Chan-
ging the battery:
1.
Remove the silicone cover from the lower section of
the cooking sensor casing and remove both screws
using a screwdriver.
2.
Open the cooking sensor lid and remove the battery
from the base.
!
3.
Insert a new battery, observing the instructions for
the battery poles. Only use premium-quality CR2032
batteries.
+
Note:Do not use any metal objects to remove the
battery. Do not touch the battery connection points.
4.
Close the cap on the cooking sensor. The indenta-
tions for the screws on the cap must be aligned with
the indentations on the lower section of the housing.
Use a screwdriver to tighten the screws and secure
the silicone cover on the lower section of the cook-
ing sensor housing.
17.5 Cleaning
Cooking sensor
Clean with a damp cloth. Do not place in the dish-
washer and do not get it wet.
When you are not using the cooking sensor, remove it
from the cookware and store it in a clean, secure loca-
tion, away from any heat sources.
Silicone patch
Clean and dry before attaching the cooking sensor.
Dishwasher safe.
Note:The cookware with the silicone patch must not
be left to soak for long periods in soapy water.
Window for the wireless cooking sensor
Always keep the window clean and dry. Important:
1.
Remove dirt and oil splatters regularly.
2.
For cleaning, use a cloth or a cotton bud and win-
dow-cleaning solution.
Loading ...
Loading ...
Loading ...