Loading ...
Loading ...
Loading ...
Use
67
EN
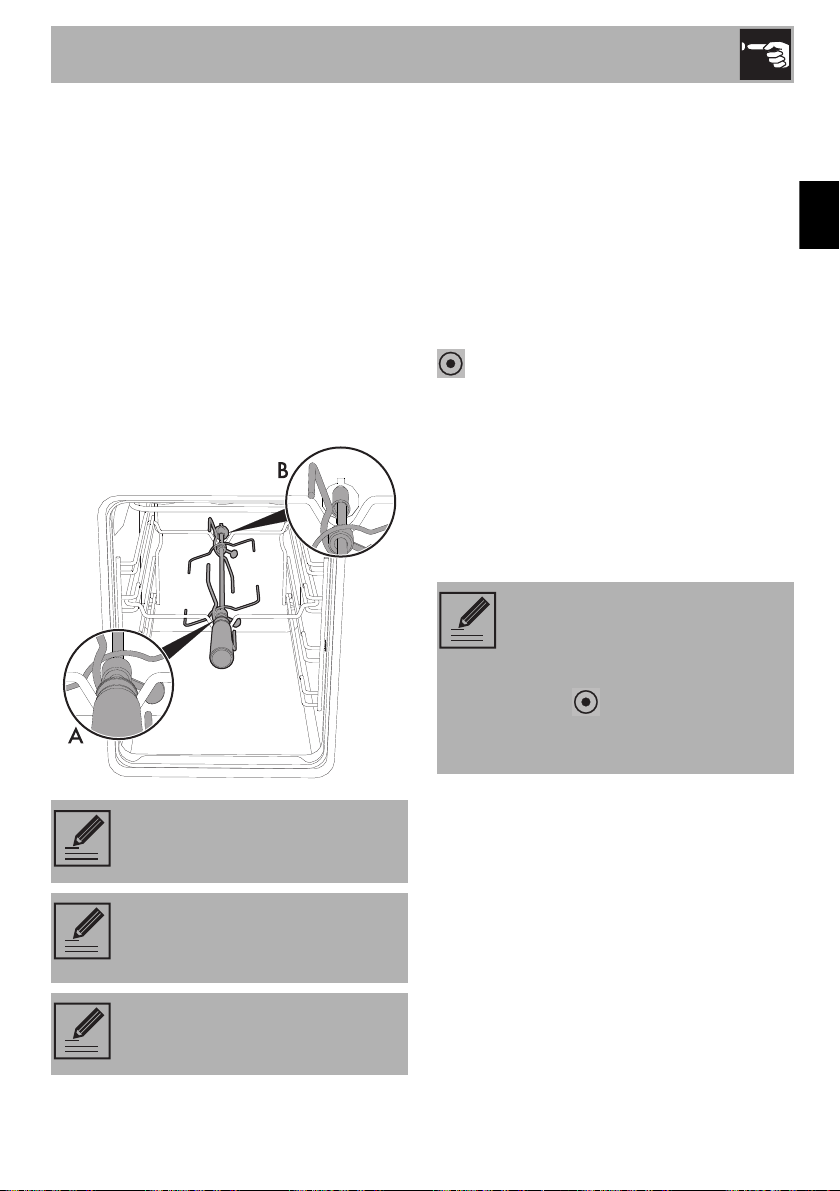
Rotisserie (auxiliary oven)
1. Position the rotisserie support on the third
shelf of the auxiliary oven.
2. Screw on the handle provided so that
you can handle the rod with the food on
it readily.
3. Once you have prepared the rotisserie
rod, place it on the rotisserie support. The
pin must be correctly positioned on the
shaped part A.
4. Insert the rod into the hole B so that it
connects with the rotisserie motor.
3.4 Using the hob
All the appliance’s control and monitoring
devices are located together on the front
panel. The burner controlled by each knob
is shown next to the knob. The appliance is
equipped with an electronic ignition device.
Simply press the knob and turn it anti-
clockwise to the maximum flame symbol,
until the burner ignites. If the burner does not
light in the first 15 seconds, turn the knob to
and wait 60 seconds before trying
again. After lighting, keep the knob pressed
in for a few seconds to allow the
thermocouple to heat up. The burner may
go out when the knob is released: In this
case, the thermocouple has not heated up
sufficiently. Wait a few moments and repeat
the operation. Keep the knob pressed in
longer.
Remove the handle before closing
the door
We recommend that you place the
tray on the first shelf to collect fats
more easily.
Pour a little water into the drip tray
to prevent smoke from forming.
In case of an accidental switching
off, a safety device will be tripped,
cutting off the gas supply, even if
the gas cock is open. Return the
knob to and wait at least
60 seconds before lighting it
again.
Loading ...
Loading ...
Loading ...