Loading ...
Loading ...
Loading ...
10
5
.
R
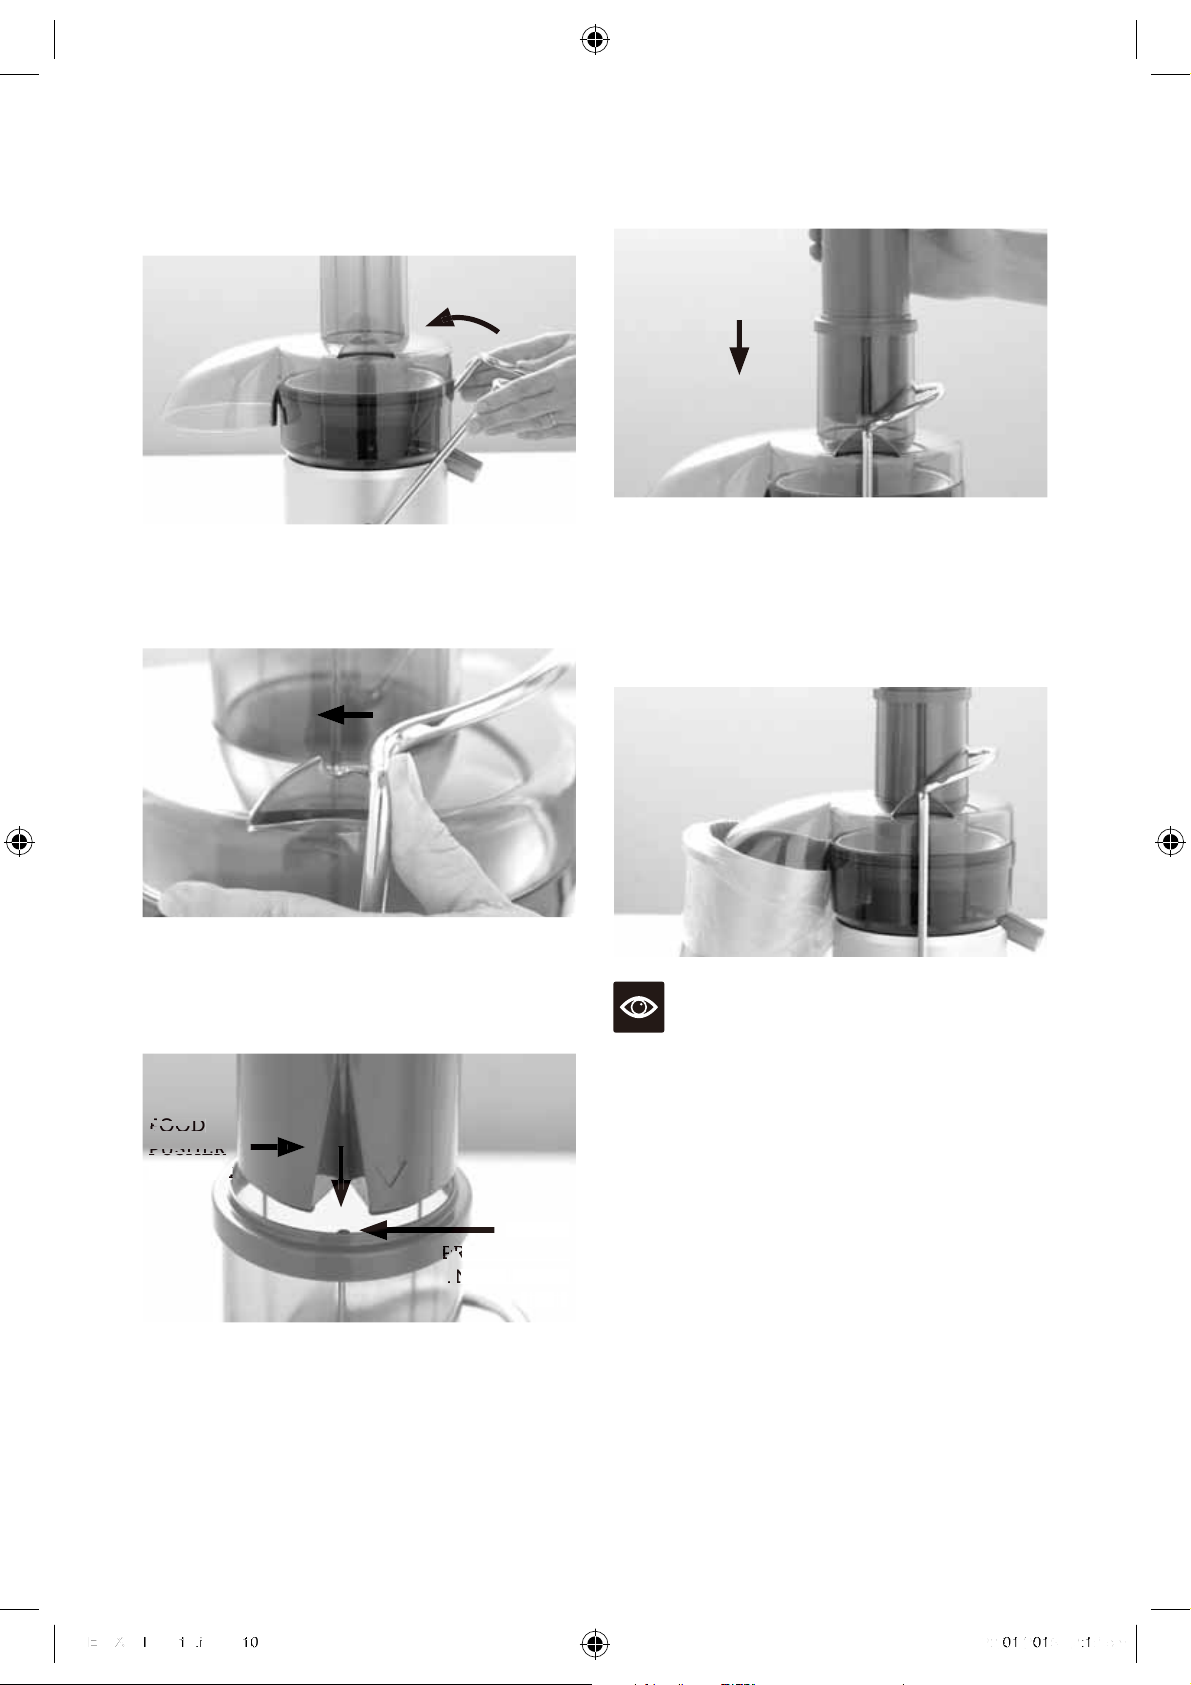
aise the sa
f
ety locking arm up and locate
i
nto the two grooves on either side o
f
the
j
u
i
ce cover.
T
he sa
f
ety locking arm should now be in a
v
ertica
l
position an
d
l
oc
k
e
d
into p
l
ace on top
of
the juice cover.
6
.
S
lide the
f
ood pusher down the
f
ood chute
b
y aligning the groove in the
f
ood pusher,
w
ith the small protrusion on the inside o
f
t
he top o
f
the
f
eed tube.
FO
FO
FO
FO
OD
OD
OD
OD
PU
PU
PU
P
PU
SH
SH
H
SH
SH
ER
ER
ER
ER
G
R
OO
VE
E
E
E
E
E
E
E
E
S
MALL
P
P
P
PR
R
R
R
R
P
R
PR
P
PR
P
P
R
P
P
P
O
TRU
S
I
ON
IN
N
N
I
S
IDE FEE
D
T
UB
E
C
ontinue to slide the
f
ood pusher down on the
f
eed chute.
7.
P
lace the pulp container into position b
y
t
iltin
g
the motor base sli
g
htl
y
to the ri
g
ht.
I
nsert the pulp container under the
j
uicer
c
over on the left hand side ensurin
g
it is
s
upported b
y
the
j
uicer cover and motor
base.
N
OT
E
T
o minimize c
l
eaning,
l
ine t
h
e pu
l
p container
w
it
h
a pro
d
uce
b
ag to co
ll
ect t
h
e pu
l
p. Pu
l
p can
b
e used in other dishes, or as a compost
f
or the
g
ar
d
en or
d
iscar
d
e
d.
8
.
Pl
ace t
h
e juicer jug un
d
er t
h
e juice spout on
t
he right hand side o
f
the Juice Fountain™
Pl
us. T
h
e juice jug
l
i
d
can
b
e use
d
to avoi
d
a
ny sp
l
atter
.
JE98XL_IB_G16.indd 10
J
E
9
8
8X
L
_
I
B
_
G
1
6
.
i
n
d
d
1
0
2
9
/0
/0
1
/2
/2
0
1
6
2
:
1
9
p
m
Loading ...
Loading ...
Loading ...