Loading ...
Loading ...
Loading ...
16 17
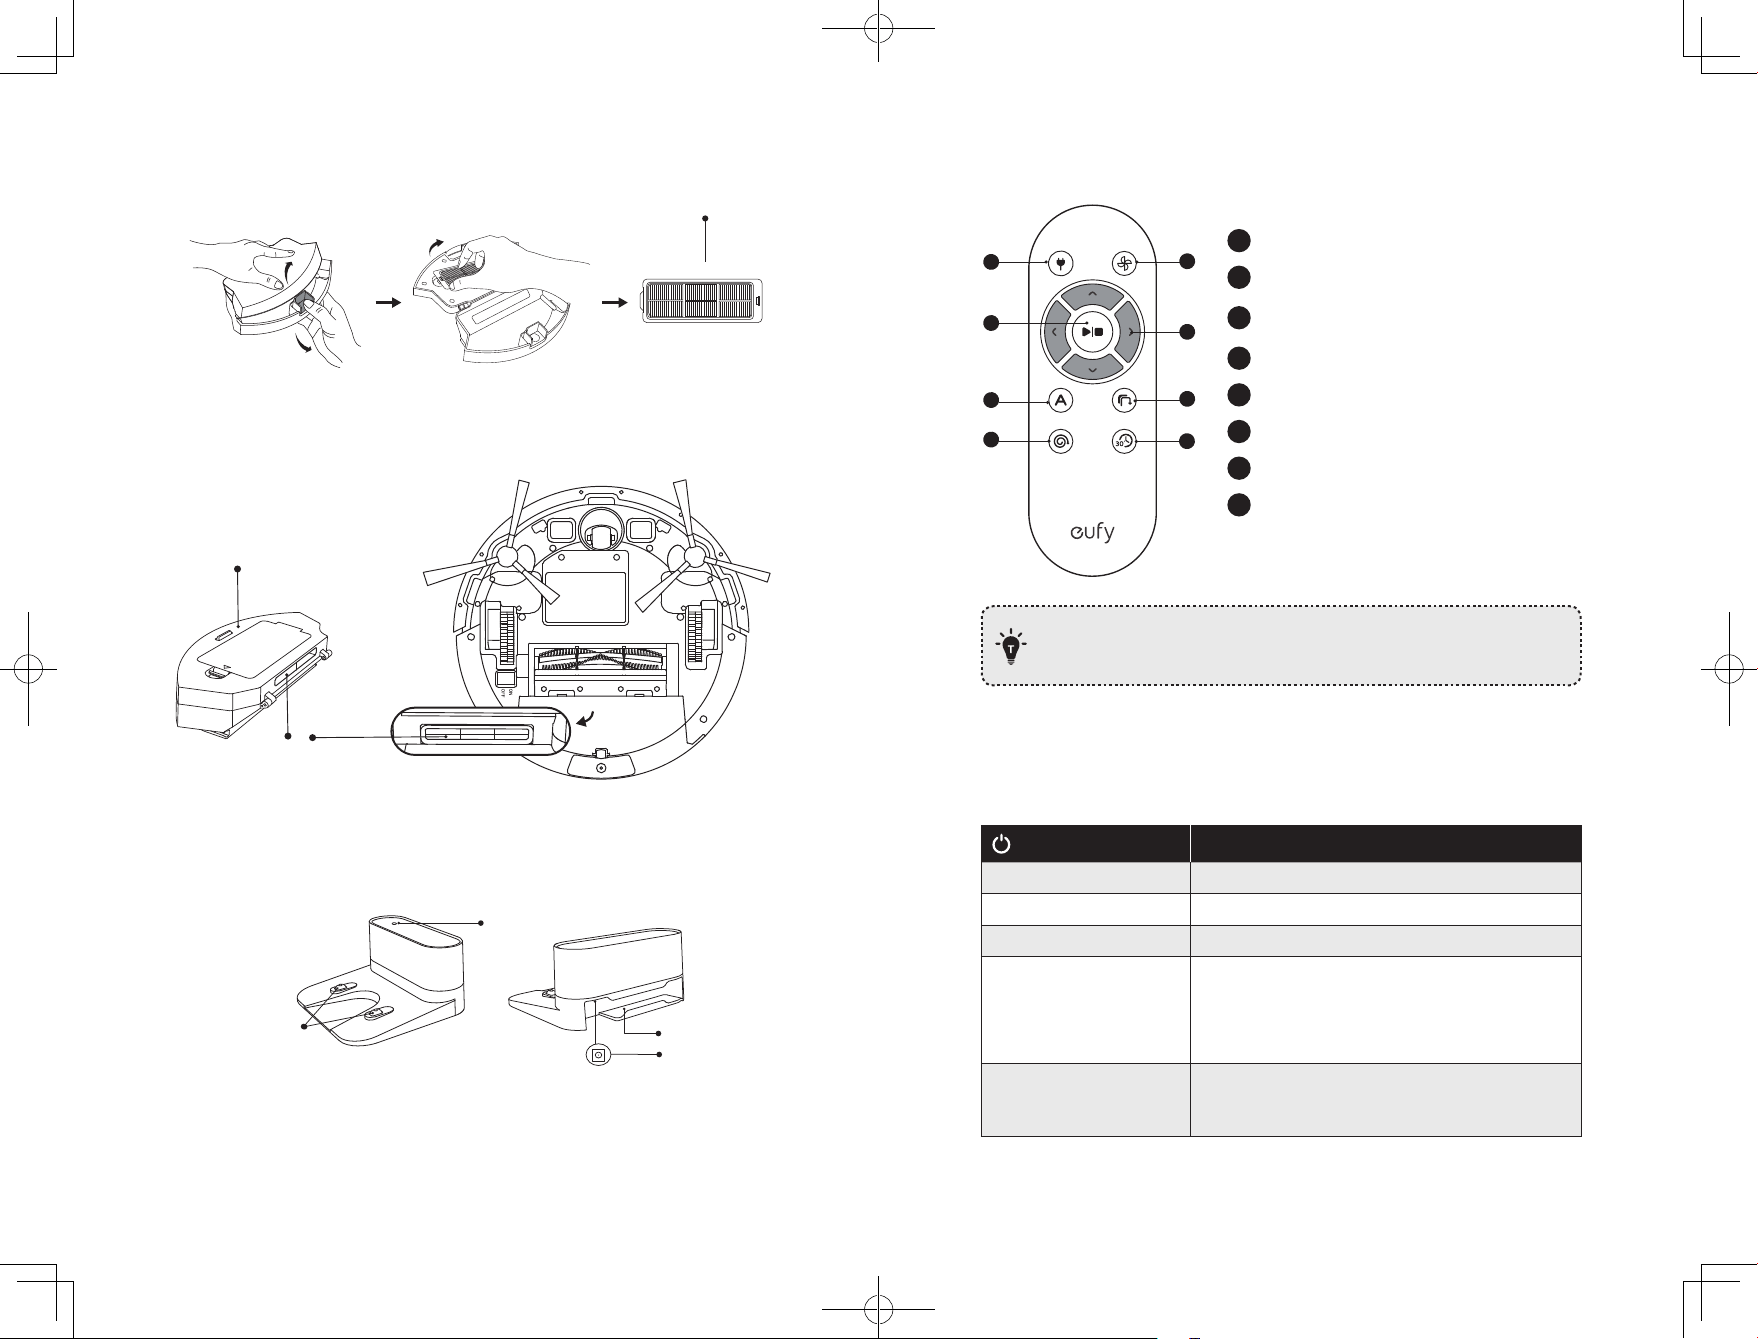
C. Dust Collector
Filter
D. Suction Inlet
Suction inlet
Dust collector
E. Charging Base
Status light
Power cord storage
compartment
Power socket
Charging contact pins
Remote Control
1
2
3
5
4
6
7
8
1
Return RoboVac to Charging Base
2
Adjust suction power level
3
Start Auto cleaning / Stop cleaning
4
Control cleaning direction manually
5
Start Auto cleaning
6
Start Edge cleaning
7
Start Spot cleaning
8
Start Quick cleaning
Install 2 AAA batteries before using the remote control for the first time.
Make sure the positive and negative ends are facing the correct polarity
direction as marked in the battery compartment.
LED Indication
You can see the status of RoboVac from the LED indicators.
(Power Status Light)
Status
Breathing orange Charging
Solid blue Standby / Cleaning / Fully charged
Solid orange Low power and returning to Charging Base
O
• RoboVac is off.
• To conserve power, the light automatically turns
off when RoboVac is not docked to the Charging
Base and has been inactive for 10 minutes.
Flashing / Solid red +
Beeping
RoboVac has an error.
Refer to the “Troubleshooting>Error Tone” section in
this manual for solutions.
Loading ...
Loading ...
Loading ...