Loading ...
Loading ...
Loading ...
Hour format
•
Press and hold the START/STOP button for
5seconds or insert the batteries. The full dis-
play appears.
•
Select the desired hour format using the memo-
ry button M and confirm with the START/STOP button .
Date
The year flashes on the display.
•
Select the desired year using the memory
button M and confirm with the START/STOP
button .
The month flashes on the display.
•
Select the desired month with
the memory button M
and confirm with the START/STOP button .
The day flashes on the display.
•
Select the desired day with the memory button M and
confirm with the START/STOP button
.
If the hour format is set as 12h, the day/month display
sequence is reversed.
Time
The hours flash on the display.
•
Select the desired hour using the memory button
M and confirm with the START/STOP button .
The minutes flash on the display.
•
Select the desired minute using the memory button
M and confirm with the START/STOP button .
Once all the data has been set, the device switches
o automatically.
5. Measuring blood pressure
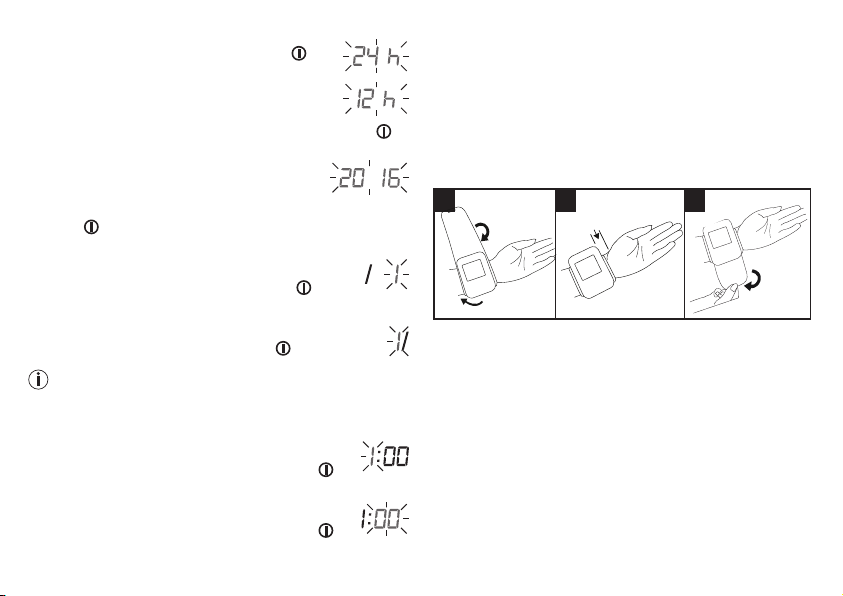
Attach the cuff
Blood pressure may vary between the right and left arm, which
may mean that the measured blood pressure values are differ-
ent. Always perform the measurement on the same arm.
If the values between the two arms are significantly different,
please consult your doctor to determine which arm should be
used for the measurement.
1 2 3
1 cm
•
Expose your left wrist. Ensure that the circulation of the arm
is not hindered by tight clothing or similar.
Place the cuff on the inside of your wrist.
•
Close the cuff with the hook-and-loop fastener so that the
upper edge of the device is positioned approx. 1 cm under-
neath the heel of the hand.
•
The cuff must be fitted tightly around the wrist, but must not
constrict.
Adopting the correct posture
•
Before every measurement, relax for about five minutes. Oth-
erwise deviations can occur.
19
Loading ...
Loading ...
Loading ...