Loading ...
Loading ...
Loading ...
13
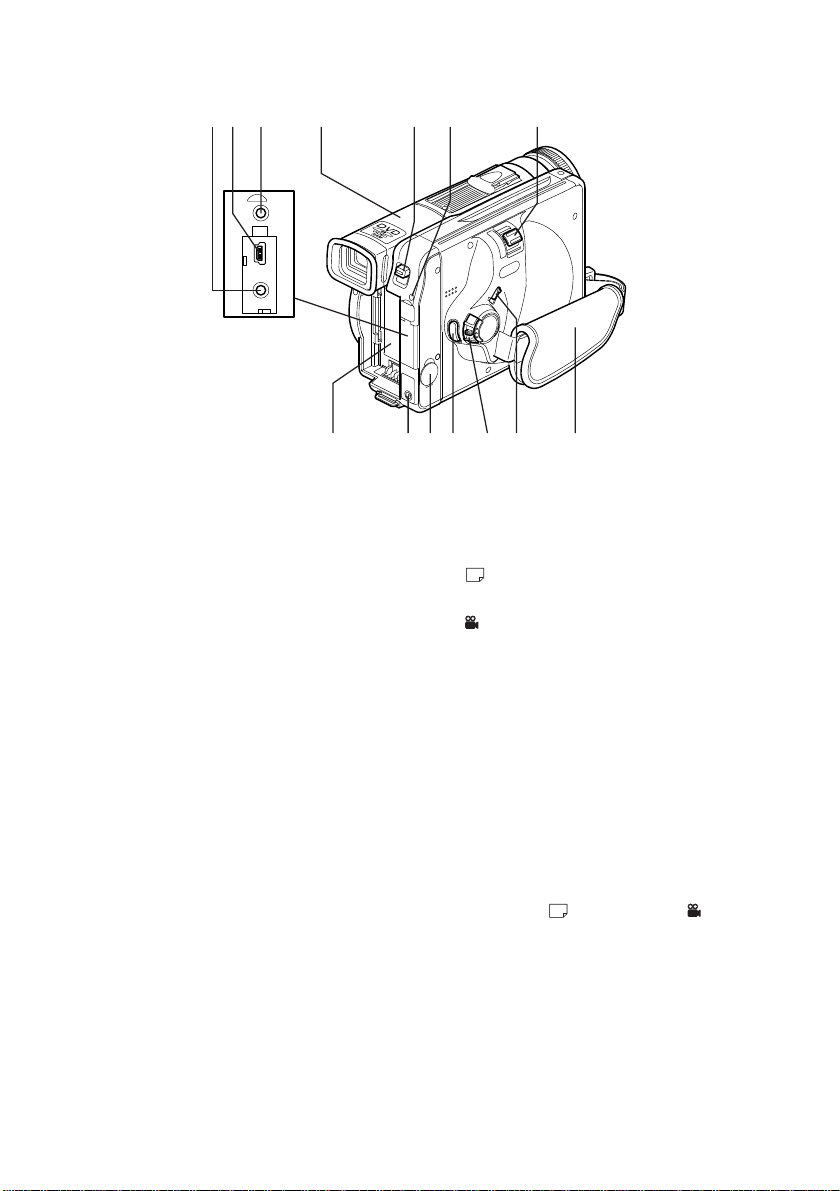
!5 AV input/output jack (p. 91)
!6 PC connection terminal (TO PC)
(p. 97)
!7 External microphone jack (p. 42)
!8 Viewfinder (p. 41)
!9 DISC EJECT button (p. 37)
Press down this button to open the
disc guide.
@0 CHARGE/ACCESS indicator
(p. 21, 31)
Will blink or light during charging,
or while the DVD video camera/
recorder is operating.
@1 Zoom lever (p. 47)
Push the lever to the T side for tel-
ephoto, or to the W side for wide-
angle.
@2
Battery attachment platform (p. 30)
@3 DC cord connection terminal
(DC IN 8.4V) (p. 31)
@4 S-VIDEO output jack (p. 91)
@5 Record button (REC) (p. 42)
@6 Power switch (p. 42, 43)
PHOTO : To record still
images
VIDEO : To record a movie
POWER OFF: To turn off the DVD
video camera/re-
corder
Press the red button at the centre of
power switch and turn it only when
turning power on: It is not necessary
to press the button when setting the
switch to “POWER OFF”.
The power switch cannot be
changed over during recording.
For playback, set the power switch
to either “
PHOTO” or “ VIDEO”.
@7 LOCK switch (p. 42)
To lock the recording mode, so that
the VIDEO mode is not switched
to the PHOTO mode by mistake.
@8 Hand strap (p. 27)
!5 !6 !7 !8 !9 @1
@7@2 @3 @4 @5
TO PC
A
/
V
@0
@6 @8
(Inside the cover)
DZ-MV238/208E(AU)P11-29 02.4.25, 5:18 PM13
Loading ...
Loading ...
Loading ...