Loading ...
Loading ...
Loading ...
English - 17
SETTING UP
HOW TO ADJUST THE DOOR
HEIGHT
If any one of the doors is lower
than the other:
• Check if the Refrigerator is
level before adjusting the
door.
• Adjust the door height
difference by inserting a
Snap Ring (A) as shown
between the door and the
hinge. You can use the rings
to raise the right side door of
the fresh food compartment
and both doors of the freezer
compartment.
A
• After checking the height difference, select one
Snap Ring with a suitable thickness.
Important: You can only insert one snap ring.
Inserting two or more Snap Rings may cause
the Snap Rings to slip out or make a rubbing
noise.
• Lift up the lower door and insert the Snap
Ring into the space between the Door and the
Hinge.
• To avoid injury, insert or remove Snap
Rings carefully.
• Keep the Snap Rings out of the reach of
children and make sure that children do not
play with them or put them into their mouths.
• 1mm, 1.5mm, 2mm, and 2.5mm Snap
Rings come with the Refrigerator.
• If the Refrigerator is level before you load
it with food, the Refrigerator may become
unbalanced due to the weight of the food. If this
occurs, adjust the level again using the same
procedure.
• If you raise the door too far, it can rub against
the Top Cover.
CAUTION
Snap Rings included with the refrigerator:
1 mm 1.5 mm 2 mm 2.5 mm
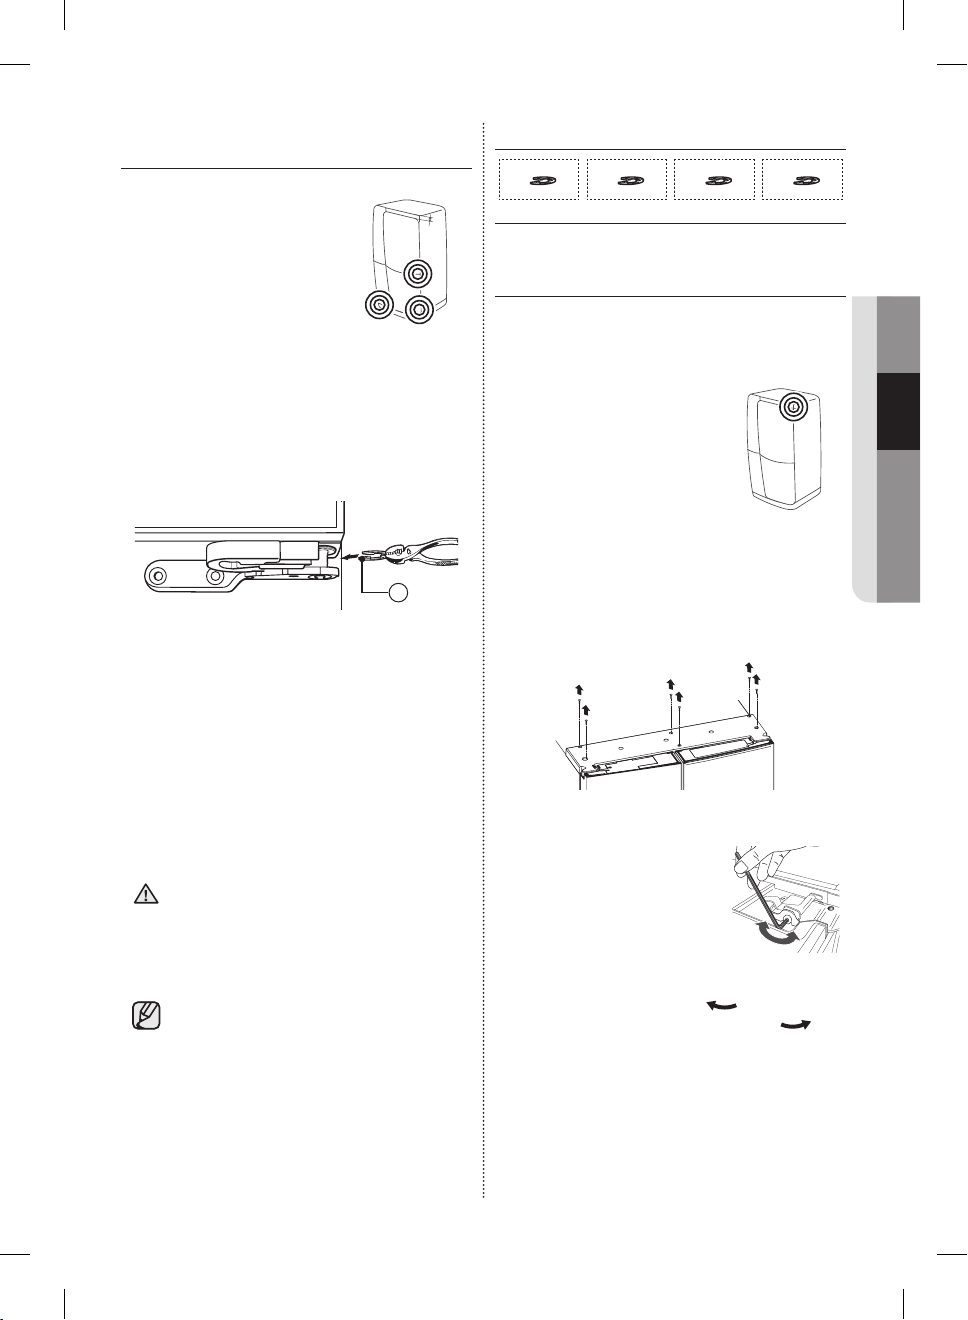
HOW TO ADJUST THE DOOR GAP
If the gap between the left and right fridge
compartment doors is not even.
• You can adjust the gap by
turning the bolt at the top
right of the cold storage
compartment door.
• Do not turn the bolt too far.
You can break it.
1. With the doors closed, remove the 6 screws
holding the top cover using a Phillips
screwdriver, and then remove the Top Cover
together with the connected cables.
2. Turn the bolt with a 4mm
hexagonal L-wrench to
adjust the gap.
(Not provided)
3. Turn the bolt clockwise to ( ) widen the
gap. Turn the bolt counter clockwise ( ) to
narrow the gap.
4. When done, re-attach the Top Cover wit the
connecting cables, and then press down on
its back until it lies flat. Insert the 6 screws you
removed, and then tighten each.
DA68-03013A-18.indb 17 2018. 7. 9. �� 4:39
Loading ...
Loading ...
Loading ...