Loading ...
Loading ...
Loading ...
English - 13
SETTING UP
DISASSEMBLING THE
REFRIGERATOR DOORS
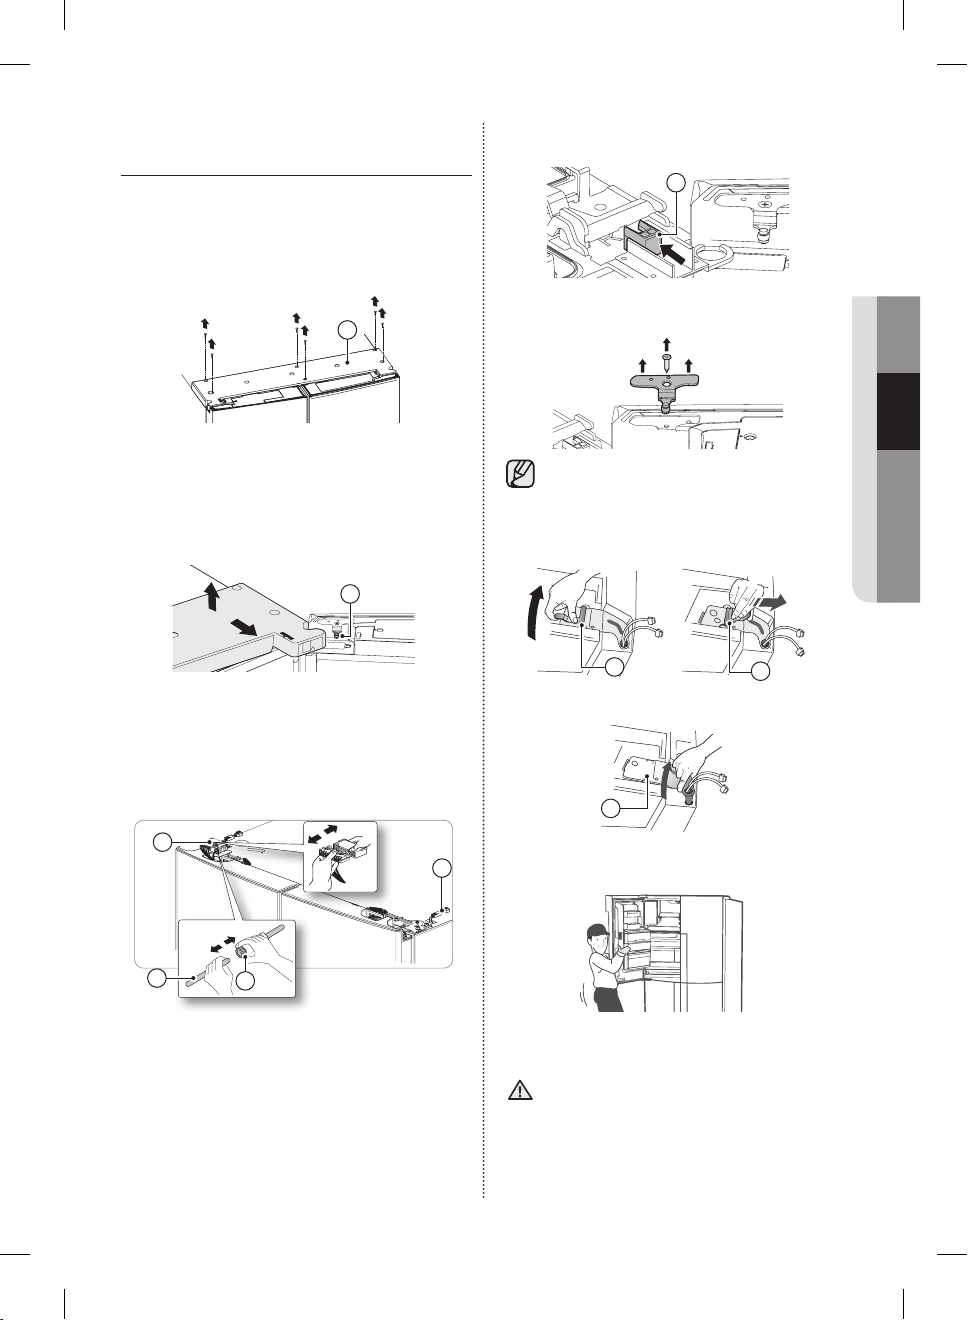
1. With the door closed, remove the 6 screws
holding the Top Cover (A) with a Phillips (+)
Screwdriver, and then remove the Top Cover
with the entire wire-harnesses attached.
A
1-1. Open the right door to prevent interference
between Bracket (B) and the Top Cover.
Hold the rear of the Top Cover, and pull it out
to remove. (Optional)
B
2. Separate the two connectors on the left door
and the one connector on the right door.
Press the white sleeve (C) of the Water Tube
Coupler, and then separate the Water Tube (D).
D
D
C
C
2-1. From the right hinge, slide Pusher (E) to the
front to remove. (Optional)
E
2-2. Loosen the screw on the right door to remove
the Bracket. (Optional)
Keep the removed Pusher and Bracket for
later use.
3. Pull up the Fixer Lever (F), and then pull it
forward.
F
F
4. Remove the Hinge (G).
G
5. Open the door more than 90°.
Lift it up and take it off.
6. Repeat Steps 3 through 5 to remove the other
Fridge door.
• While disassembling and reassembling
the doors, make sure that the electric
wires are not peeled off.
• Do not let the doors fall down.
CAUTION
DA68-03013A-18.indb 13 2018. 7. 9. �� 4:38
Loading ...
Loading ...
Loading ...