Loading ...
Loading ...
Loading ...
3
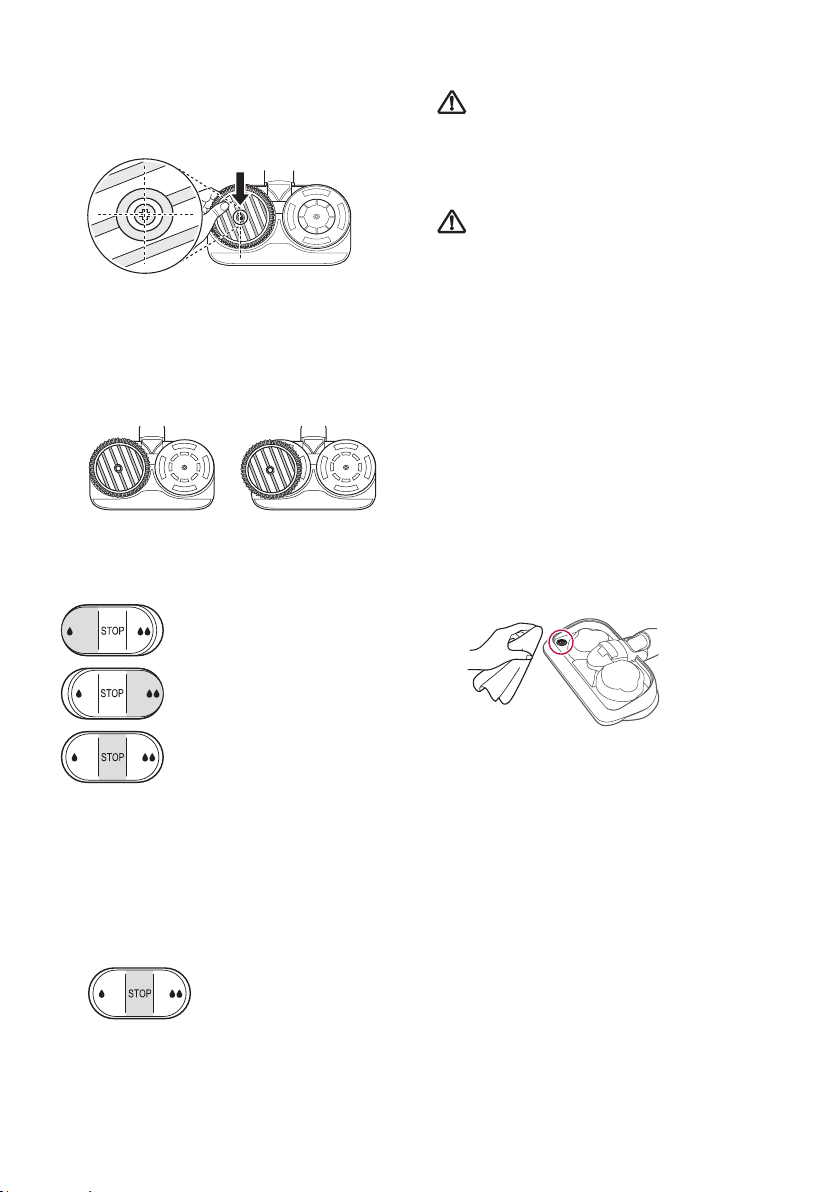
Align the center of the mop pad with the center of
the mop attachment plate, and have the striped
side of the mop face up.
•
Fitting the mop plate upside down or failure to attach
the mop pad to the attachment plate properly may
compromise the cleaning performance.
•
Attaching the mop pad in a dry state may compromise
the cleaning performance.
※
How to install the mop pad properly
Good) Bad)
How to adjust the water flow to the Mop Pads
The amount of water injected from the mop nozzle
can be adjusted.
Used to clean a moisture-sensitive
floor or to supply a little amount of
water
Used to clean ingrained dirt or to
supply a large amount of water
Used to stop the supply of water or
clean with a dry mop
For dry mop cleaning
1
Empty the water in the water tank.
2
Attach the dry mop pad to the mop attachment
plate at the bottom of the mop nozzle.
3
Set the Water Adjustment button to STOP.
4
Turn on the power and begin mopping
WARNING
•
Do not insert your hand into the moving rotor. It may
result in injury.
•
Do not attach the mop pad while the mop nozzle is
operating. It may result in injury.
CAUTION
•
Do not slam down or throw the mop nozzle onto the
floor.
Doing so may result in an injury or product damage.
•
Do not let the product stand on the floor while the
wet mop plates are attached.
Doing so may result in damage or swelling to timber
f
loor
ing.
•
Set the Water Adjustment button to STOP when not
using the product for an extended period of time.
Otherwise it may result in a product failure.
•
Do not use any other mop pad other than the one
provided.
•
Do not put liquid other than water in the water tank.
•
Do not put hot water in the water tank.
•
Do not step on the mop nozzle. It may result in
product damage
•
After cleaning, remove the remaining water in the mop
nozzle with a tissue before storing. The water may
leak and damage the floor.
•
Do not pull on the marked rubber. It may tear.
22
Loading ...
Loading ...
Loading ...