Loading ...
Loading ...
Loading ...
14
Fig.
6
V
Fig.
7
D
V
7
Disassembly of the worktop must only be done by a qualified
service technician
DISASSEMBLE OF WORK-TOP
ln case it is necessary to repair or replace the inside components,
act as follows:
Remove the grids, remove burners and flame-spreaders (see
Fig. 6), unscrew the visible screws "V" placed on the work-top
(see Fig. 7). Disassemble the work-top by unscrewing the rear
screws "A" (see Fig. 15 according to the models). ln this
way it is possible to lift the work-top and to reach the inside
components.
GREASING OF TAPS
If a tap becomes hard to be turned, grease it using a specific
grease withstanding high temperatures. Act as follows: open the
work-top and disassemble also the control panel as described on
the previous paragraph. Unscrew the two fixing screws from the
burner body (see picture) and remove the cone.
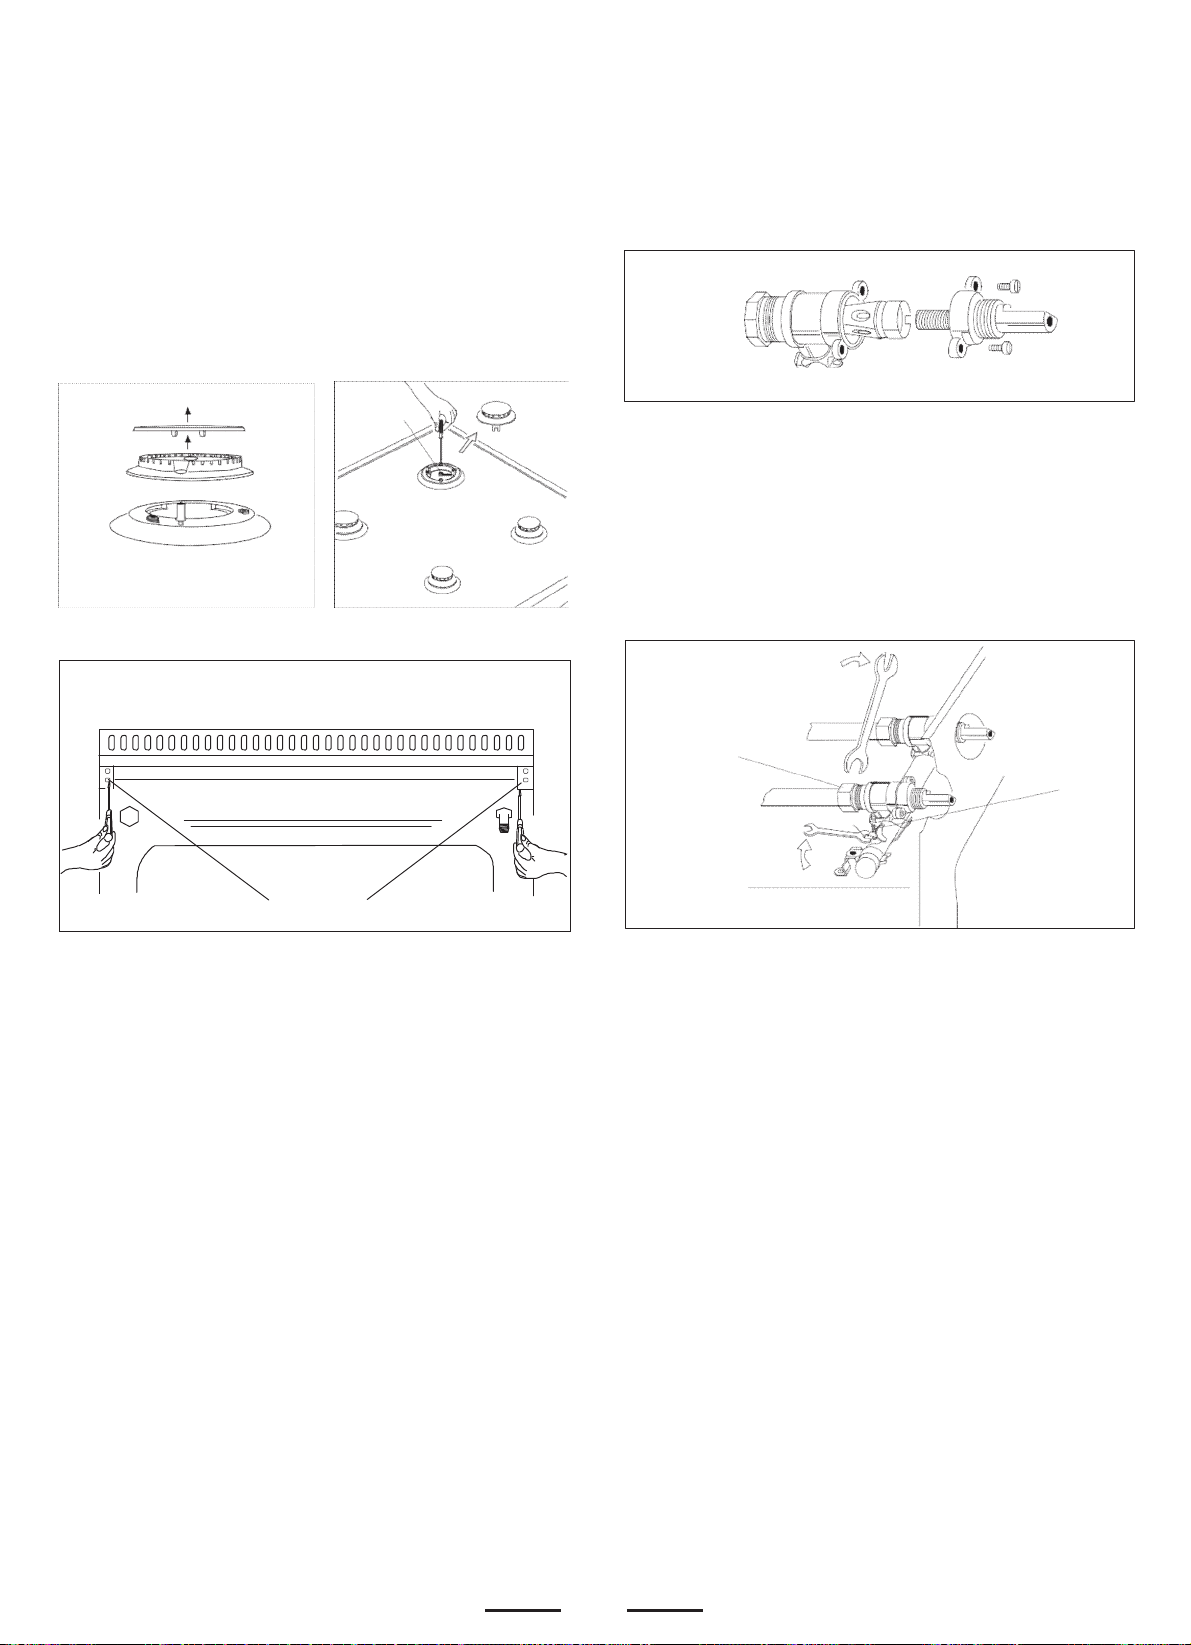
TAPS REPLACEMENT
Act as follows: open the work-top and disassemble also the control
panel as described on the previous paragraph. Unscrew screw
nut D of the gas tube supplying the burner. Unscrew screw V
fixing the tap to the bridle and remove it (see picture).
Note: Every time the tap is replaced, it is necessary to replace
the seal gasket too check the connection seal by means of soapy
water.
Clean the cone and its slot by means of a cloth soaked with solvent.
Slightly grease the cone with the relevant grease, put it in its slot,
and turn it some times. Remove the cone again, remove the excess
grease making sure the gas entries are not obstructed by grease
residue. Assemble everything carefully in the opposite direction
check the connection seal by means of soapy water.
A
Fig. 8
Loading ...
Loading ...
Loading ...