Loading ...
Loading ...
Loading ...
Convertingto LP Gas (continued)
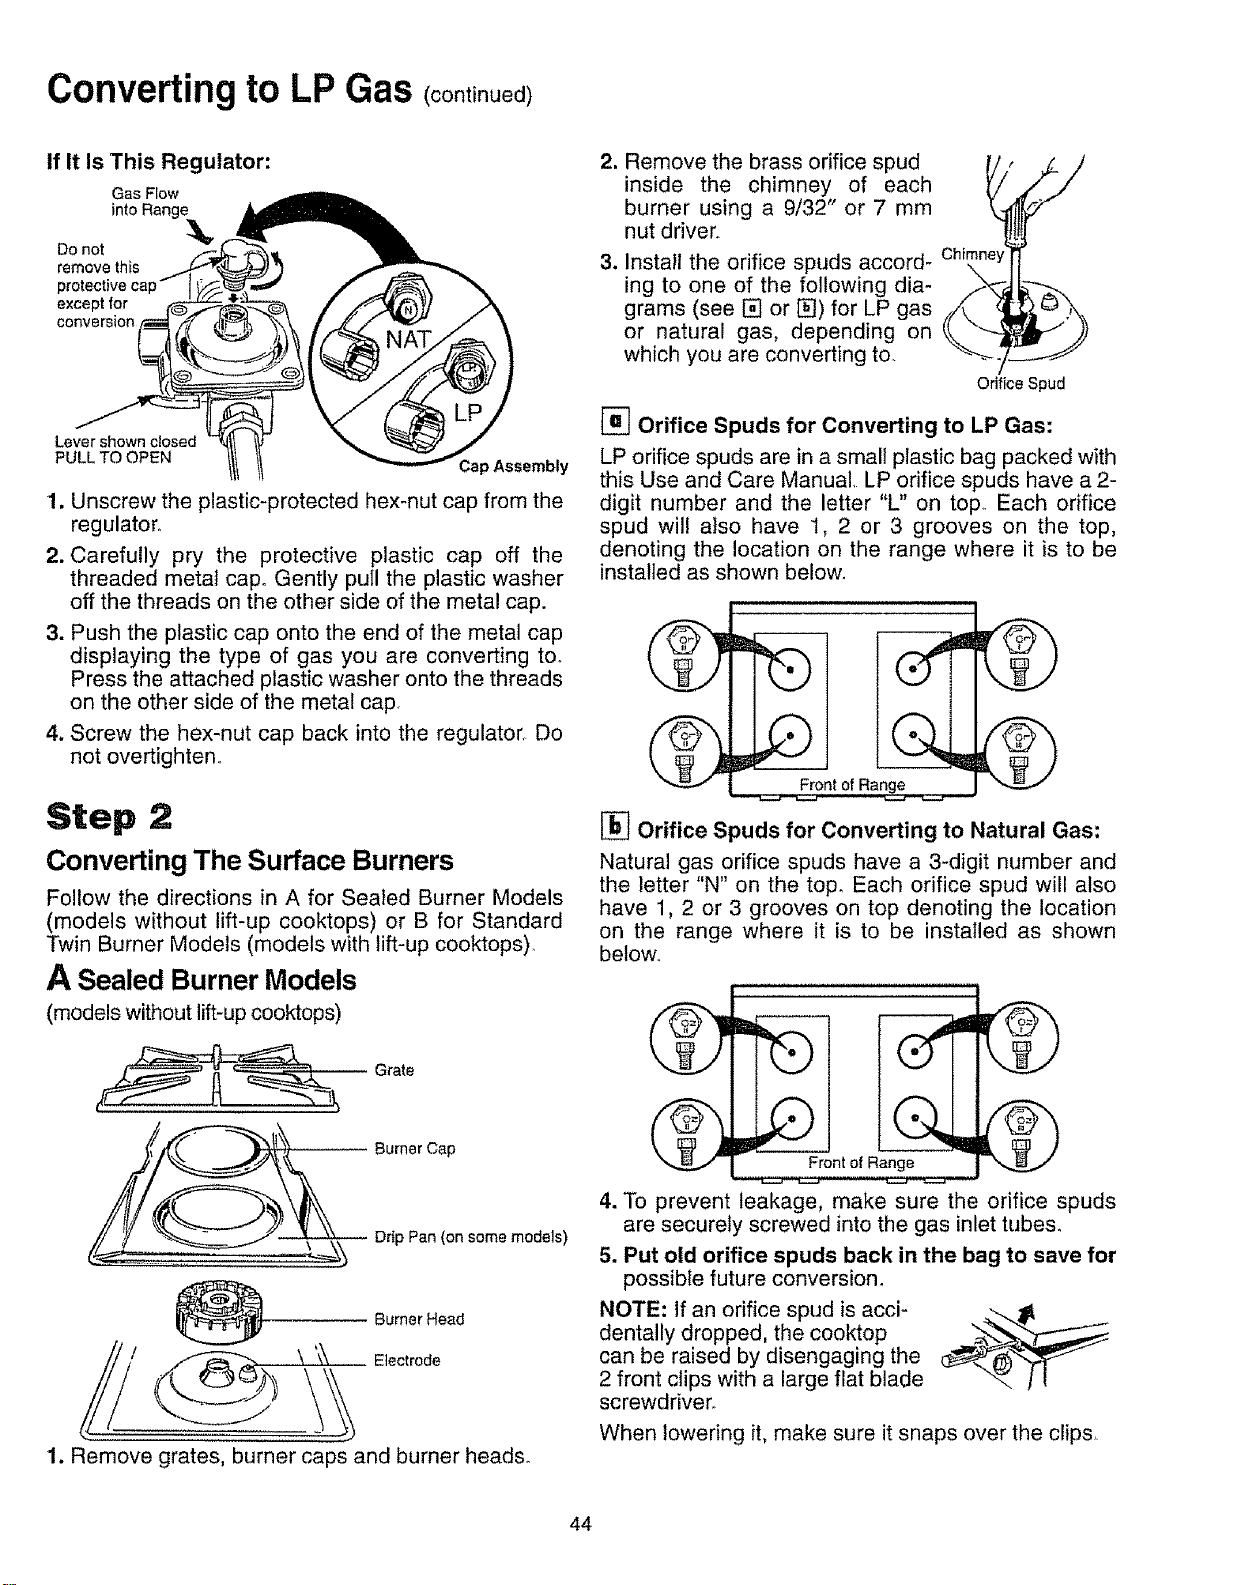
if It Is This Regulator:
Gas Flow
Donot
removethis
except for
cortversion
Lever shown closed
PULL TO OPEN
Cap Assembly
1. Unscrew the plastic-protected hexmut cap from the
regulator°
2. Carefully pry the protective plastic cap off the
threaded metat cap. Gently pull the plastic washer
off the threads on the other side of the metal cap.
3. Push the plastic cap onto the end of the metal cap
displaying the type of gas you are converting to.
Press the attached plastic washer onto the threads
on the other side of the metal cap,
4. Screw the hex-nut cap back into the regulator_ Do
not overtighten,,
Step 2
Converting The Surface Burners
Follow the directions in A for Sealed Burner Models
(models without lift-up cooktops) or B for Standard
Twin Burner Models (models with lift-up cooktops),
A Sealed Burner Models
(models without lift-up cooktops)
m
3.
Remove the brass orifice spud f/,__j
inside the chimney of each
burner using a 9/32" or 7 mm _
nut driver,
Install the orifice spuds accord- Ch_mn
ing to one of the following dia-
grams (see [] or F_) for LP gas
or natural gas, depending on
which you are converting to.
Orifice Spud
[_] Orifice Spuds for Converting to LP Gas:
LP orifice spuds are in a small plastic bag packed with
this Use and Care Manual, LP orifice spuds have a 2-
digit number and the letter "L" on top,, Each orifice
spud will also have 1, 2 or 3 grooves on the top,
denoting the location on the range where it is to be
installed as shown be!ow,
Front of Range
[_ Orifice Spuds for Converting to Natural Gas:
Natural gas orifice spuds have a 3-digit number and
the letter "N" on the top, Each orifice spud will also
have 1, 2 or 3 grooves on top denoting the location
on the range where it is to be installed as shown
below°
Grate
Burner Cap
_ Drip Pan (on some models)
Burner Head
\ i_ Electrode
1. Remove grates, burner caps and burner head&
4. To prevent leakage, make sure the orifice spuds
are securely screwed into the gas inlet tube&
5. Put old orifice spuds back in the bag to save for
possible future conversion.
NOTE: If an orifice spud is acci-
dentally dropped, the cooktop
can be raised by disengaging the
2 front clips with a large flat blade
screwdriver°
When lowering it, make sure it snaps over the clips
44
Loading ...
Loading ...
Loading ...