Loading ...
Loading ...
Loading ...
5
OPERATION OF CONTROL PANEL
The operation of the oven is controlled by pressing the appropriate keys arranged on the surface of the control
panel.
A 'beep' sound should be heard each time you press the control panel to make a correct entry.
When starting and stopping the cooking/timer, the response sounds of the START key and the STOP key are
different from the others.
In addition an audible signal will sound for approximately 2 seconds at the end of the cooking cycle, or 4 times
when an action is required during a cooking programme.
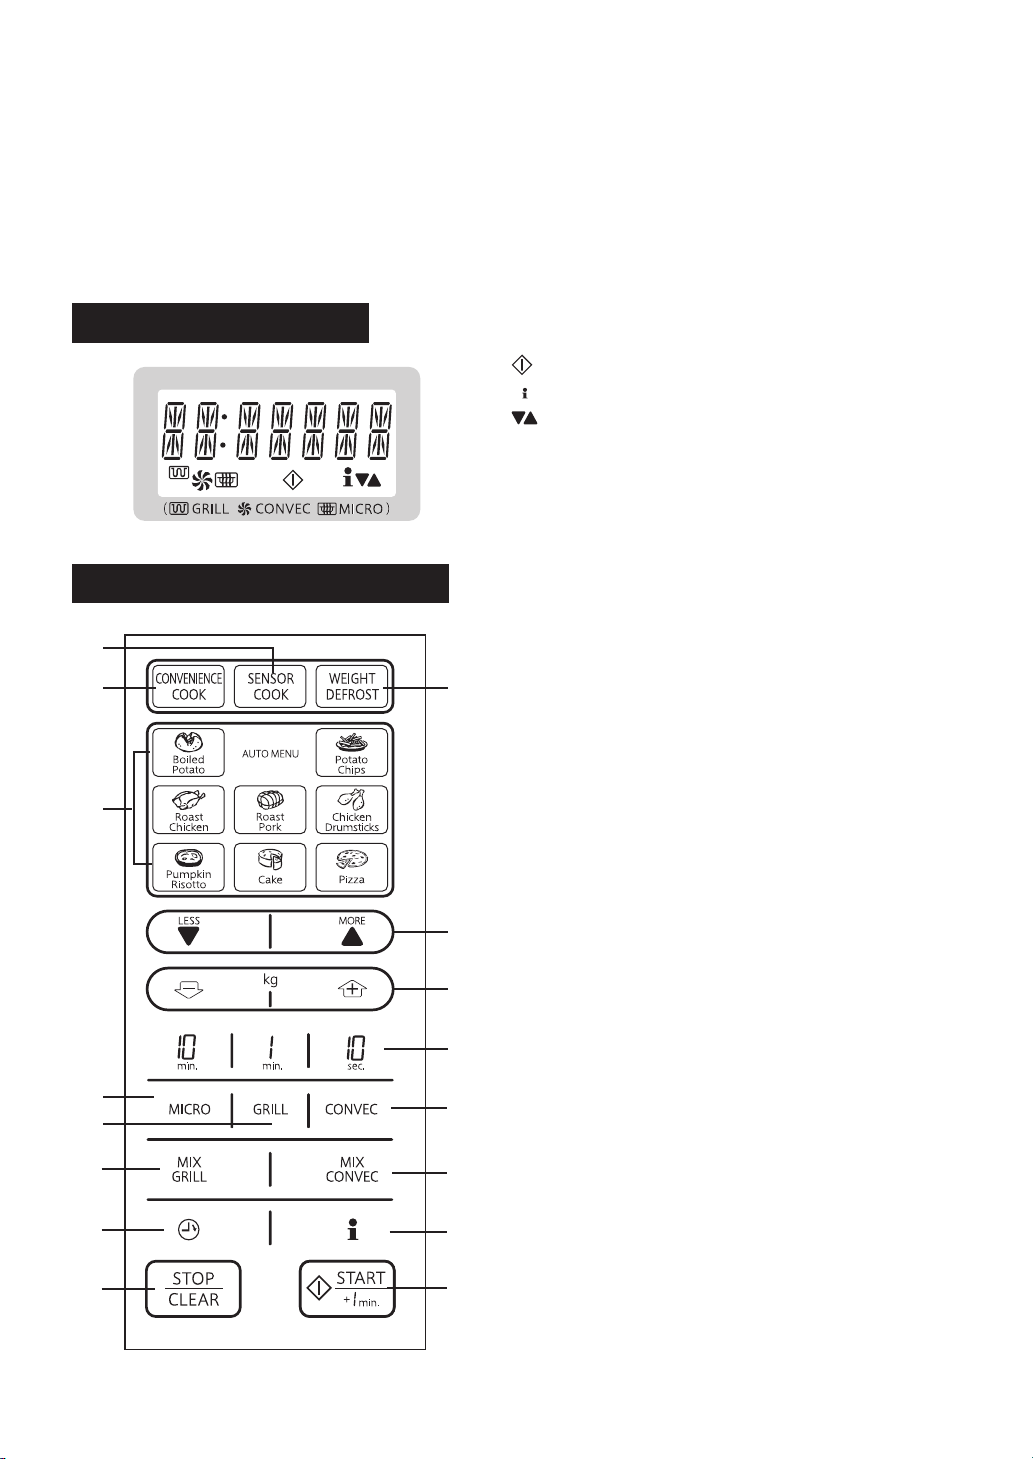
Control Panel Display
The display shows useful information including cooking
time and cooking mode.
: COOK indicator
: INFO indicator
: LESS/MORE indicators
1 SENSOR COOK key
Press to select Sensor Cook menus.
2 CONVENIENCE COOK key
Press to select Convenience Cook menus.
3 WEIGHT DEFROST key
Press to select Weight Defrost menus.
4 AUTO MENU keys
Press to cook 8 popular menus.
5 LESS/MORE keys
Press to alter the cooking result for Auto Menu,
Sensor Cook, Convenience Cook, and
Weight Defrost modes.
Press to increase/decrease the time in one minute
increments during cooking.
6 WEIGHT keys
Press to increase/decrease the weight.
7 TIME keys
Press to enter time.
8 MICROWAVE key
Press to select microwave power setting.
If not pressed, 100% is automatically selected.
9 CONVECTION key
Press to select Convection mode.
10 GRILL key
Press to select Grill mode.
11 MIX GRILL key
Press to select Mix Grill mode.
12 MIX CONVECTION key
Press to select Mix Convection mode.
13 TIMER/CLOCK key
Press to set Timer or Clock.
14 INFO key
Press to set Delay Start or Child Lock.
15 STOP/CLEAR key
Press to clear during programming.
Press once to stop operation of the oven during
cooking; press twice to cancel cooking programme.
16 START/+ 1min. key
Press once to cook for 1 minute on 100% microwave
cooking or increase by 1 minute multiples each time
this key is pressed during Microwave, Convection,
Grill or Mix cooking. Press to start the oven after
setting programmes.
Touch Control Panel Layout
1
2
3
4
5
6
7
8
9
10
11
12
13
14
15
16
R-995D(W).indd 5 2016/10/19 17:33:29
Loading ...
Loading ...
Loading ...