Loading ...
Loading ...
Loading ...
22
OPERATION
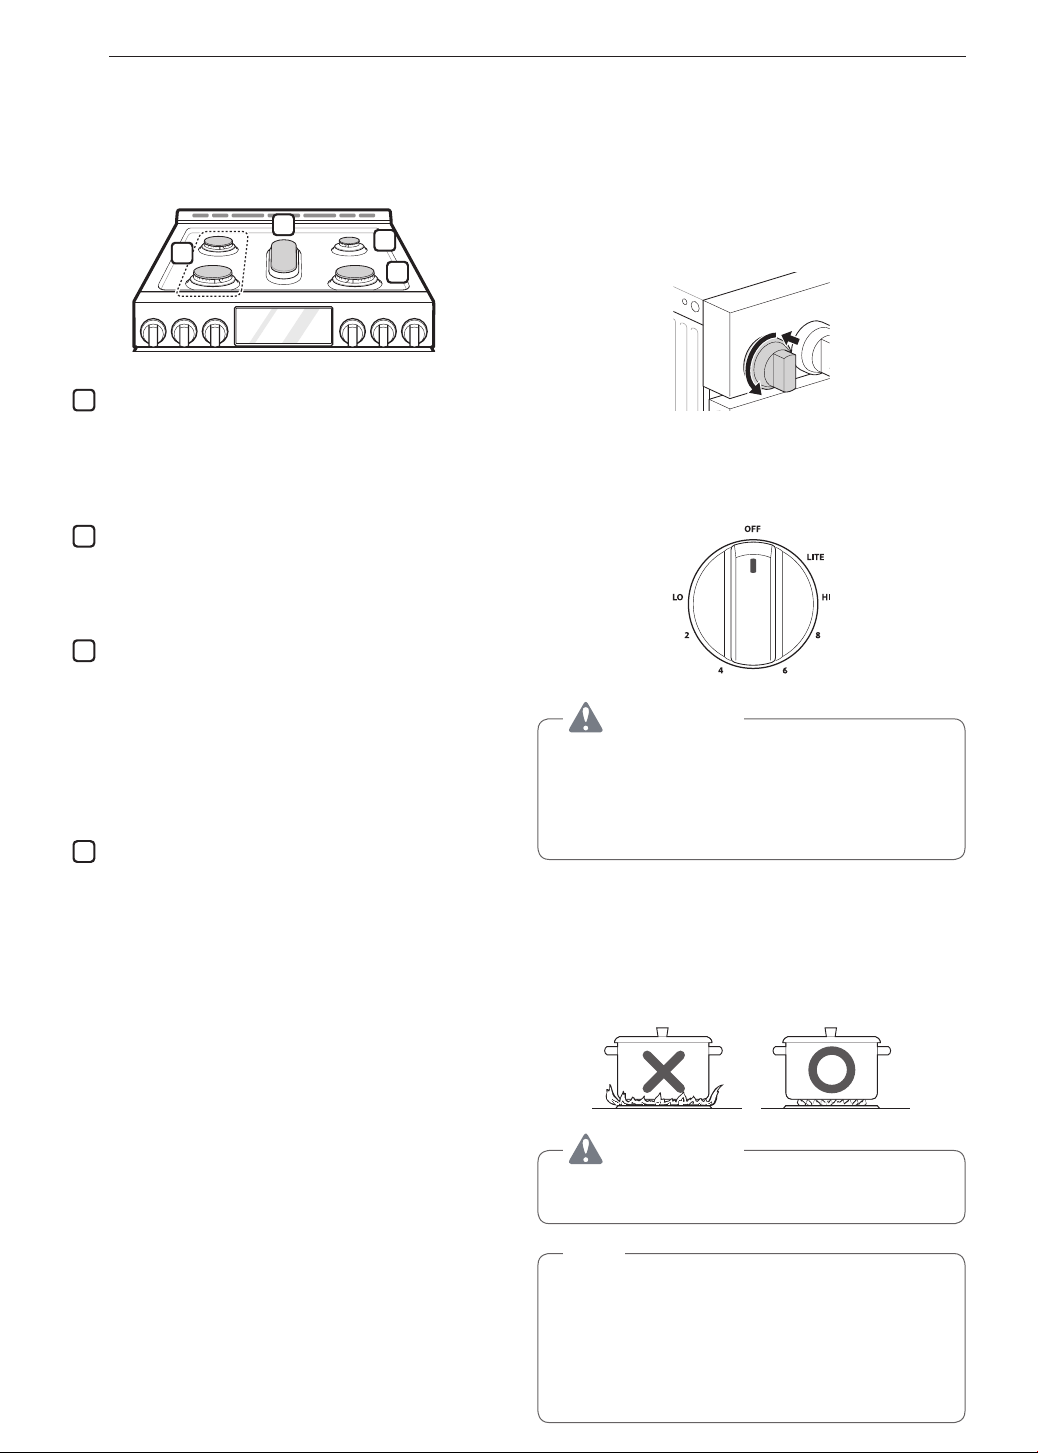
Burner Locations
Your gas range cooktop has four or five sealed gas
burners, depending on the model. These can be
assembled and separated. Follow the guide below.
1
4
2
3
1
Medium and Large Burners
The medium and large burners are the primary
burners for most cooking. These general
purpose burners can be turned down from Hi to
Lo to suit a wide range of cooking needs.
2
Small Burner
The smallest burner is used for delicate foods
such as sauces or foods that require low heat for
a long cooking time.
3
Extra Large Burner
The extra large burner is the maximum output
burner. Like the other four burners, it can be
turned down from Hi to Lo for a wide range
of cooking applications. This burner is also
designed to quickly bring large amounts of liquid
to a boil. It can be used with cookware 10 inches
or larger in diameter.
4
Oval Burner
The center, oval burner is for use with a griddle
or oval pots.
Using the Gas Surface Burners
1
Be sure that all of the surface burners and grates
are placed in the correct positions.
2
Place cookware on the grate.
3
Push the control knob and turn to the Lite
position.
The electric spark ignition system makes a
clicking noise.
4
Turn the control knob to control the flame size.
CAUTION
Do not attempt to disassemble or clean around
any burner while another burner is on. All the
burners spark when any burner is turned to Lite.
An electric shock may result causing you to knock
over hot cookware.
Setting the Flame Size
Watch the flame, not the knob, as you reduce heat.
Match the flame size on a gas burner to the cookware
being used for fastest heating.
CAUTION
Never let the flames extend up the sides of the
cookware.
NOTE
•
The flames on the surface burners may burn
yellow in the presence of high humidity, such as
a rainy day or a nearby humidifier.
•
After LP gas conversion, flames can be bigger
than normal when you put a pot on the surface
burner.
Loading ...
Loading ...
Loading ...