Loading ...
Loading ...
Loading ...
20 49-2000385 Rev. 1
OVEN INTERIOR (Cont.)
Self Clean Mode (Cont.)
We recommend venting your kitchen with an open window
or using a ventilation fan or hood during the first self-clean
cycle.
Soil on the front frame of the oven and outside the gasket
on the door will need to be cleaned by hand. Clean
these areas with hot water, soap-filled steel wool pads or
cleaners such as Soft Scrub®. Rinse well with clean water
and dry.
Do not clean the gasket. The fiberglass material of the
oven door gasket cannot withstand abrasion. It is essential
for the gasket to remain intact. If you notice it becoming
worn or frayed, replace it.
Make sure the oven light bulb cover is in place and the
oven light is off. When using the Self Clean Mode in a
GRXEOHRYHQRQO\WKHXSSHURUORZHURYHQFDQXWLOL]HWKH
cycle at one time. Additionally, no other mode may be
started in the alternate oven cavity while self clean is in
progress.
IMPORTANT: The health of some birds is extremely
sensitive to the fumes given off during the self-cleaning
cycle of any range. Move birds to another well-ventilated
room.
PROBE
The temperature probe may be cleaned with soap and
water or a soap-filled scouring pad. Cool the temperature
probe before cleaning. Scour stubborn spots with a
soap-filled scouring pad, rinse and dry.
To order additional temperature probes, see the
Accessories and Consumer Support sections at the end of
this manual.
Ŷ Do not immerse the temperature probe in water.
Ŷ Do not store the temperature probe in the oven.
Ŷ Do not leave the temperature probe inside the oven
during a self or steam clean cycle.
OVEN RACKS
The racks that were provided with your oven (dark
enameled racks, not shiny) may remain in the oven during
the self-cleaning cycle without being damaged.
To manually clean racks, use warm, soapy water. Make
sure not to wash the rack slides on an extension rack.
If racks become more difficult to remove from the oven,
put some vegetable oil on a soft cloth or paper towel and
rub onto the oven rack supports. Do not wipe the oil on an
extension rack slide.
NOTE: Using other cooking oils will cause a discoloring or
a rust like color residue on the racks and cavity sides. To
clean this residue, use a soap and water or a vinegar and
water solution. Rinse with clean water and dry with a soft
cloth.
OVEN HANDLE REPLACEMENT
Some models have custom handles. Please follow the
instructions with the handle for proper installation.
OVEN DOORS
Lift-Off Oven Door
7KHGRRULVYHU\KHDY\%HFDUHIXOZKHQUHPRYLQJDQG
lifting the door.
Do not lift the door by the handle.
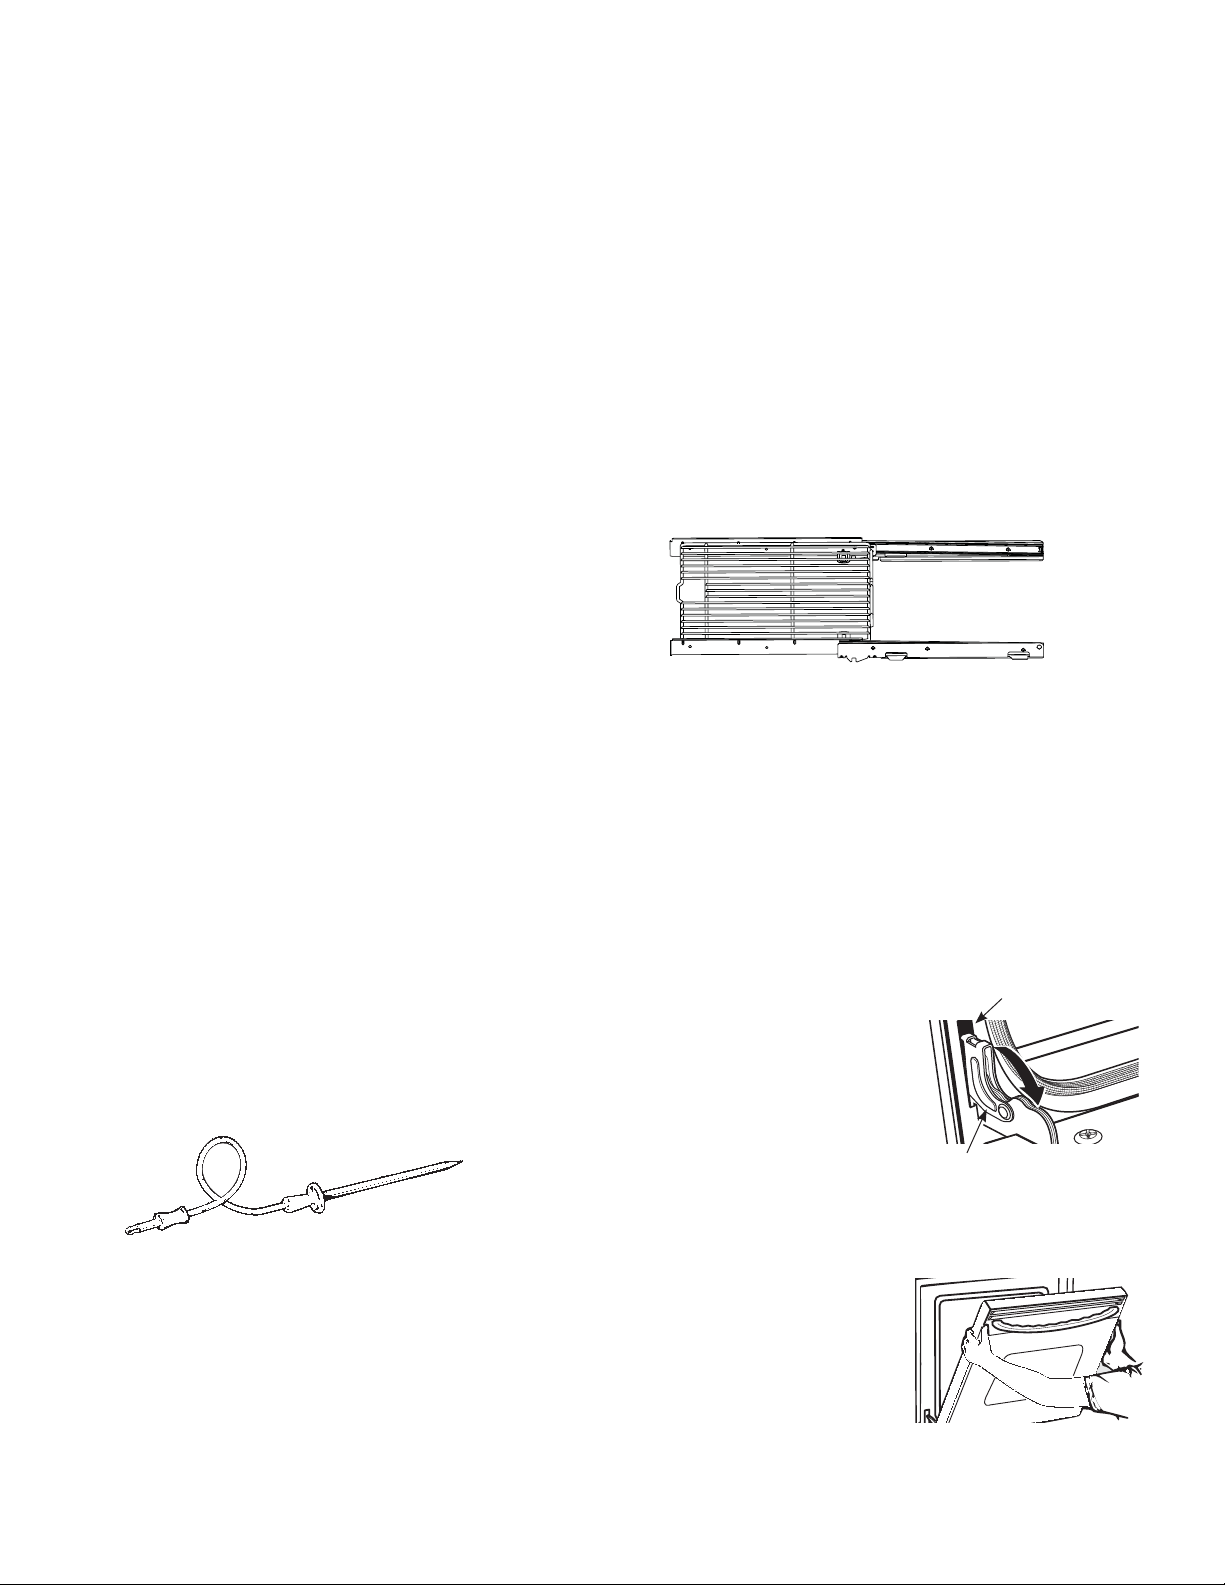
To remove the door:
1. Fully open the door.
2. Pull the hinge locks down
toward the door frame, to
the unlocked position. A
tool, such as a small flat-
blade screwdriver, may be
required.
3. Firmly grasp both sides of
the door at the top.
4. Close door to the door removal position. The door
should be open approximately 3" with no obstruction
above the door.
5. Lift door up and out until
both hinge arms are clear of
the slots.
CARE AND CLEANING
Removal position
Hinge lock
Pull hinge locks down to unlock
Slot
Loading ...
Loading ...
Loading ...