Loading ...
Loading ...
Loading ...
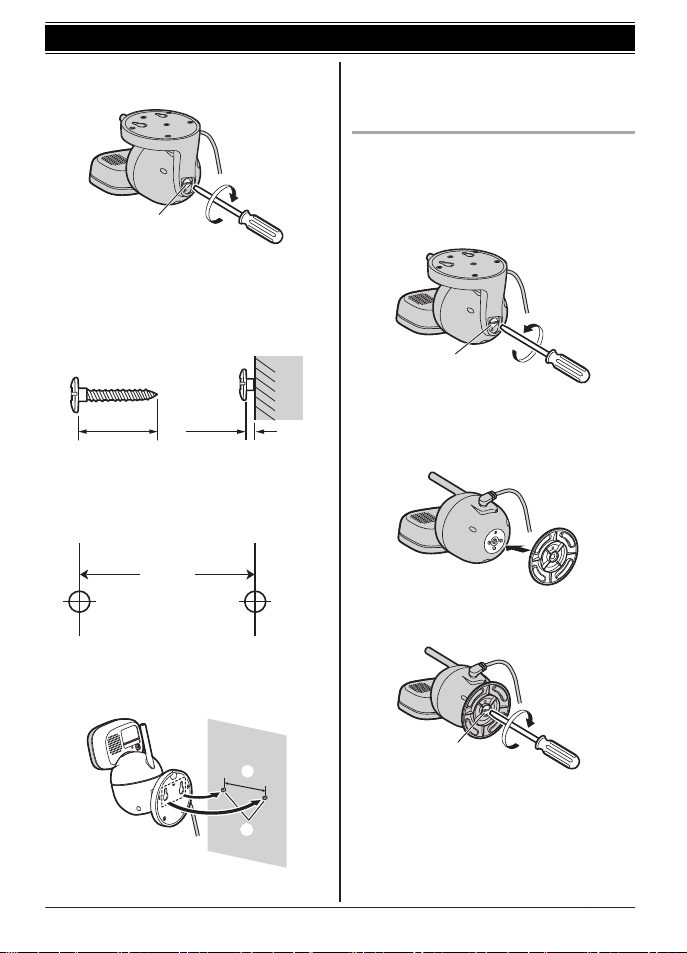
3 D
rive the supplied screw into the camera
unit.
1
1
Supplied screw (page 9)
4 D
rive the screws (not supplied) into the
wall.
2
Longer than 20 mm (
25
/32 inches)
3
Space 1.3 mm (
1
/32 inches)
2 3
Note:
R Use the following template when
determining the location of the screw
holes.
(1 / inches)
31 mm
7
3
2
5 M
ount the camera unit to the wall.
4
Screws
5
31 mm (1
7
/3
2 inches)
4
5
6 A
djust the angle of the camera unit by
using MFN, MEN, MDN, or MCN on the monitor
unit.
Reattaching the camera base
1 T
ake the camera unit off from the wall.
2 Remove the screw and then remove the
wall mounting adaptor from the camera
unit.
1
1
Supplied screw (page 9)
3 A
ttach the camera base to the camera
unit.
4 D
rive the supplied screw into the camera
unit.
1
1
Supplied screw (page 9)
For assistance, please visit http://shop.panasonic.com/support
13
Getting Started
HN4001_(en_en)_0508_ver.010.pdf 13 2019/05/08 16:24:08
Loading ...
Loading ...
Loading ...