Loading ...
Loading ...
Loading ...
Connections
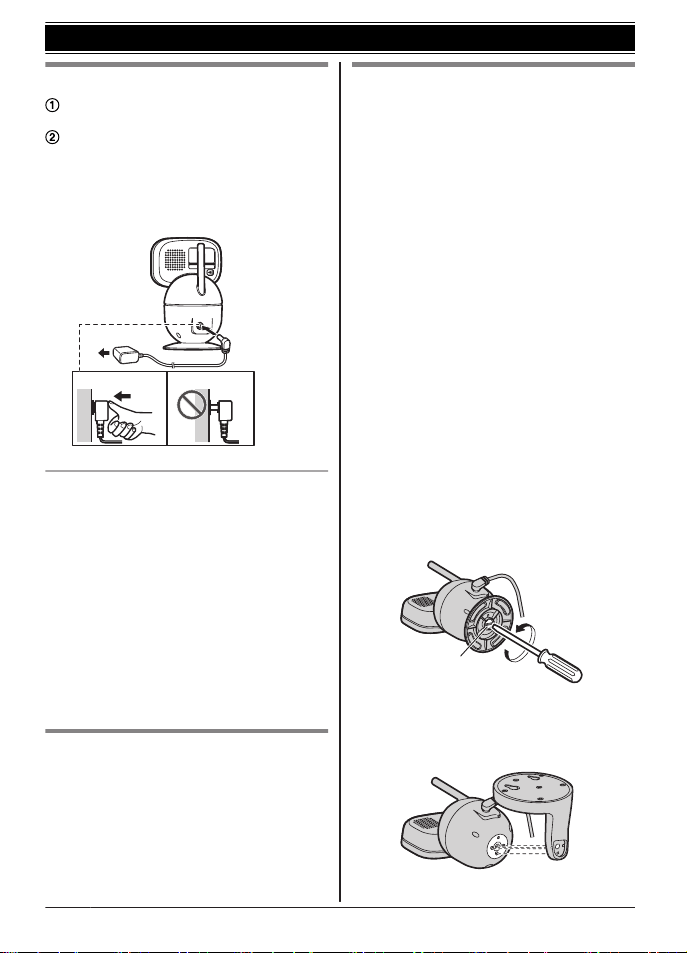
Insert the AC adaptor plug firmly into the
D
C jack.
Connect the AC adaptor to the power
o
utlet.
Note:
R Use only the supplied AC adaptor
S006AKU0500100.
2
1
Note about power connections
A
C adaptor connection
R The AC adaptor must remain connected at
all times. (It is normal for the adaptor to feel
warm during use.)
R The AC adaptor should be connected to a
vertically oriented or floor-mounted AC
outlet. Do not connect the AC adaptor to a
ceiling-mounted AC outlet, as the weight of
the adaptor may cause it to become
disconnected.
Power failure
R The camera unit will not work during a
power failure.
Placing the camera unit on a flat
s
urface
The camera unit can be placed on a flat
surface, however make sure to choose a
stable location.
Wall mounting
R Attach the wall mounting adaptor to the
camera unit after making the connections
(page 12).
R Only use the supplied screw that is
attached to the camera base when
attaching the wall mounting adaptor to the
camera unit. Do not use user supplied
screws. This may cause the camera unit to
become loose from the wall mounting
adaptor.
R Mount the camera unit on the stable
location where the unit can be adequately
supported when installing.
R Use a string or wire to prevent the camera
unit from falling and causing injury if the
camera unit comes off from the wall.
R Do not mount the wall mounting adaptor to
a ceiling.
R Do not mount the camera unit on a soft
material. It may fall down, break or cause
injury.
R Do not mount the camera unit on the
following places: plaster board, ALC
(autoclaved lightweight cellular concrete),
concrete block, plywood less than 25 mm
(1 inch) thick, etc.
1 Remove the screw and then remove the
camera base from the camera unit.
1
1
Supplied screw (page 9)
2 A
ttach the wall mounting adaptor to the
camera unit.
12
For assistance, please visit http://shop.panasonic.com/support
Getting Started
HN4001_(en_en)_0508_ver.010.pdf 12 2019/05/08 16:24:08
Loading ...
Loading ...
Loading ...