Loading ...
Loading ...
Loading ...
12 49-50300-2
Anode Rod Maintenance and Service
CARE AND CLEANING
Tools needed:
77RU[6FUHZGULYHU
• Slot Screwdriver
• Tape
• Socket Wrench
6RFNHW([WHQWLRQ´ORQJ
• 1
1
/16´6RFNHW
• Softset Sealant
• Anode Rod, if needed
* See page 24 for part ordering instructions
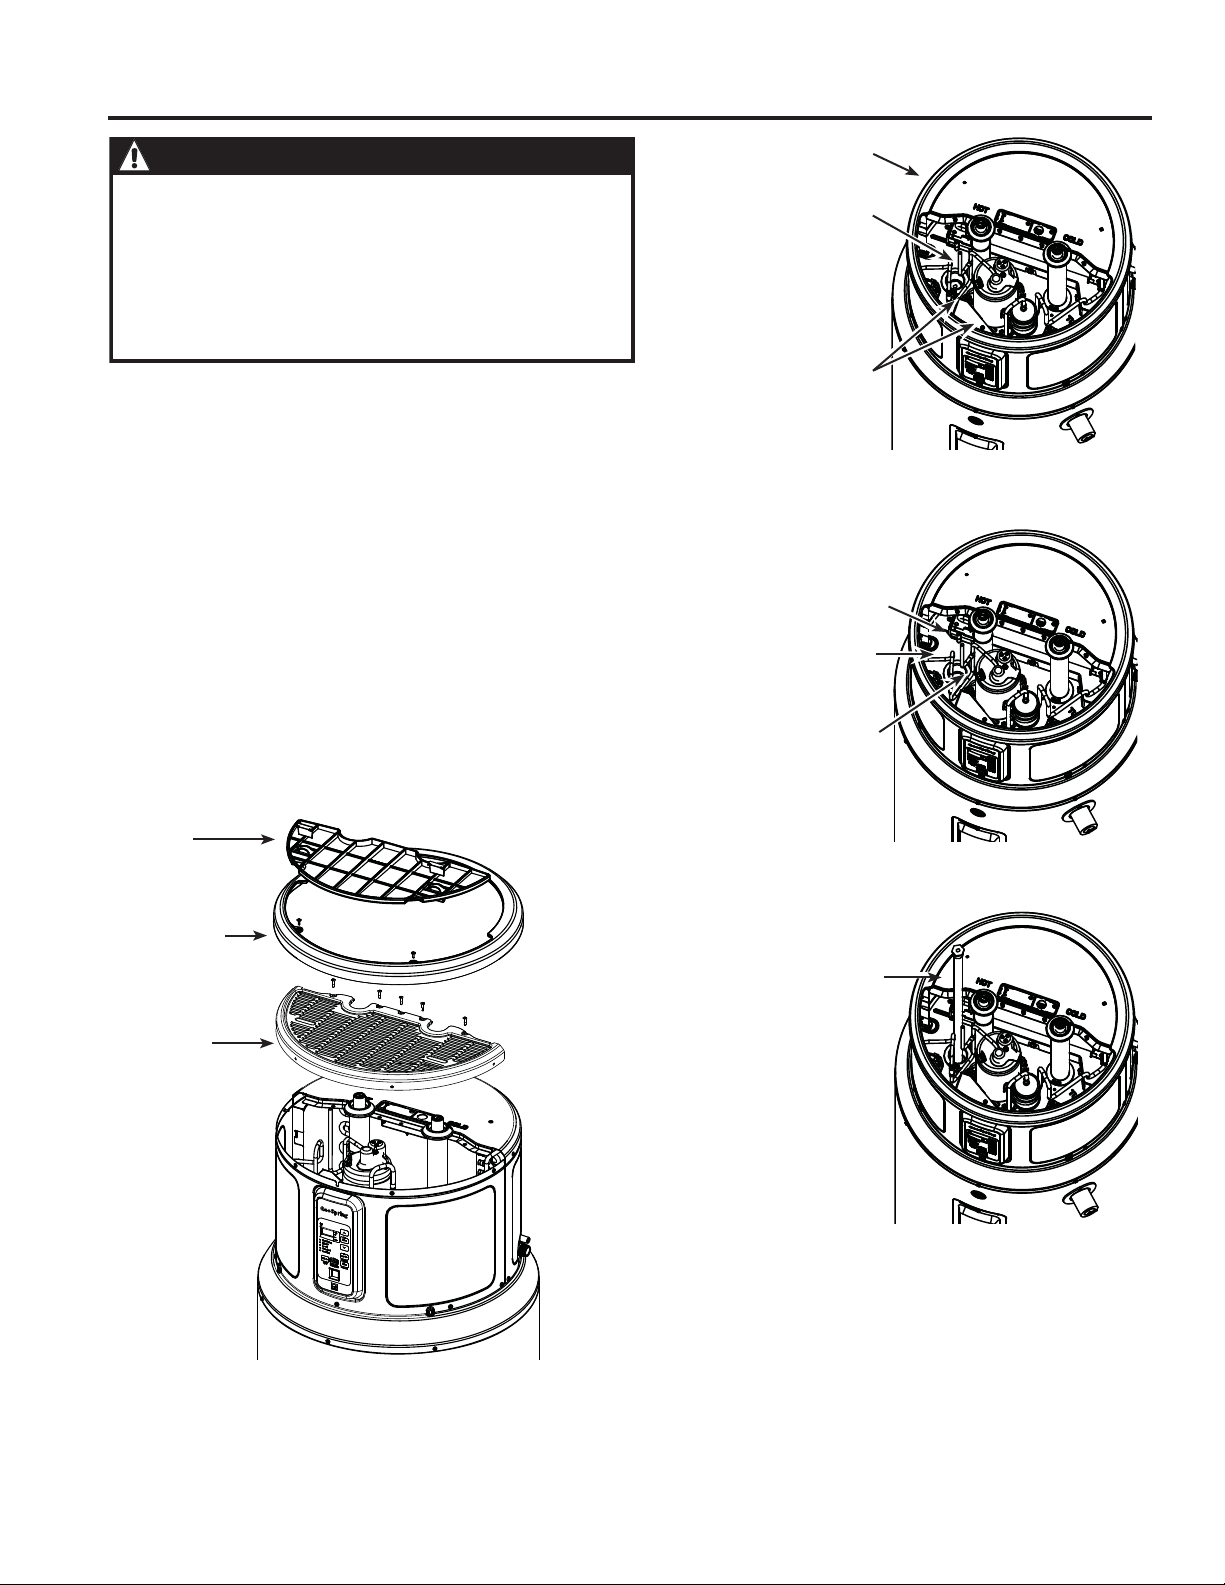
To service the Anode Rod:
1. Disconnect power, shut off the water supply, and partially
drain one or two gallons from the water heater through
the lower drain valve.
2. Remove the filter, trim ring, and front top cover as shown
in Illustration A.
3. Reinstall the trim ring, place a protective layer of tape on
sheet metal edges, as shown in Illustration B.
4. If present, remove insulation to uncover the anode rod
as shown in Illustration C. Unplug anode wire (on some
models).
5. Using a 1
1
/16´VRFNHWDQGH[WHQVLRQXQVFUHZWKHDQRGH
rod, then lift out to inspect as shown in Illustration D.
6. To install the anode rod, seal the threads with soft set
sealant, thread into the port and using the torque wrench
tighten to 50 ± 5 ft-lbs of torque. Plug in the wire for the
anode rod (some models). If an Aluminum-Zinc or other
non-sensing anode rod is installed, the anode depletion
sensing feature must be disabled and the wire end taped
(some models).
7. Turn water supply on, open a tap to remove any air in
plumbing system, inspect for leaks, then reassemble the
unit in reverse order as shown in Illustration A, and turn
the power on. Reset the ANODE button (some models)
by pressing and holding for 10 seconds to indicate that a
new anode depletion sensing anode rod is installed.
CAUTION - IMPORTANT SAFETY NOTICE
This information is intended to use by individuals
possessing adequate background of electrical, electronic
DQGPHFKDQLFDOH[SHULHQFH$Q\DWWHPSWWRUHSDLU
a major appliance may result in personal injury and
property damage. The manufacturer or seller cannot be
responsible for the interpretation of this information, nor
can it assume any liability in connection with its use.
Trim Ring
Tape Process
Tube Pinch Off
Tape Corner
and Edges
Wires
Wires
Anode Rod
Filter
Trim Ring
Front
Top Cover
Illustration A
Illustration B
Illustration C
Anode Rod
Illustration D
Loading ...
Loading ...
Loading ...