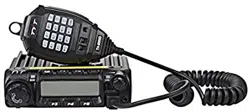
Owner Manual Mobile Radio
Getting Acquainted
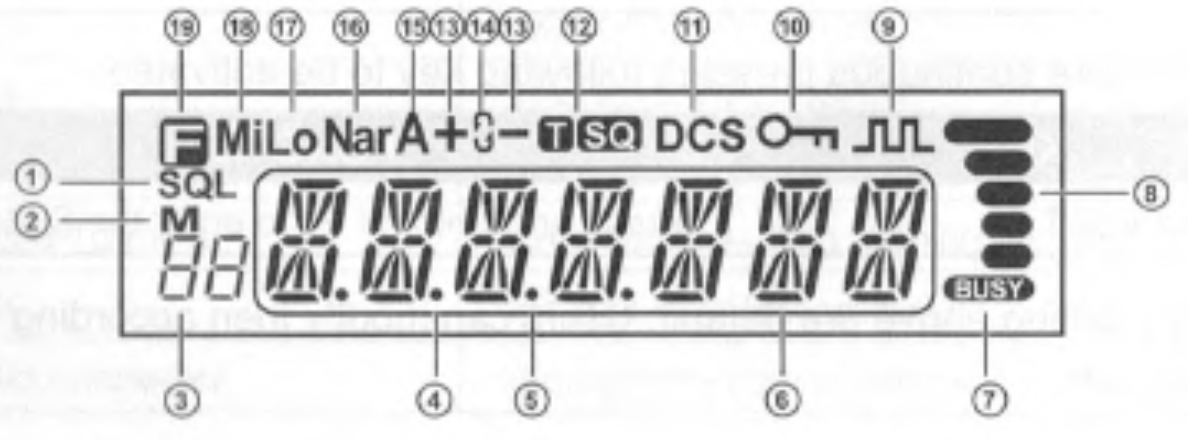
Front panel
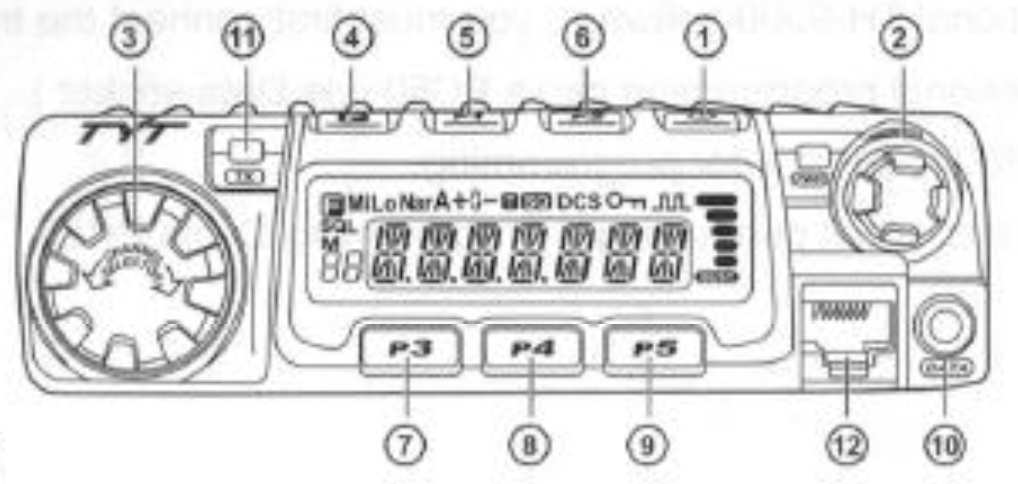
Basic Function

Press  key until icon appears then press the following key.
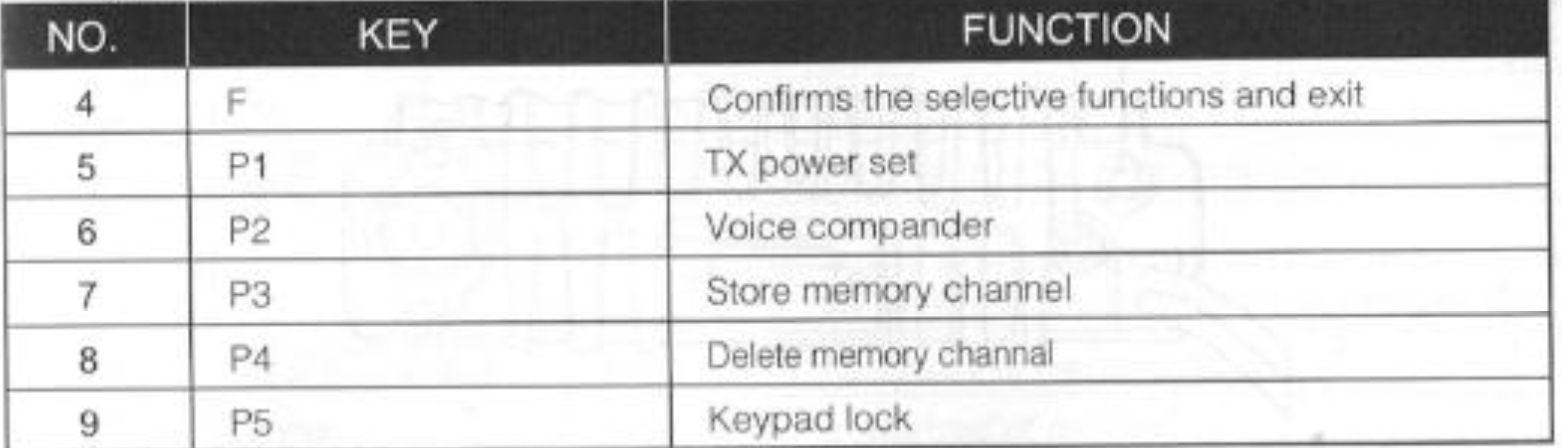
Press  key and following key together to activate following function:
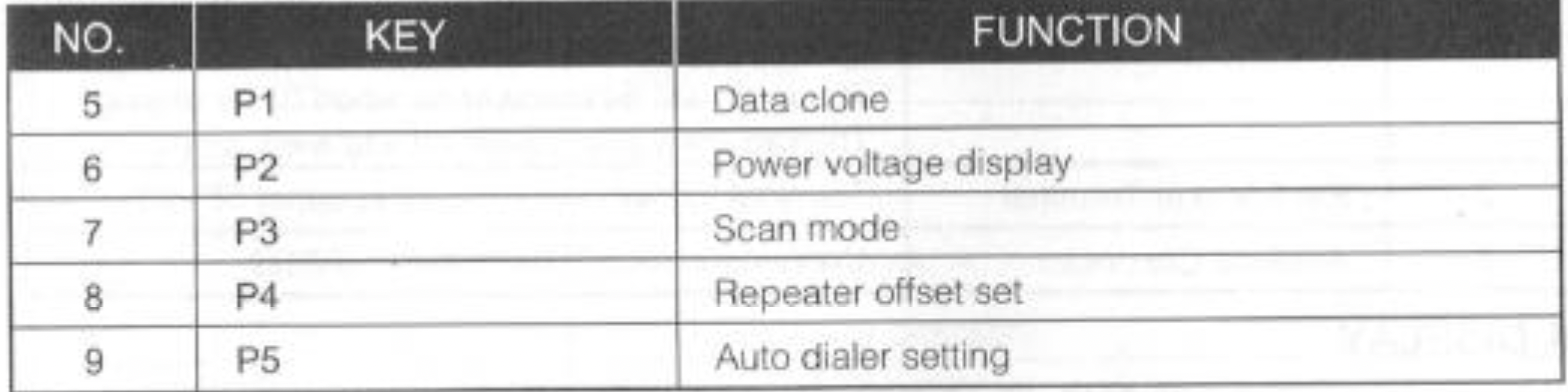
Functions that require continuous pressing following key to be activated

Note: P1-P5 keys setting above are default. Users can modify then according to their need by program software.
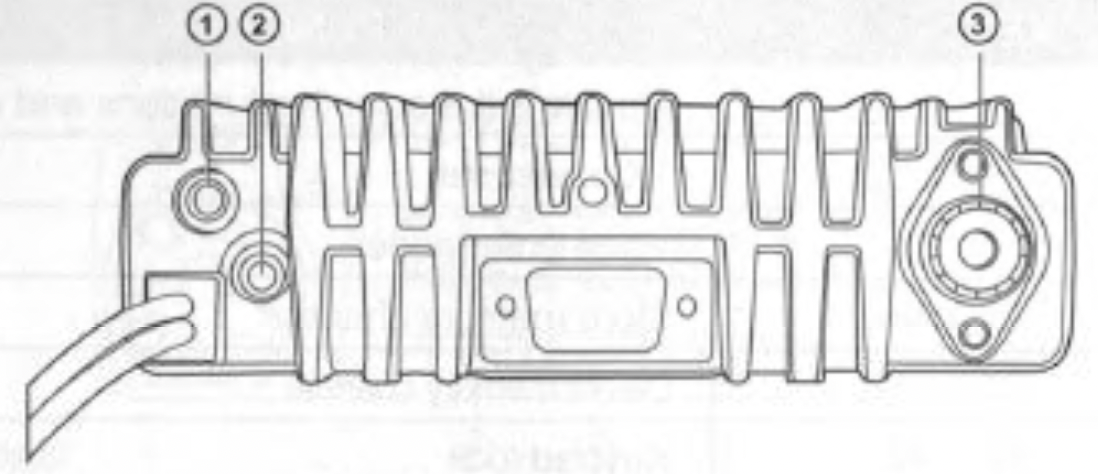
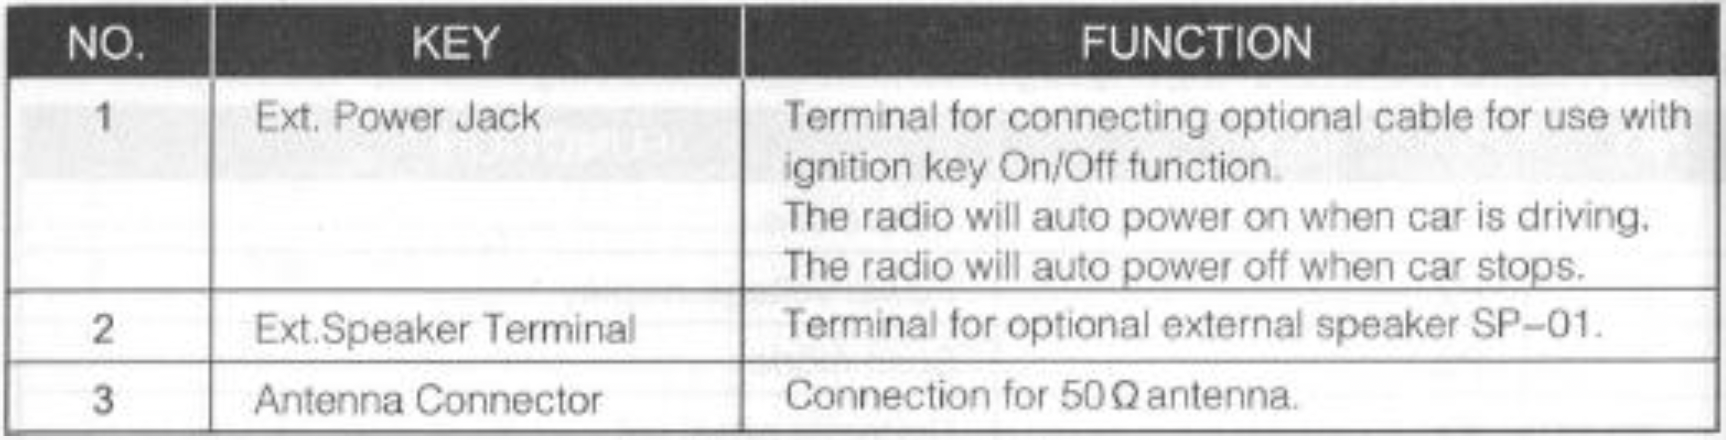
Rear panel
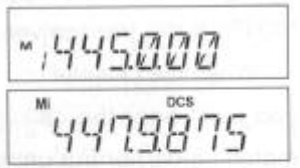
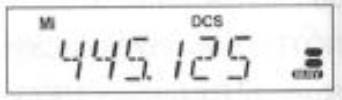
Display

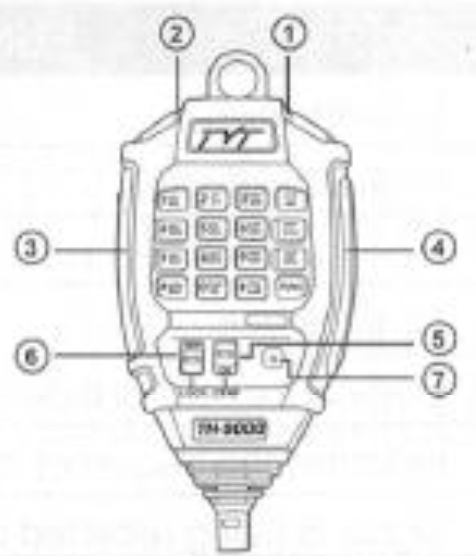
Microphone

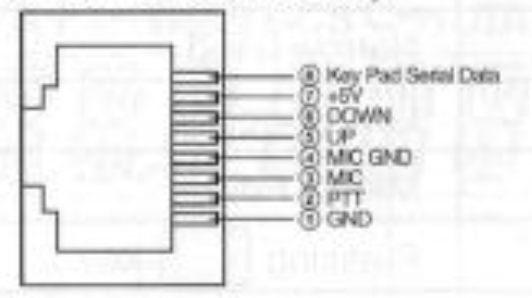
MIC Connector Diagram (in the front view of connector)
Basic Operations
Switching The Power On/Off
According to the option selected during installation. Press the  switch or turn the ignition key to ACC (speed up) or ON (startup) position to power on radio. Press the
  key for 1s or turn the ignition key to OFF position to turn off.
Adjusting The Volume
Turn the VOL knob clockwise to increase the audio level, counterclockwise to decrease.
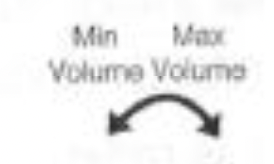
NOTE: During communication, volume can be adjusted more accuratiy.

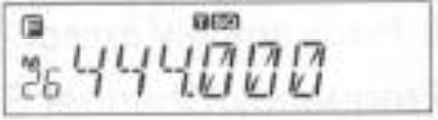
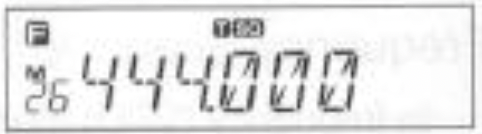
Switch Between VFO And Channel Mode
In standby, press  key or Microphone's
  key until appear, this indicates current channel in channel mode. Repeat above operation to switch between Frequency mode (VFO) and Channel mode.
Adjusting Frequency/Channel Through Selector Knob
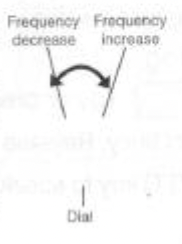
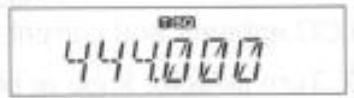
- Under frequency (VFO) mode, you can change the current frequency to the desired one through selector knob. Turn clockwise to increase frequency; turn counterclockwise to decrease. Every gear will increase or decrease one step.
Press key, the decimal point of  key, the decimal point of frequency in screen will be auto-hidden. In this status, turn selector knob or Microphone [UP/DOWN] key will increase or decrease frequency quickly by 1MHz step.
- Under channel mode, you can change the current channel to the desired one through selector knob, clockwise turn to the forward channel, anti clockwise turn to the backward channel. In relative working mode, Microphone's [UP/DOWN] key has same function for adjusting frequency and channel.
NOTE: 5k, 6.25k, 8.33K, 10k, 12.5k, 20k, 25k, 30k and 50k total nine step size available for this radio.
Receiving
When the channel you are operating is called, the screen shows BUSY and field intensity, in this way, you can hear the calling from transmitting party.
NOTE: If the transceiver has set at higher squelch level, it may fail to hear the calling.
When the channel you are operating is called, the screen shows BUSY and field intensity, you can't hear the calling from transmitting party, it means current channel receives matching carrier but unmatching signaling. (Refer to CTCSS/DCS encode and decode or Optional Signaling setup).
Transmitting
Press  key or press MIC's
  key to monitor for a while to confirm the channel desired is not busy. Release
  or press Mic's
  key to return standby status. Then press and hold [PTT] key to speak into microphone.
Please hold the microphone approximately 2.5-5.0cm from your lips, and then speak into the microphone in your normal speaking voice to get best timbre.
NOTE: Press and hold [PTT] key, LED lights RED and power intensity showed in screen indicates it is transmitting, release to receive.
Transmitting Tone-pulse
Press and hold [PTT] key, then press Microphone DOWN transmit current selected tone-pulse signal.
Transmitting Optional Signaling
Press and hold [PTT] key, then press Microphone UP key or press  key in front panel or press Mic's
  key to transmit pre-stored and selected DTMF/2Tone/5T one optional signaling.
Channel Edit
- Under frequency mode(VFO),tum selector knob to select the desired frequency or input frequency by MIC's numeric keys.
- Press
 key to enter CTCSS/DOS signaling setup, turn selector knob to select the desired signaling.
- Press
 key, LCD appears
  , Micon and current channel number. Micon flashing means current channel is empty.
- Tum selector knob to select the desired channel number to store.
- Press
 key,
key,  , Micon and channel number disappears and emit a prompt voice, thus the channel storage succeed.
Channel Delete
- Under channel mode, turn selector knob to select channel which you want to delete.
- Press
 key and
  key together, current channel will be deleted and emitted and emitted a prompt voice. Micon flashing means current channel is deleted.
Shortcut Operations
Squelch Off
 key programmed as Squelch Off to monitor the weak signal.
- Squelch Off: Press
 key to disable squelch, press
  key again to resume squelch.
Squelch level Setup
Setting the radio to a tight squelch level, you can avoid unwanted signals or noise, but you may not receive a weak signal. Therefore, it will be better for you to select the normal squelch level.
- While standby, press
 key and turn selector knob at the same time until LCD appears and current squelch level
- Turn selector knob or press MIC [UP/DOWN] key to set desired squelch level.
- Press any key except
 and
and  key to exit.
Frequency/Channel Scan
Frequency Scan
In frequency (VFO) mode, this function is designed to monitor signal of every communicative frequency point of transceiver "step size" you have set.
- In VFO mode, press for 1s to enter into frequency scan.
- Turn selector knob or press Microphone [UP/DOWN] key to change scan direction.
- Press any key except and key to exit.
Channel Scan
In channel mode, this function is designed to monitor signal in every channel.
- In channel mode, press key for 1s to enter into channel scan
- Turn selector knob or press Microphone [UP/DOWN] key to change scan direction.
- Press any key except and key to exit.
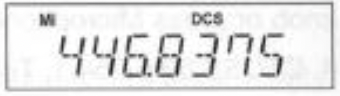
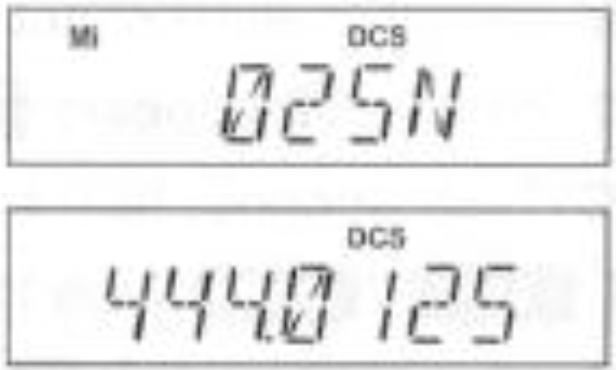
CTCSS/DCS Encode and Decode Setup
Repeatedly press key to check whether set CTCSS/DCS encode and decode in current channel or not.
- When LCD appears
 iron, it means current channel with CTCSS encode, turn selector knob or press Microphone's [UP/DOWN] key to select desired CTCSS encode.
- When LCD appears
 and
and  iron, it means current channel with CTCSS encode and decode, tum selector knob or press Microphone's [UP/DOWN] to select desired CTCSS code.
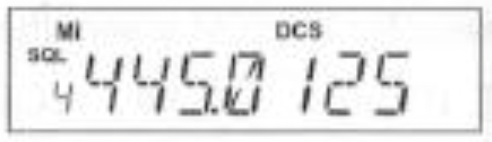
- When LCD appears DCS iron, it means current channel can be set with DCS encode and decode together, turn selector knob or press Microphone's [UP/DOWN] to select desired DCS encode and decode.
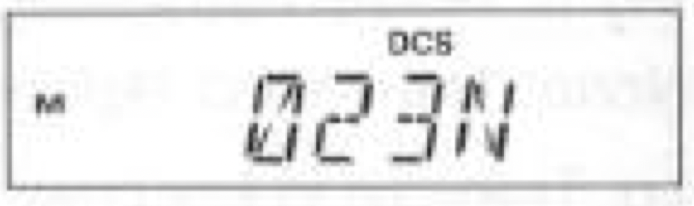
- CTCSS: 62.5-254.1, Total 51 groups; DCS:000N-7771 total 1024 groups. N is positive code, is inverse code.
- Press any key except , and keys to return into standby status.
NOTE: Under channel mode, this operation can be temporarily used by user. Once the radio is turned off or switched to another channel, the temporary setting will be erased.
CTCSS Scan
Repeatedly press key until LCD displays and icons. Press  key on microphone the press
  key to enter into CTCSS scanning. Once finding a matching CTCSS signaling, it will stop for 15s then scan again.
DCS Scan
Repeatedly press key until LCD displays DCS icons. Press key on microphone the press key 1S to enter into DCS scanning. Once finding a matching DCS signaling, it will stop for 15s then scan again.
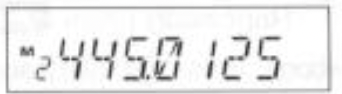
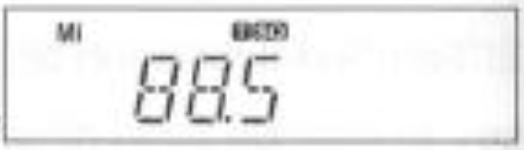
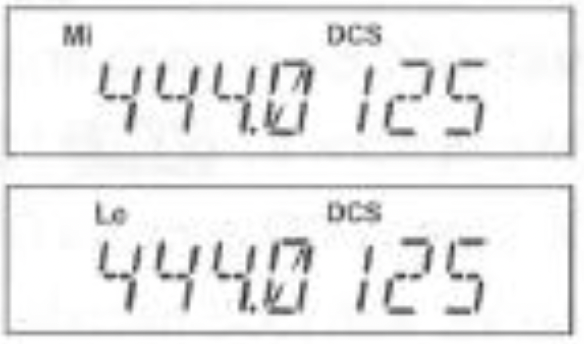
High/Mid/Low Power Switch
Press key until LCD display iron, then press  key to switch between high/Mid/low power. The LCD appears
None: Transmit in high power:
Mi: Transmit in middle power
Lo: Transmit in low power
Voice Compander
Compander function will decrease the background noise and enhance 15 audio clarity, especially in long range communication.
- Press key, then press key to turn on compander function, repeat above operation again to tum off compander function.
- When LCD appears
 iron, enable compander in current channel.
- When LCD doesn't display iron, disable compander in current channel.
Offset Direction and offset frequency setup
Repeater receives a signal (UP-LINK) on one frequency and re- transmits on another frequency (DOWN-LINK). The difference between these two frequencies is called the offset frequency. If the UP-LINK frequency higher than DOWN-LINK frequency, the direction is positive. If it is lower, the shift direction is negative.
- Press key until the icon displays on the LCD, then press key, LCD displays offset direction and offset frequency.
- Repeatedly press key to select positive offset and negative offset.
- When LCD displays "+" icon, it indicates positive offset, which means transmitting frequency higher than receiving frequency.
- When LCD displays "-" icon, it indicates negative offset, which means transmitting frequency lower than receiving frequency.

- Turn selector knob or Mic's [UP/DOWN] key to change offset frequency, offset frequency changed as per stepping.
- Press any key except and key to exit into standby.
NOTE: Under channel mode, this operation can be temporarily used by user.
Once the radio is turned off or switched to another channel, the temporary setting will be erased.
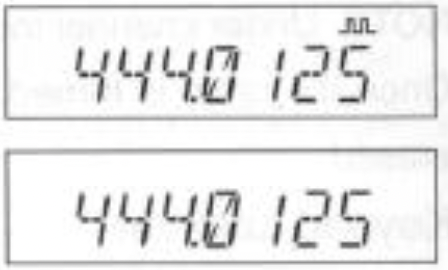
Keypad Lockout
Avoiding unintentional operation, this function will lock main keys, all keys except , and key are invalid.
- Press key until the icon displays on the LCD, then press key until LCD displays
 icon, it indicates keypad lockout function is valid.
- Repeat above operation, icon disappears, it indicates keypad lockout function is invalid.
Current Voltage Enquiry
This function will display Current Battery Voltage.
- Press and hold key, then press key, LCD displays current battery voltage.
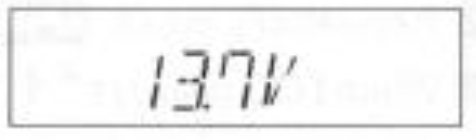
- Repeat above operation to return into VFO or Channel mode.
NOTE: In voltage display mode, all functions and channel or frequency selection are invalid.
Auto-Dialer Setup
This will automatically transmit pre-programmed and stored DTMF tones. And they are often used to remote control electronic devices or AUTO PATCH phone systems available on some repeater.
- Press and hold key to enter the auto-dialer enquiry mode, LCD displays current default data and current group displayed on left. If no data in current group, it shows"EMPTY".
- Turn selector knob to choose group you desired. Total: 16 group. 01-16.
- Press
 key to enter into editing of current group, press MIC's numeric keys to set your desired data.
- The display scrolls when the 7th digit is entered. The numbers 0-9, --, A-D, * and # can be stored up to a total of 23 digits.
- After editing, press PTT or key to send current group and store edited DTMF signaling.

Transmitting Edited DTFM tones in the Auto-dialer memory
- Press and hold key to enter into auto-dialer enquiry
- Turn selector knob to select desired transmitting group
- Press PTT then UP or key to transmit current selected DTMF tones.
Microphone Operation
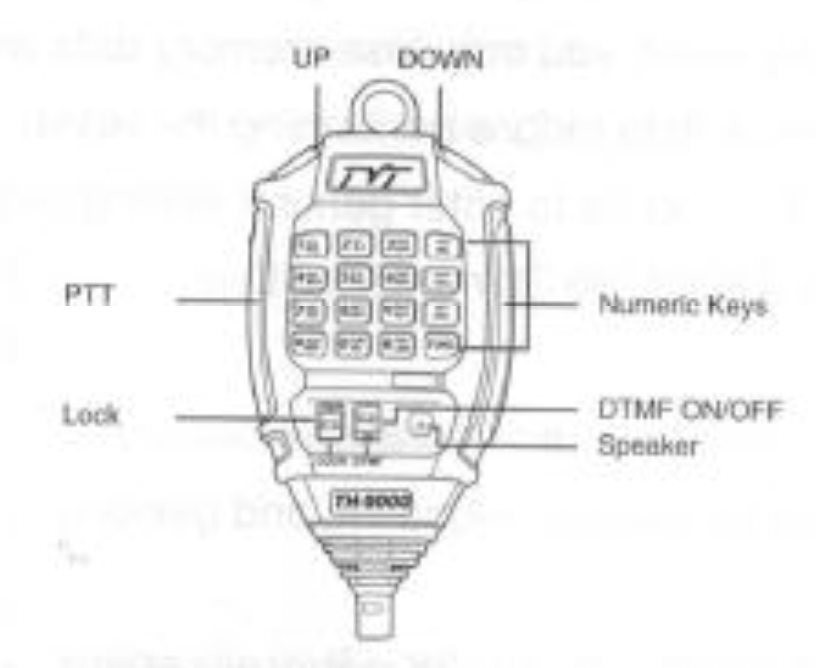
You can operate the transceiver by keypad or input desired frequency or channel through the microphone (Note: In professional transceiver mode, other keys are invalid except PTT, [UP/DOWN],  and
and  ).
).
Keypad Lock
Pull down the slide switch to lock position,The lamp is turned off and all of keypads is not work except PTT switch.
Transmitting DTMF By Microphone Keypad
Slide DTMF key to DTMF position, press and hold the [PTT] key, transmitting the desired DTMF signaling by the numeric key directly. (Note: Slide DTMF key to DTMF position, the keyboard is invalid in standby).
Function Setup By Microphone Keypad
Squelch off: In standby, press  key, the squelch is disabled when
  icon, flashed in LCD. Press
  again to enable squelch and the
  icon disappears.

Switches between VFO and channel mode
In standby, press  key to switch between channel mode and Frequency mode (VFO).
Short Calling
In standby, press  to transmit the selected DTMF/2 TONE/5 TONE in current channel. Transmitting DTMF Code: In standby, press
  , LCD displays DTMF data and group. Press [UP/DOWN] key to select the desired transmitting DTMF group, then Press PTT to transmit.
If no DTMF data in current group,LCD displays "EMPTY", press  key again and input desired DTMF code by key pad, press PTT to transmit and store DTMF data.
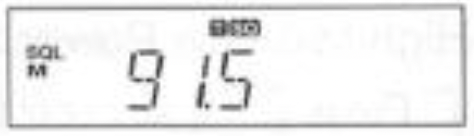
Squelch Level
- In standby, press
 , then press
  , LCD displays "SQL" and current squelch level.
- Press [UP/DOWN] to adjust the desired squelch level. (press
 , then press
  turn selector knob also can adjust the desired squelch level.
- Press number key to confirm and exit.
Optional signaling
In standby, press  , then press
  to add optional signaling, repeat above operation to set DTMF, 2 TONE or 5 TONE signaling.
When first bit of Exa byte in frequency displays "D", it indicates DTMF function enable.
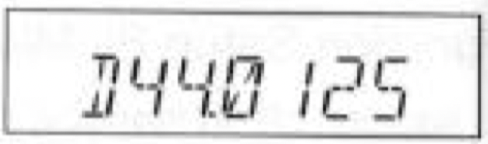
When first bit of Exa byte in frequency displays "T", it indicates 2 Tone function enable.
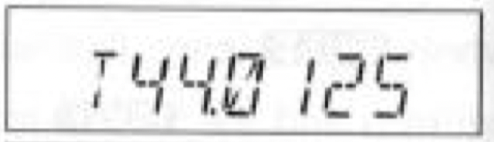
When first bit of Exa byte in frequency displays "F", it indicates 5 Tone function enable.
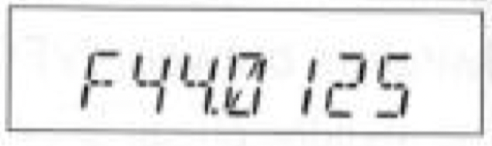
This function can be temporarily used in channel mode. Once the radio is turned off or switched to another channel, the temporary setting will be erased and back to initial settings.
Scan Skip
In Channel mode, press  then press
  , decimal point displayed between frequency's ten digit and unit digit, it means current channel is scan skip.Repeat above operation to set scan or scan skip in current channel.
- Decimal point displayed between frequency's ten digit and unit digit, it means current channel is scanned skip.
- Decimal point is not displayed between frequency's ten digit and unit digit, it means current channel is scanned.
Frequency/Channel scan
In corresponding mode, press  then press
  key to enter into scanning.In scanning mode, press [UP/DOWN] to change scan direction.
Busy Channel Lockout
BCLO is to disable transmitting while RX signal is received.Once the channel is busy and you press PTT, the radio will beep as warning and get back to receiving.
- In standby, press , then press
 to enter into Busy Channel Lockout.
- Press [UP/DOWW] to select the desired value.
BU: Enable BCLO, Carrier lockout, transmitting is inhibited when current channel receives a matching carrier; press [PTT] to emit error voice prompt.
RL: Enable BTLO, transmitting is inhibited when current channel receives a matching carrier but dis-matching CTCSS/DCS, press [PTT] to emit error voice prompt It can transmit in any receiving status.
OFF: Busy channel lockout is disabled.
- Press number keys to confirm and exit.
NOTE: This function can be temporarily used in Channel mode.Once the radio is turned off or switched to another channel, the temporary setting will be erased and back to initial settings.
Reverse TX/RX
TX frequency turns to RX frequency & RX frequency changes to TX frequency. The signaling will also be reversed if CTCSS/DCS signaling exited in this channel.

- In standby, press , then press
 LCD displays "REV--OF".
- Press [UP/DOWN] to select the desired value.
ON: Enable Frequency Reverse
OFF: Disable Frequency Reverse
- Press number keys to confirm and exit.
NOTE:This function can be temporarily used in Channel mode.Once the radio is turned off or switched to another channel, the temporary setting will be erased and back to initial settings.
TOT (Time-out timer)
The time-out timer limits the amount of transmitting time.When you reach the time limit which has been programmed by your dealer, your transmission will be cut off. In order to transmit again, you must release PTT button to reset the timer.
- In standby, press ,then press
 LCD displays "TOT-X".
- Press [UP/DOWN] to select the desired value.
- Press number keys to confirm and exit.
CTCSS/DCS Encode and Decode
- In standby, press , then press
 to enter into CTCSS/DCS Encode and Decode.
- Repeat above operation to set as below:
LCD displays T icon, it indicates CTCSS encode set in current channel.
LCD displays T and SQ icon, it indicates CTCSS encode and decode set in current channel.
LCD displays DCS icon, it indicates DCS encode and decode set in current channel.
- In corresponding icon, press [UP/DOWN] to select the desired CTCSS/DCS encode and decode.
- Press
 ,
,  , or
, or  to confirm and exit.
NOTE: This function can be temporarily used in Channel mode. Once the radio is turned off or switched to another channel, the temporary setting will be erased and back to initial settings.
Talk Around
By Talk Around function, you can directly communicate with other radios in your group in case the repeater is not activated or when you are out of the repeater range.The transceiver will transmit by RX frequency with its CTCSS/DCS signaling.
- In standby, press , then press
 key, LCD displays "TALK-OF".
- Press [UP/DOWN] to select the desired setting
ON: Enable Talk Around
OFF: Disable Talk Around
- Press number keys to confirm and exit.
NOTE: This function can be temporarily used in Channel mode. Once the radio is turned off or switched to another channel, the temporary setting will be erased and back to initial settings.
Voice Prompt
The prompting tone provides confirmation of entry, error status or malfunctions of the transceiver. You can enable or disable this function.
- In standby, press , then press
 LCD displays"BEEP-XX"
- Press [UP/DOWN] to turn on/off BEEP voice prompt.
BEEP--OF: turn off voice prompt
BEEP--ON: turn on voice prompt
- Press number key to exit and store.
HIGH/MID/LOW Power Selection
- In standby, press , then press
 LCD displays"POW-XX".
- Press [UP/DOWN] to select the desired power.
Hl: High Power
Ml: Middle Power
LOW: Low Power
- Press number keys to exit and store.
LCD Backlight
- In standby status, press , then press
 LCD displays "LAMP-XX".
- Press [UP/DOWN] to select desired backlight brightness (1-32 levels).
- Press number keys to confirm and exit.
Long-distance Anti-theft Alarm
This function is mainly use for simple anti-theft alarm device in vehicles. When the transceiver be removed in an improper manner, the transceiver will emit and transmit alarming and background voice to system and other transceiver of the same frequency.
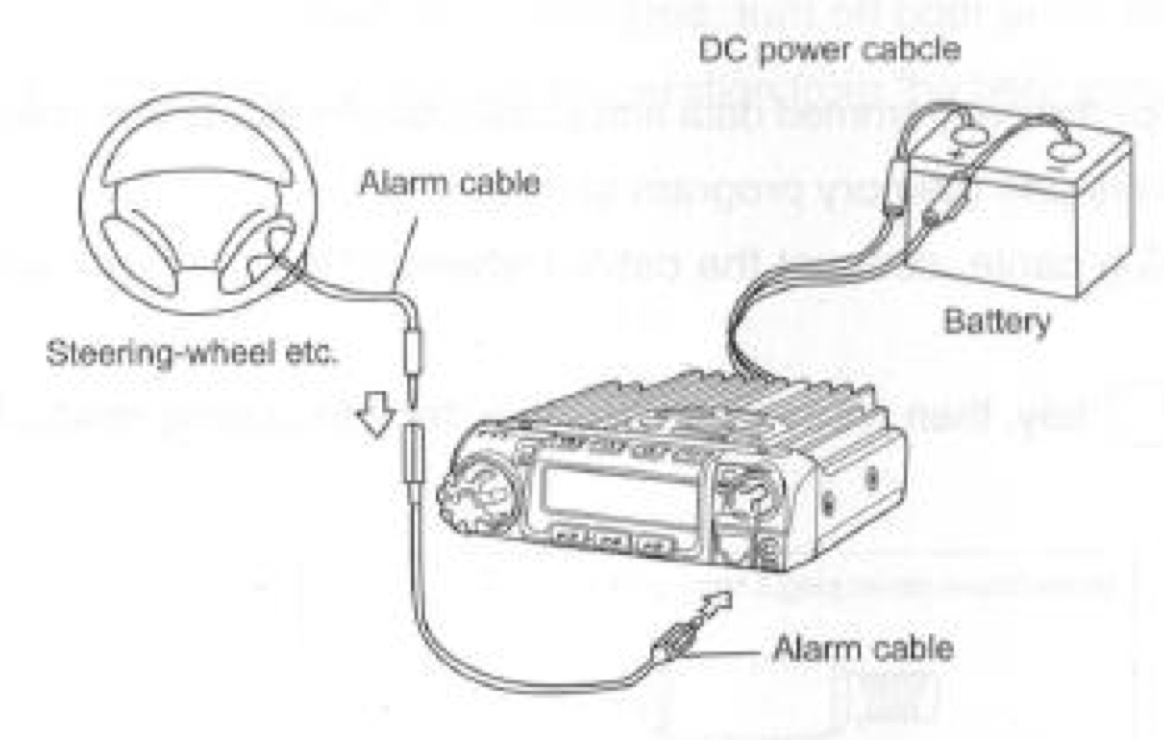
Connect DC power cable with car battery.
- Connect the optional alarm cable to the data jack on the front panel as shown. Secure the other end of the cable to an object that stays fixed in vehicle. (Note: if alarm cable is not enough long, you can choose optional alarm cable to extend).
- When transceiver power off by press
 key, the long-distance anti-theft alarm enable.
- Note: The long-distance anti-theft alarm only available when transceiver power off.
- When the alarm cable or is removed from the DATA jack or cut by improper sequence, the alarm function enable and will alarm as programmed. In alarming, the transceiver will stop alarm once receiving a matching signal.And alarm again when a matching signal disappeared.
- Restart radio to cancel anti-theft alarming. Reconnect with alarm cable and turn off radio, the system will return to alarm mode.
Cable Clone
This feature will copy the programmed data and parameters in the master unit to slave units. It copies the parameters and memory program settings.
- Use optional cloning cable, connect the cable between the data jacks on both master and slave.
- Press and hold
 key, then press
  key to enter into cloning mode, LCD displays "CLONE".
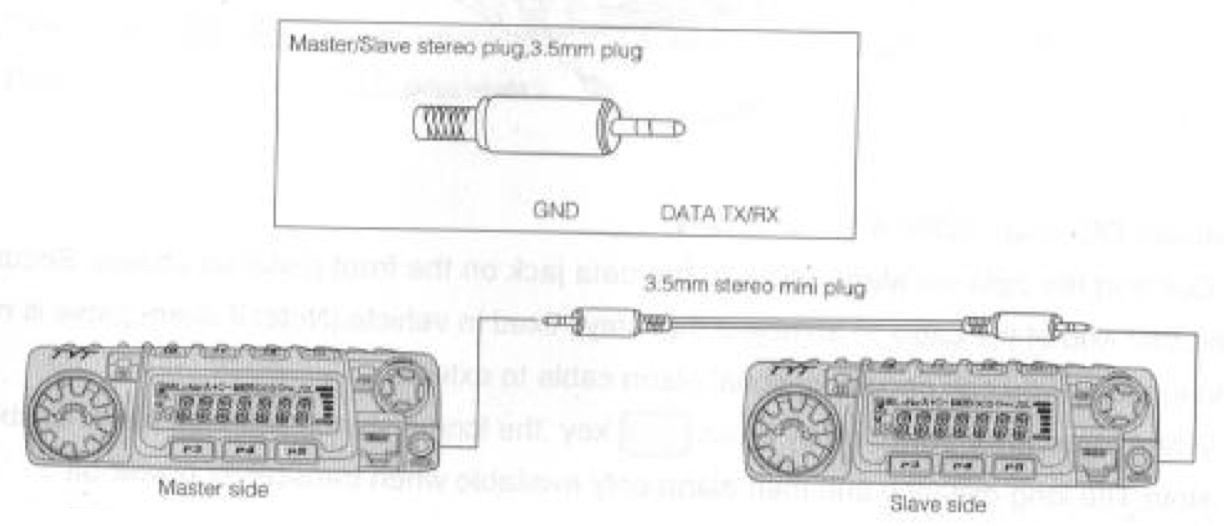
- Press master unit's [PTT] key, LCD displays "SD XXX","XXX" indicates data volume in transmitting. Slave unit displays "LD XXX","XXX" indicates received data volume. When the transmission is successfully finished, the master and slave unit both display "PASS".
Turn off the pwer, disconnect the cable and repeat step 2 to step 3 operations to clone the next slave unit.
NOTE: If the data is not successfully transmitted, turn off both units, make sure the cable connection is correct and repeat the entire operation from the beginning.
Maintenance
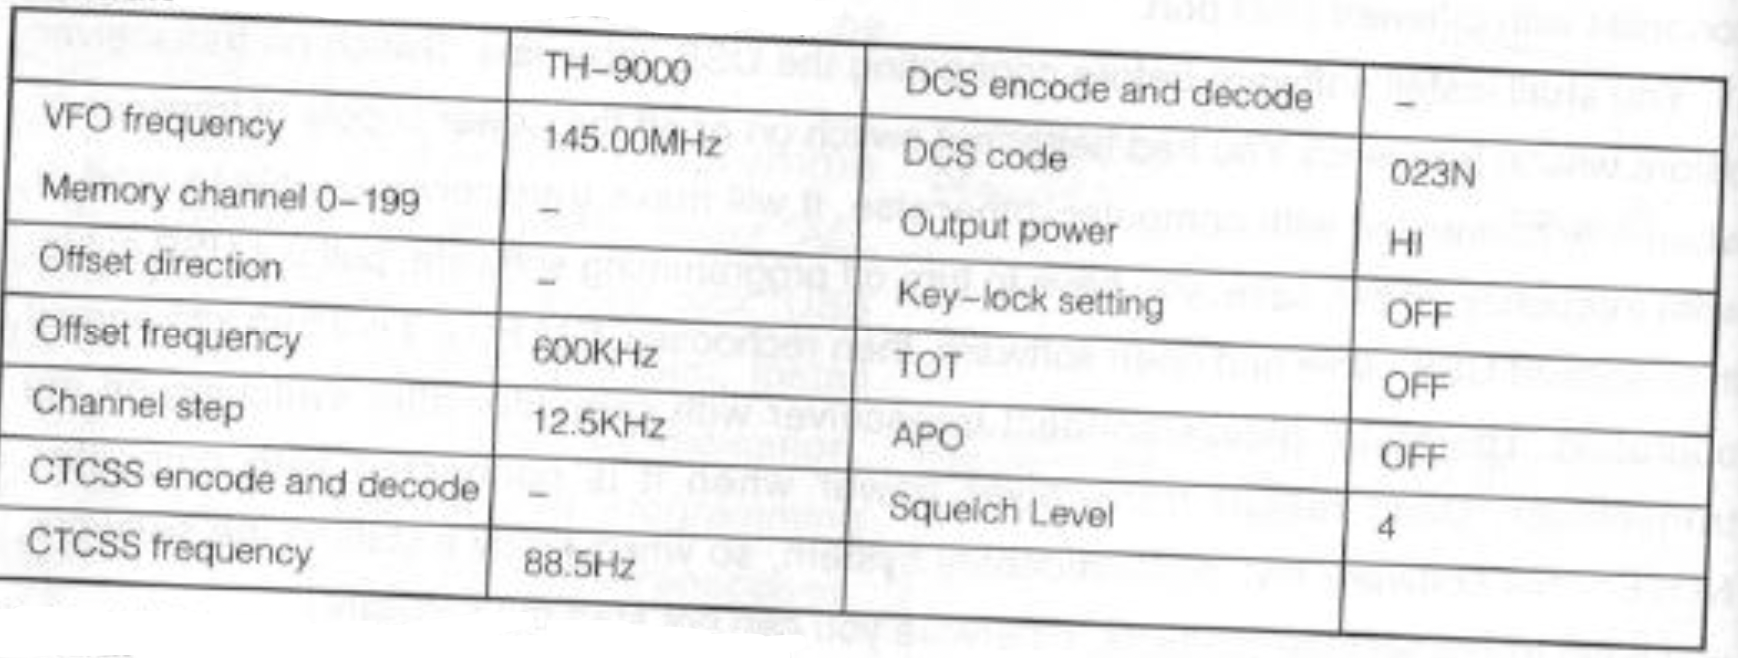
Default Setting after Resetting (VHF)
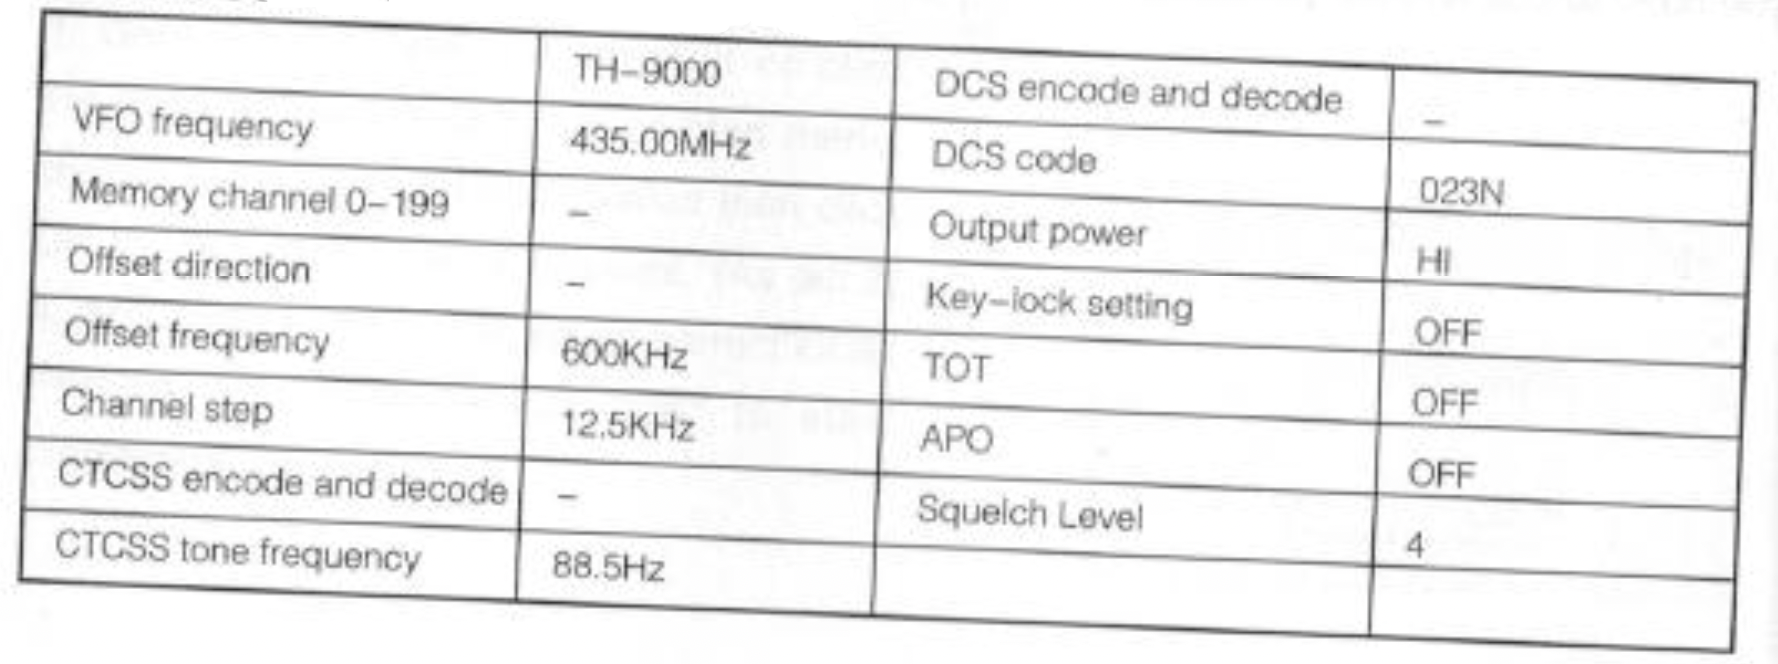
Default Setting after Resetting (UHF)
Troubleshooting
| Problem |
Possible Causes and Potential Solutions
|
| (a) Power is on, nothing appears on Display. |
+ and- polarities of power connection are reversed.
Connect red lead to plus terminal and black lead to minus terminal of DC power supply.
|
| (b) Fuse is blown. |
Check and solve problem resulting in blown fuse and replace fuse with new fuse.
|
| (c) Display is too dim. |
Dimmer setting is "LAMP-L'.Please make the dimmer setting "LAMP-H".
|
| (d) No sound comes from speaker. |
Squelch is muted.Decrease squelch level.
Tone or CTCSS/DCS squelch is active. Turn CTCSS or DCS squelch off.
|
| (e) Key and Dial do not function. |
Key-lock function is activated.Cancel Key-lock function.
|
| (i) Rotating Dial will not change memory channel. |
Transceiver is in CALL mode.Press the VFO or memory mode.
|
| (g) PTT key is pressed but transmission does not occur. |
Microphone connection is poor. Connect microphone properly.
Antenna connection is poor. Connect antenna property.
|