Loading ...
Loading ...
Loading ...
E
Getting Started
Choosing a Location
For Your Microwave Oven on the Counter
You will use the microwave oven frequently so plan its
location for ease of use. It’s wise, if possible, to have
counter space on at least one side of the microwave oven.
Allow at least 2 inches on the sides, top and at the rear of
the microwave oven for air circulation.
For Your Built-in Microwave Oven
Your microwave oven can be built into a cabinet or wall
by itself or above any electric wall oven or warming
drawer.
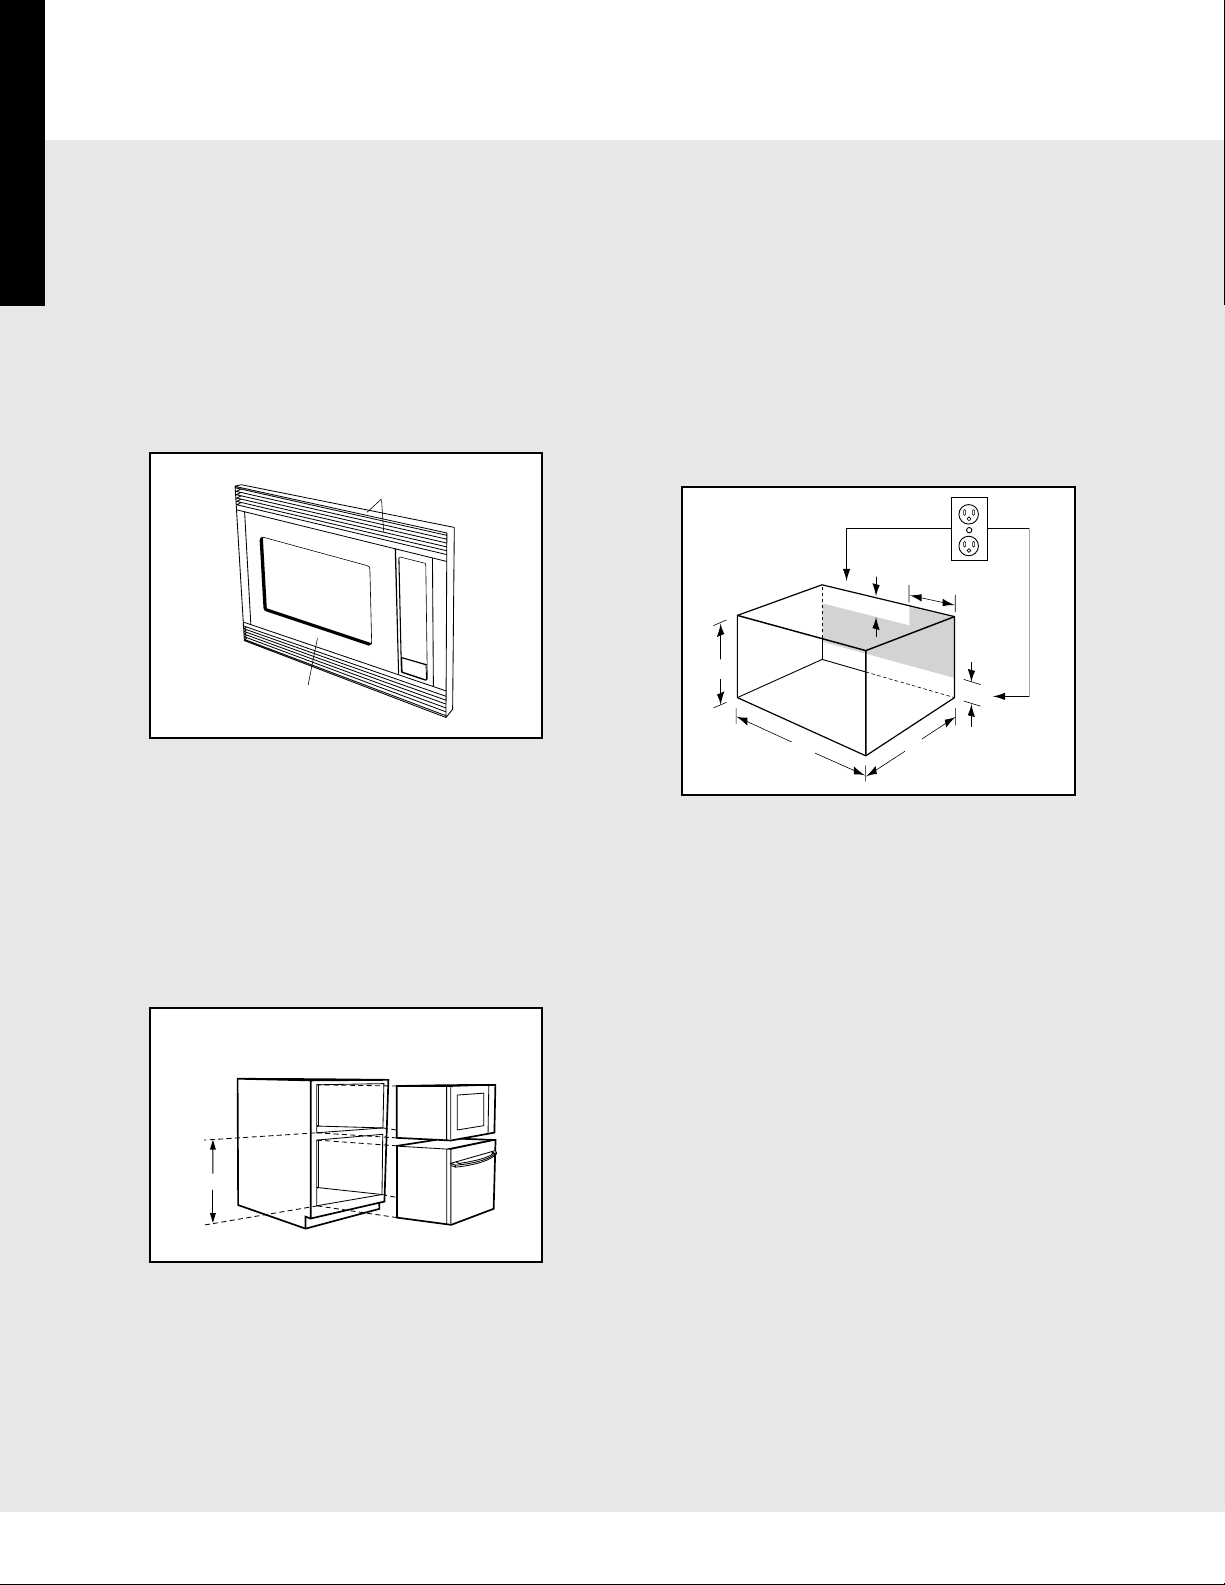
Microwave
Oven Front
Built-in Trim Kit
Frame Assembly
See built-in trim kit installation instructions for proper
location when building in above the specified ovens.
Carefully follow both the oven installation instructions and
built-in trim kit instructions.
The opening in the wall or cabinet must be within the
following dimensions:
A HEIGHT : 16
3
/4" - 17"
B WIDTH : 24
3
/8" - 24
11
/16"
C DEPTH : minimum 20"
Over Oven Installation
29
7
/16"
Outlet should NOT be in the shaded area as indicated.
1. If the dimension of DEPTH (C) is more than 21", the
outlet location may be any area on the rear wall.
2. The floor of the opening should be constructed of
plywood strong enough to support the weight of the
microwave oven and floor load (about 100 pounds).
The floor should be level for proper operation of the
microwave oven. Be sure to check the local building
code as it may require that the opening be enclosed
with sides, ceiling and rear partition. The proper
functioning of the microwave oven does not require
the enclosure.
C
4"
4
"
6"
A
B
The built-in trim kit includes all the necessary parts and
easy-to-follow instructions for installation as well as
location of the power supply.
The ease of assembly for these kits will allow installation
into an existing wall opening in less than an hour (if power
outlet is already properly located).
All it takes are four steps and a Phillips screw driver.
6
Loading ...
Loading ...
Loading ...