
Loading ...
Loading ...
Loading ...
INSTRUMENTS AND CONTROLS
* Option/accessory.
100
Interior rearview mirror
The interior rearview mirror has an auto-dim
function that helps reduce glare from following
vehicle's headlights.
Auto-dim function
The interior rearview mirror’s auto-dim function is
controlled by two sensors: one pointing forward
(located on the forward-facing side of the mirror,
which monitors the amount of ambient light) and
one pointing rearward (located on the side of the
mirror facing the driver at the upper edge, which
senses the strength of following vehicles' head-
lights), and work together to help eliminate glare.
17
NOTE
Obstructing the forward sensor with e.g.,
parking stickers, transponders, etc., or the rear
sensor by placing objects on the parcel shelf
or the rear seat in such a way that light is pre-
vented from reaching the sensor will reduce
the auto-dim function in the interior rearview
mirror and optional auto-dim function in the
door mirrors.
Related information
•
Power door mirrors (p. 97)
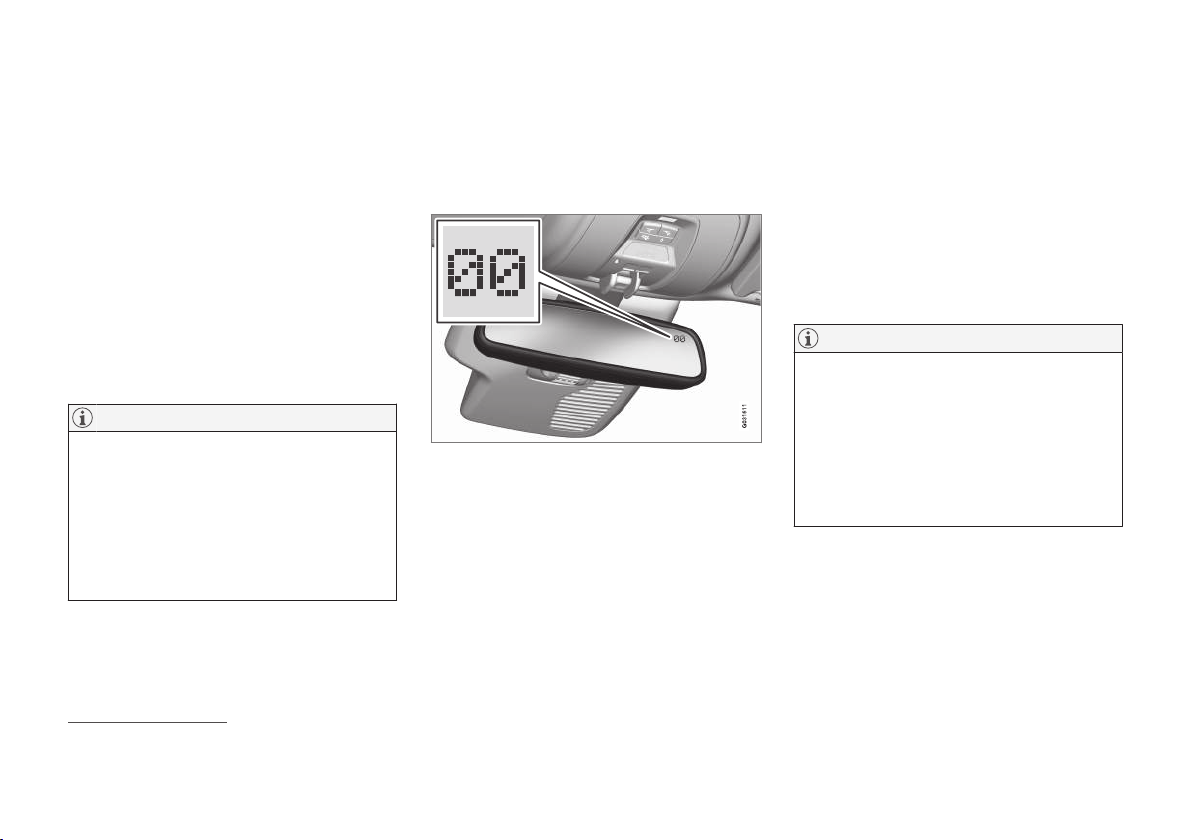
Digital compass*
The rear-view mirror has an integrated display
that shows the compass direction in which the
vehicle is traveling.
Operation
Rearview mirror with compass.
Eight different directions are shown with the
abbreviations:
N (north), NE (north east), E (east),
SE (southeast), S (south), SW (southwest), W
(west) and NW (northwest).
The compass is displayed automatically when the
vehicle is started or in ignition mode II. To switch
the compass on/off use a pen, paperclip or simi-
lar object and press in the button on the under-
side of the mirror.
Calibration
North America is divided into 15 magnetic zones
and the compass will need to be calibrated if the
vehicle is driven into a new one (see the mag-
netic zones on the map in the following section
"Selecting a magnetic zone"). To do so:
1. Stop the vehicle in a large open area, safely
out of traffic and away from steel structures
and high-tension electrical wires.
2. Start the vehicle.
NOTE
•
For best calibration results, switch off all
electrical equipment in the vehicle (climate
system, windshield wipers, audio system,
etc.) and make sure that all doors are
closed.
•
Calibration may not succeed or be incor-
rect if the vehicle's electrical equipment is
not switched off.
3. Using a pen, paperclip or similar object, press
and hold the button on the underside of mir-
ror for approx. 6 seconds until
C is displayed
in the mirror.
4. Press and hold the button for 3 seconds until
the number of the current magnetic zone is
displayed.
17
The auto-dim function is also available as an option on the door mirrors.
Loading ...
Loading ...
Loading ...