Loading ...
Loading ...
Loading ...
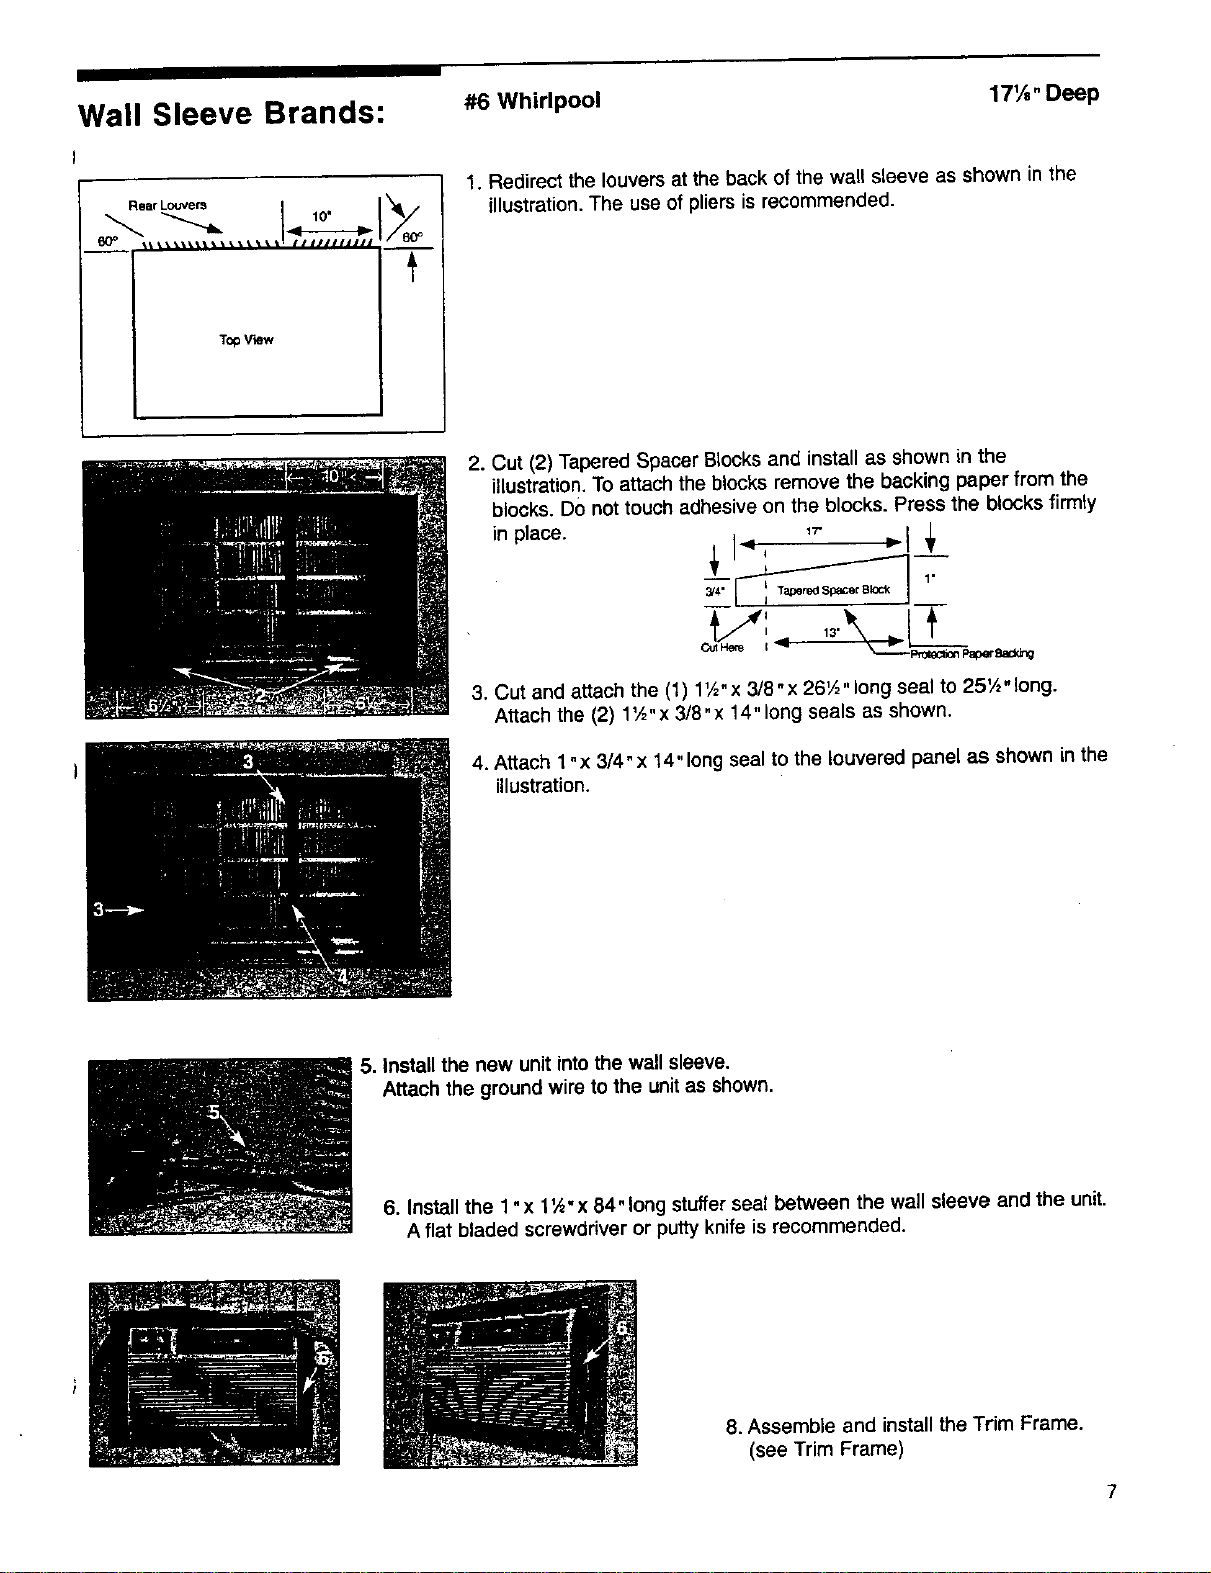
Wall Sleeve Brands:
I
Rear Louvers
_ |L|_¥|l_llt|l_|t' / J i/p//111_*
TopV'_w
#6 Whirlpool 171._"Deep
I. Redirect the louvers at the back of the wall sleeve as shown in the
illustration. The use of pliers is recommended.
2. Cut (2) Tapered Spacer Blocks and install as shown in the
illustration.To attach the blocks remove the backing paper from the
blocks. DO not touch adhesive on the blocks. Press the blocks firmly
in place. 1T
k--Z--2F'n_c_mPm_Sadd_
3. Cut and attach the (1) 1'_" x 3/8" x 261/2"long seal to 25_½"long.
Attach the (2) 1'_"x 3/8" x 14" long seals as shown.
4. Attach 1 "x 3/4"x 14"long seal to the Iouvered panel as shown in the
illustration.
5. Install the new unit into the wall sleeve.
Attach the ground wire to the unitas shown.
6. Install the 1"x 1',_-x 84" long stuffer seal between the wall sleeve and the unit.
A flat bladed screwdriver or putty knife is recommended.
8. Assemble and install the Trim Frame.
(see Trim Frame)
Loading ...
Loading ...
Loading ...