Loading ...
Loading ...
Loading ...
Wall Sleeve Brands:
#3 Fedders or Frieddch
163/4-Deep
RearLm,'vem
60 _ _llllll_lllll I n IiJiiJiJJJ
Top Vmw
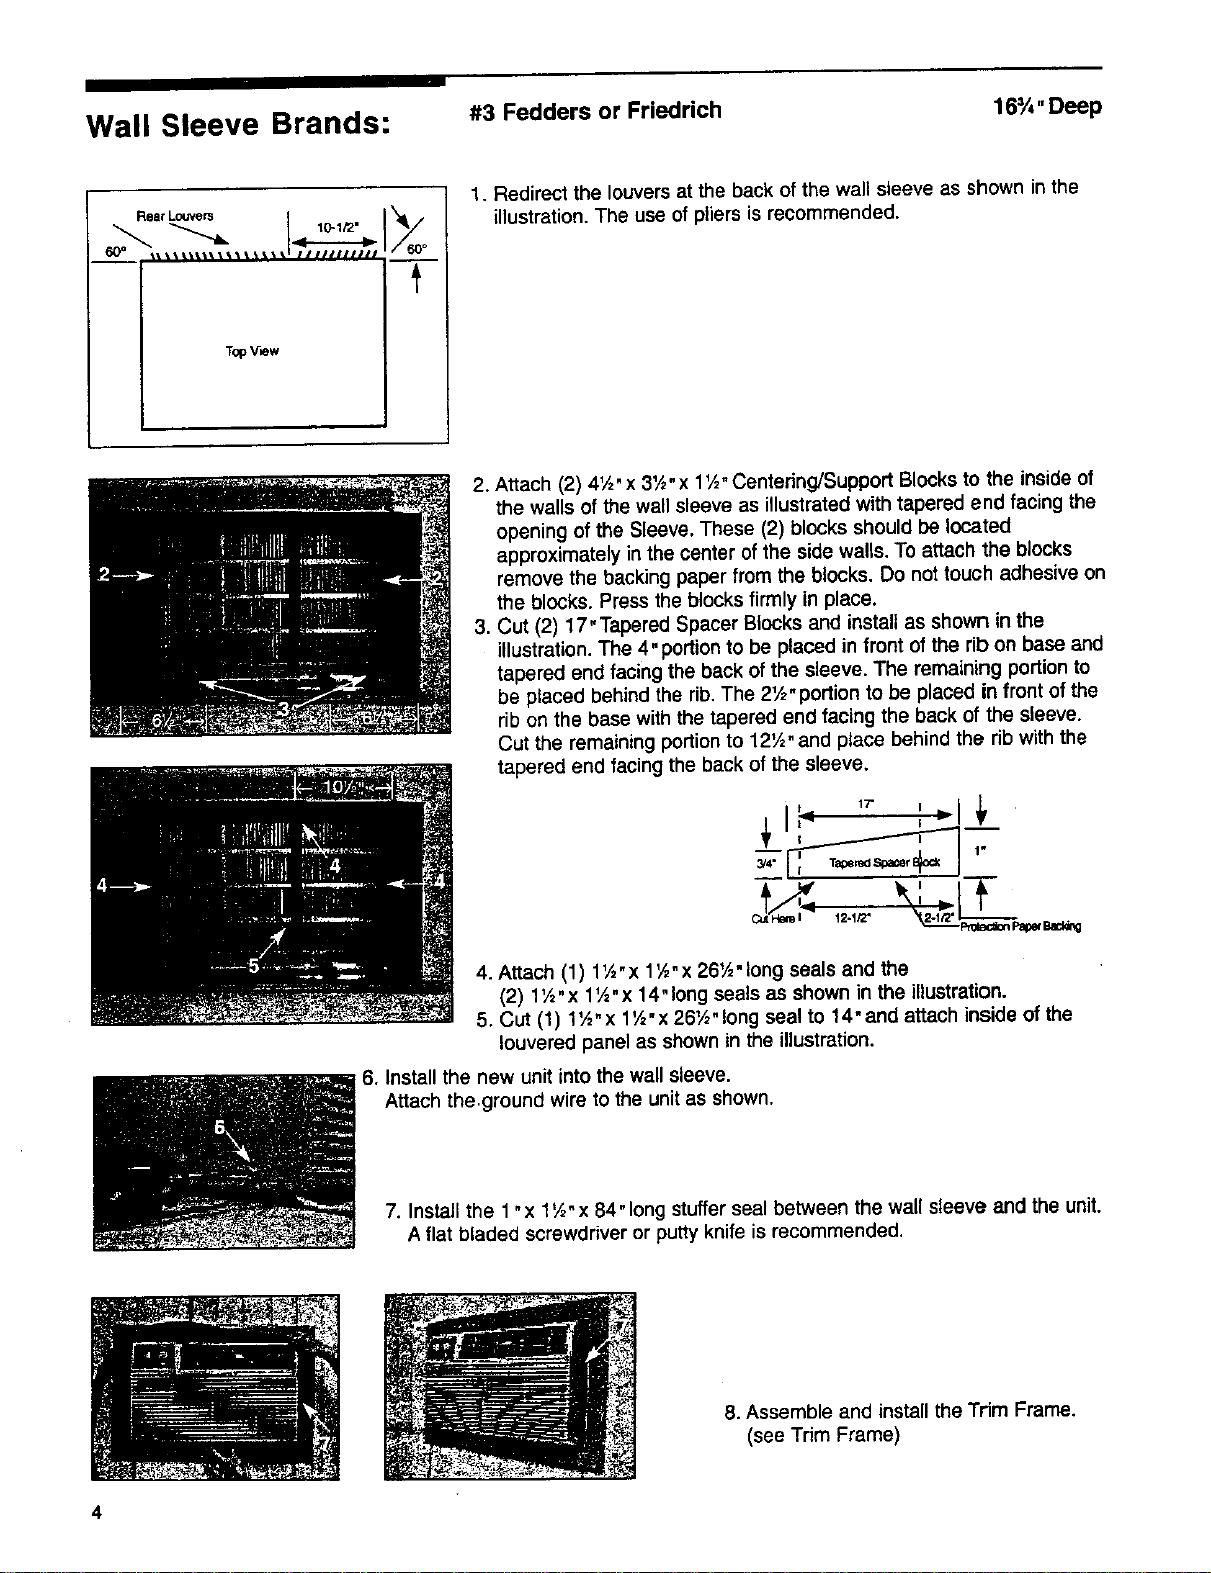
1. Redirect the louvers at the back of the wall sleeve as shown in the
illustration. The use of pliers is recommended.
2. Attach (2) 4½" x 3½"x 1½- Centering/Support Blocksto the inside of
the wails of the wall sleeve as illustrated with tapered end facing the
opening of the Sleeve. These (2) blocks should be located
approximately in the center of the side walls. To attach the blocks
remove the backing paper from the blocks. Do not touch adhesive on
the blocks. Press the blocks firmly in place.
3. Cut (2) 17.Tapered Spacer Blocks and install as shown in the
illustration. The 4" portion to be placed in front of the rib on base and
tapered end facing the back of the sleeve. The remaining portionto
be placed behind the rib. The 2½" portion to be placed in front of the
rib on the base with the tapered end facing the back of the sleeve.
Cut the remaining portionto 12½" and place behind the ribwith the
tapered end facing the back of the sleeve.
1i-_ ,-
c=_,'_ 1_-_" __..=_._
4. Attach (1) 1½"x 1',_"x 26½"long seals and the
(2) 1½"x 1½"x 14"long seals as shown in the illustration.
5. Cut (1) 1½- x 1½•x 26½ - long seal to 14" and attach inside of the
Iouvered panel as shown in the illustration.
6. Install the new unit into the wall sleeve.
Attach the.ground wire to the unit as shown.
7. Install the 1 "x 1½-x 84"long stuffer seal between the wall sleeve and the unit.
A flat bladed screwdriver or putty knife is recommended.
8. Assemble and install the Trim Frame.
(see Trim Frame)
4
Loading ...
Loading ...
Loading ...