Loading ...
Loading ...
Loading ...
30
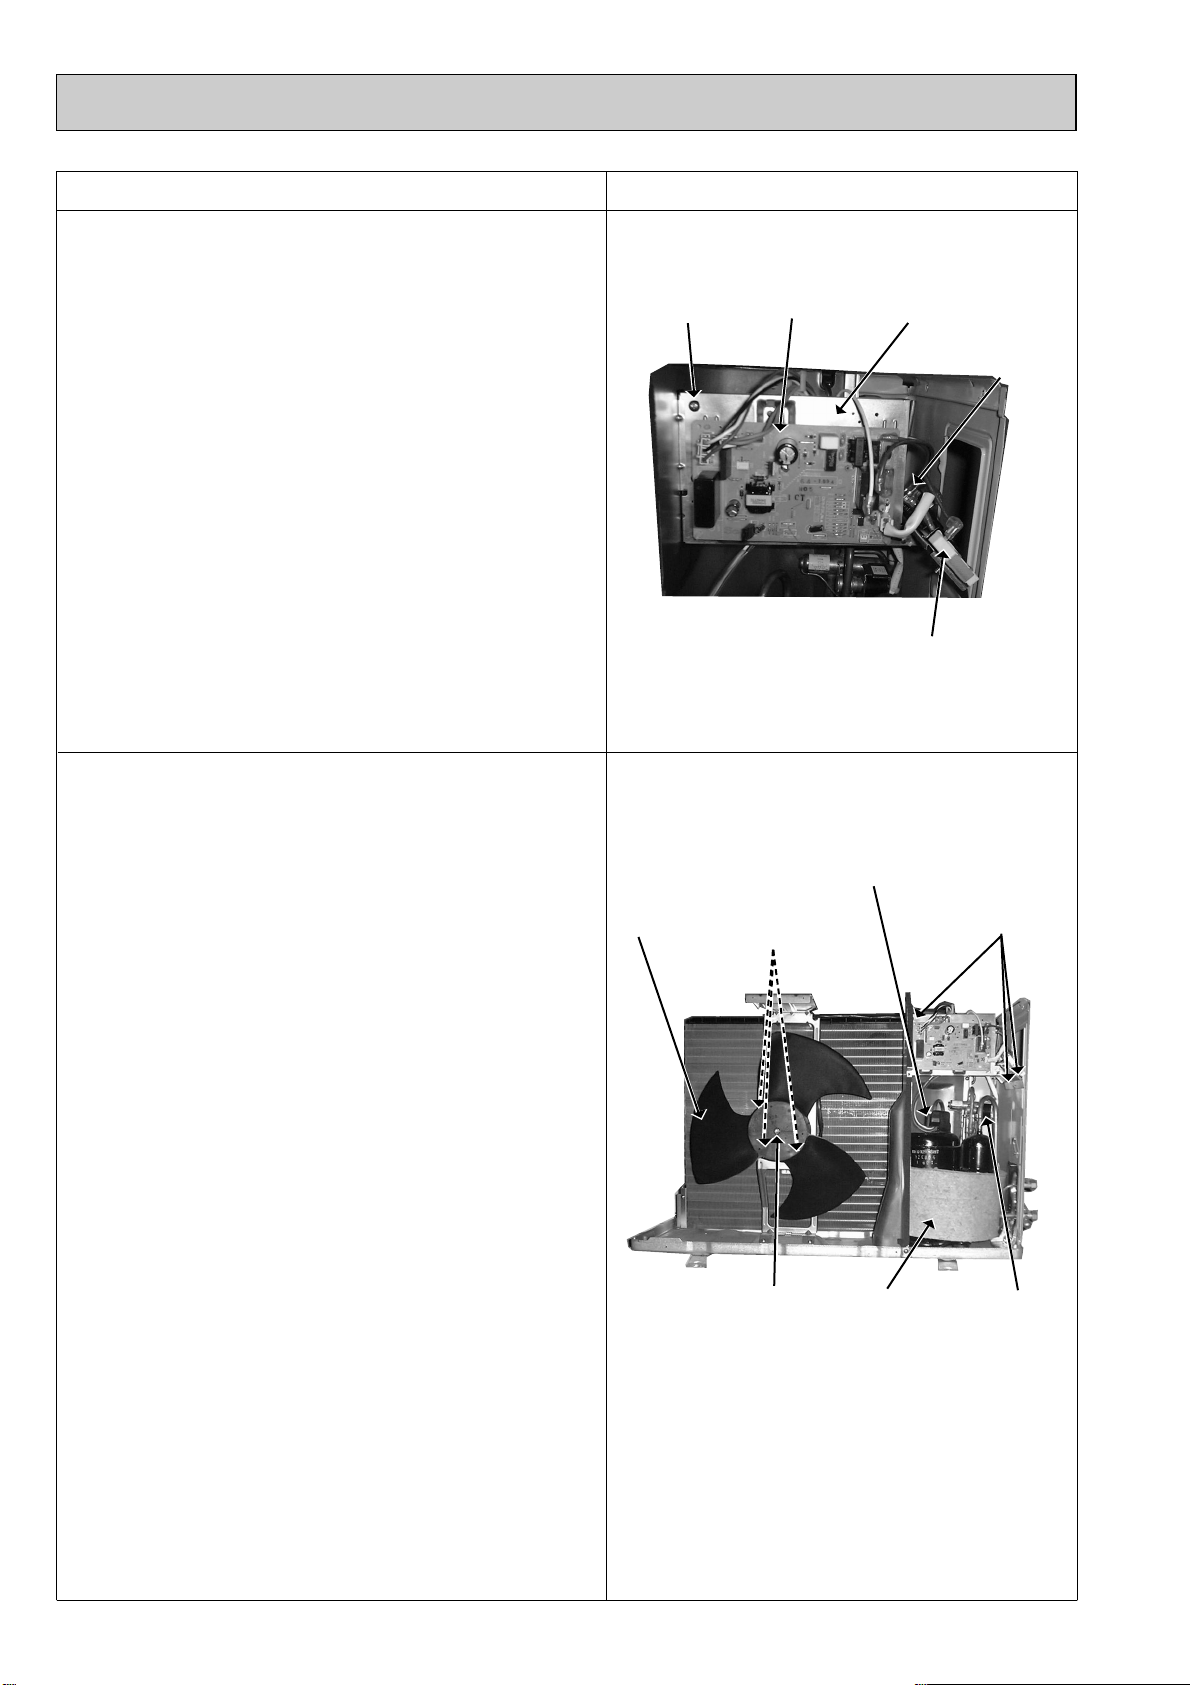
3. Removing the propeller and the outdoor fan motor
(1) Remove the cabinet. (Refer to 1.)
(2) Remove the propeller nut.
(3) Remove the propeller.
NOTE : Loose the propeller in the rotating direction for
removal.
When attaching the propeller, align the mark on the
propeller and the motor shaft cut section.
Set the propeller in position by using the cut on the
shaft and the mark on the propeller.
(4) Disconnect the outdoor fan motor connector.
(5) Remove screws fixing the fan motor.
(6) Remove the outdoor fan motor.
Photo 5
Propeller
Propeller
nut
Screw of the
outdoor fan motor
Terminal
cover
Screws of
the relay
panel
OPERATING PROCEDURE PHOTOS
2. Removing the deicer P.C. board
(1) Remove the service panel and the cabinet.
(2) Disconnect all the connectors and the terminals on the
deicer P.C. board.
(3) Remove the deicer P.C. board.
Photo 4
Terminal
block
Surge absorber
Deicer
P.C. board
Relay panel
Screw of the
relay panel
Sound proof felt
R.V. coil
(W) This photo shows MUH-GA20VB.
OB387-2.qxp 05.2.21 10:03 AM Page 30
Loading ...
Loading ...
Loading ...