Home
Bookmarks
Home
Canon
Canon XC10 User Manual
Page 17
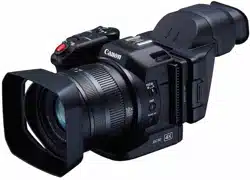
Canon XC10 Professional Camcorder
User Manual - Page 17
For XC10.
PDF File Manual
,
165 pages
,
Read Online
|
Download pdf file
Important Usage Instructions
Highlights of the XC10
Table of Contents
1. Introduction
About this Manual
Conventions Used in this Manual
Supplied Accessories
Names of Parts
Viewfinder unit
RC-6 Remote Controller
2. Preparations
Charging the Battery Pack
Preparing the Camcorder
Attaching the Lens Hood
Using the Viewfinder Unit
Using the LCD Panel
Adjusting the Grip
Attaching the Shoulder Strap
Using a Tripod
Basic Operation of the Camcorder
Switching Between Movies and Photos
Switching Between Recording and Playback
Using the Touch Screen
Date, Time and Language Settings
Setting the Date and Time
Changing the Language
Changing the Time Zone
Using the MENU Button and Joystick
Using the FUNC. Menu and Setup Menus
Preparing Recording Media
Inserting a CFast Card
Removing a CFast card
Inserting and Removing an SD Card
Initializing the Recording Media
Recovering Data on a Recording Media
Using the Remote Controller
Inserting the Battery
Activating the Remote Sensor
Using the Remote Controller to Operate the Camcorder
3. Recording
Recording Video and Taking Photos
Preparing to Record
Basic Recording
Selecting the Photo Size
Shooting Continuous Photos (Drive Mode)
Remote Operation Using Browser Remote
Onscreen Icons and Displays
Using the Fan
Video Configuration: Resolution (4K/HD), Frame Rate and Bit Rate
Selecting the Resolution (Recording in 4K or HD)
Selecting the Frame Rate and Bit Rate
Shooting Modes
Setting the Shooting Modes
Manual Exposure
Aperture Priority AE
Shutter Priority AE
Program AE
Auto
Special Scene
Adjusting Shooting Mode Settings
Automatic Gain and ISO Limits
Exposure
Exposure Lock
Touch Exposure
AE Shift
Light Metering Mode
White Balance
Using Looks
Selecting a Pre-installed Look
Creating a User-defined Look
Zooming
Adjusting the Focus
Autofocus (AF) Mode
Manual Focus (MF)
Push AF
Detecting and Focusing On Faces (Face Detection & Tracking)
Image Stabilizer
Onscreen Markers and Zebra Patterns
Displaying Onscreen Markers
Displaying Zebra Patterns
Setting the Time Code
Selecting the Time Code Mode
Selecting Drop or Non-Drop Frame
User Bit
Setting the User Bit
User Bit Output
Recording Audio
Using Commercially Available Microphones
Audio Scenes (Built-in Microphone)
Audio Recording Level
Wind Screen (Built-in Microphone)
Microphone Attenuator (Built-in Microphone)
Audio Equalizer (Built-in Microphone)
Microphone Directionality (Built-in Microphone)
Microphone Attenuator (External Microphone)
Low Cut Filter (External Microphone)
Switching the Input
Audio Limiter
Audio Compressor
Monitoring the Audio with Headphones
Colors Bars/Audio Reference Signal
Recording Color Bars
Recording an Audio Reference Signal
Recording GPS Information (Geotagging)
Slow & Fast Motion Mode
Pre-recording Mode
Interval Recording Mode
Self Timer
Orientation Detection
Using an Optional Speedlite Flash
Attaching the Speedlite
Configuring an Attached Flash
4. Customization
Customizing the FUNC. Menu
Assignable Buttons
Using an Assignable Button
Saving and Loading Menu Settings
Saving Menu Settings to an SD Card
Loading Menu Settings from an SD Card
5. Playback
Playback
Playing Back Recordings
Changing the Index Screen
Onscreen Icons and Displays during Playback
Playback Controls during Clip Playback
Playback Controls during Photo Playback
Adjusting the Volume
Displaying Clip Information
Playing an HD-sized Clip from a 4K Clip
Capturing Photos from 4K Clips (4K Frame Grab) and HD Clips
Magnifying Photos during Playback
Deleting Recordings
Deleting Clips and Photos from the Index Screen
Deleting a Clip During Playback Pause
Deleting a Photo during Playback
6. External Connections
Video Output Configuration
Recording Video Signal Configuration and Video Output Configuration
Playback Video Configuration and Video Output Configuration
Connecting to an External Monitor
Connection Diagram
Saving Clips to a Computer
Installation
Saving Photos to a Computer
Installation
Connecting the Camcorder to a Computer
7. Wi-Fi Functions
About the Wi-Fi Functions
Wireless Connections Using Wi-Fi
Wi-Fi Protected Setup (WPS)
Searching for Access Points
Manual Setup
Viewing and Changing Wi-Fi Settings
Browser Remote: Controlling the Camcorder from a Network Device
Setting Up Browser Remote
Starting Browser Remote
Playback via Browser
Media Server
8. Additional Information
Menu Options
FUNC. Menu
Setup Menus
Troubleshooting
List of Messages
Handling Precautions
Maintenance/Others
Optional Accessories
Specifications
Reference Tables
Index
Page 17/165
Page 1
Page 2
Page 3
Page 4
Page 5
Page 6
Page 7
Page 8
Page 9
Page 10
Page 11
Page 12
Page 13
Page 14
Page 15
Page 16
Page 17
Page 18
Page 19
Page 20
Page 21
Page 22
Page 23
Page 24
Page 25
Page 26
Page 27
Page 28
Page 29
Page 30
Page 31
Page 32
Page 33
Page 34
Page 35
Page 36
Page 37
Page 38
Page 39
Page 40
Page 41
Page 42
Page 43
Page 44
Page 45
Page 46
Page 47
Page 48
Page 49
Page 50
Page 51
Page 52
Page 53
Page 54
Page 55
Page 56
Page 57
Page 58
Page 59
Page 60
Page 61
Page 62
Page 63
Page 64
Page 65
Page 66
Page 67
Page 68
Page 69
Page 70
Page 71
Page 72
Page 73
Page 74
Page 75
Page 76
Page 77
Page 78
Page 79
Page 80
Page 81
Page 82
Page 83
Page 84
Page 85
Page 86
Page 87
Page 88
Page 89
Page 90
Page 91
Page 92
Page 93
Page 94
Page 95
Page 96
Page 97
Page 98
Page 99
Page 100
Page 101
Page 102
Page 103
Page 104
Page 105
Page 106
Page 107
Page 108
Page 109
Page 110
Page 111
Page 112
Page 113
Page 114
Page 115
Page 116
Page 117
Page 118
Page 119
Page 120
Page 121
Page 122
Page 123
Page 124
Page 125
Page 126
Page 127
Page 128
Page 129
Page 130
Page 131
Page 132
Page 133
Page 134
Page 135
Page 136
Page 137
Page 138
Page 139
Page 140
Page 141
Page 142
Page 143
Page 144
Page 145
Page 146
Page 147
Page 148
Page 149
Page 150
Page 151
Page 152
Page 153
Page 154
Page 155
Page 156
Page 157
Page 158
Page 159
Page 160
Page 161
Page 162
Page 163
Page 164
Page 165
Contents
Table of Contents
Search
Previous
Next
Troubleshooting
Bookmarks
Loading ...
Loading ...
Loading ...
17
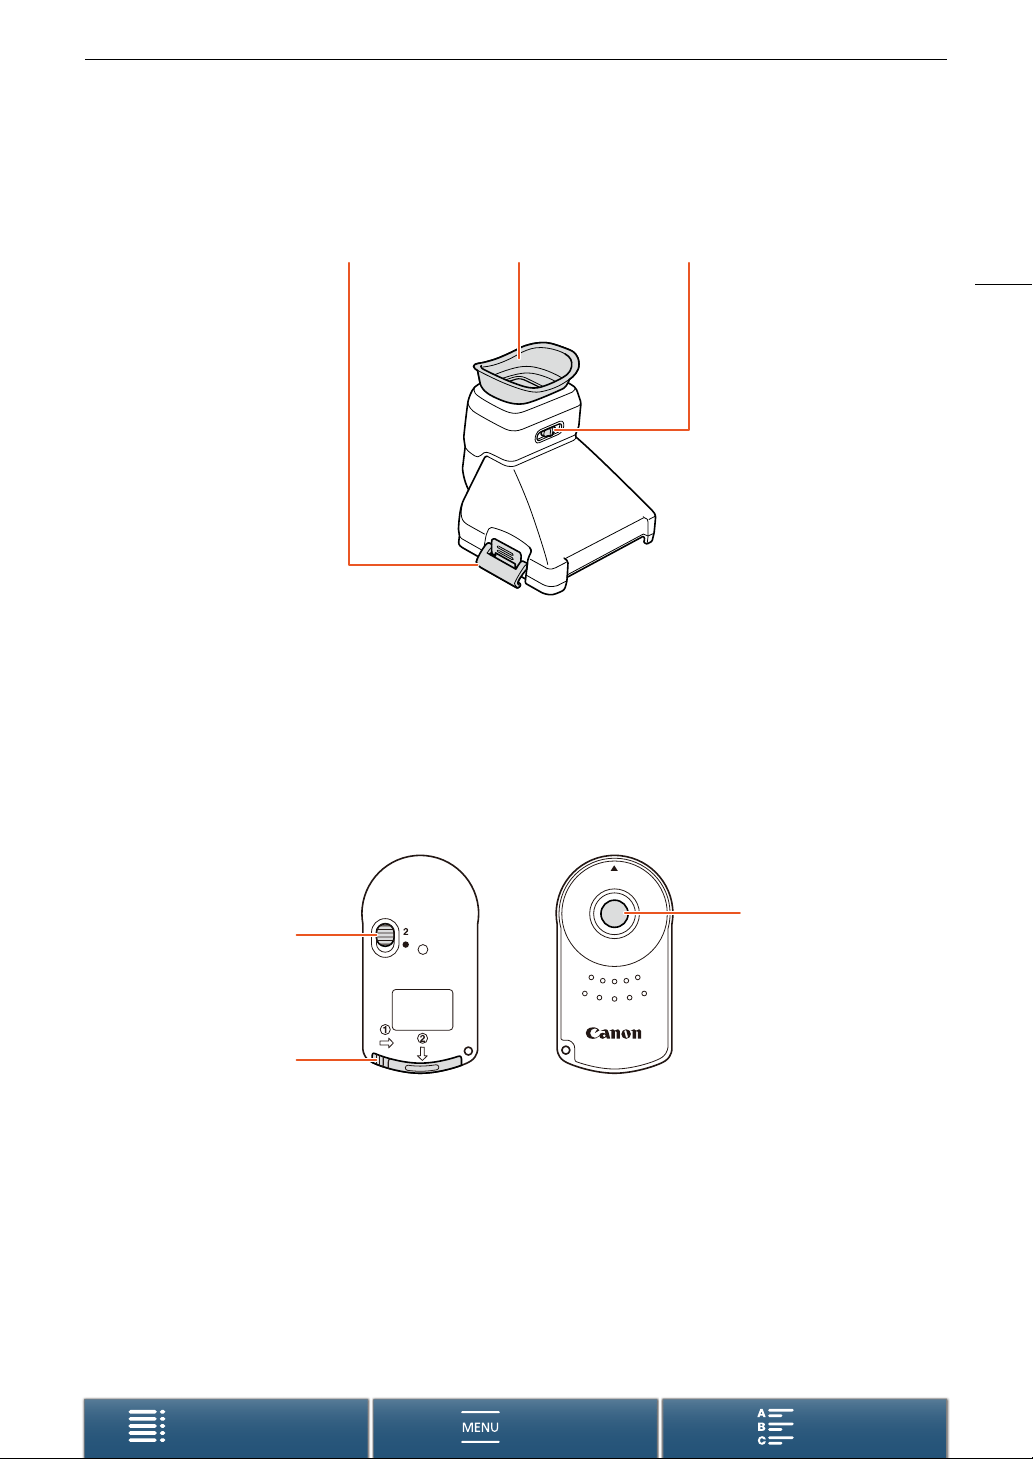
Names of Parts
Menus
T
able of Contents
Index
Viewfinder unit
RC-6 R
emote
Controller
123
1
Viewfinder
unit latch (
A
21)
2E
y
e
c
u
p
3
Dioptric adjustment lev
er (
A
22)
6
4
5
4
Delay switch (
A
35)
5
Battery compartment cover
6
T
ransmit button
Loading ...
Loading ...
Loading ...
File type: PDF
File name: xc10.pdf
File size: 7.13 MB
File Language: English
Pages: 165
Author: Canon
Published: 2020-01-18 00:00:00
Updated: 2023-06-01
Download File
Table of Contents
×
Important Usage Instructions
2
Highlights of the XC10
4
Table of Contents
6
1. Introduction
9
About this Manual
9
Conventions Used in this Manual
9
Supplied Accessories
11
Names of Parts
12
Viewfinder unit
17
RC-6 Remote Controller
17
2. Preparations
18
Charging the Battery Pack
18
Preparing the Camcorder
21
Attaching the Lens Hood
21
Using the Viewfinder Unit
21
Using the LCD Panel
23
Adjusting the Grip
24
Attaching the Shoulder Strap
24
Using a Tripod
24
Basic Operation of the Camcorder
25
Switching Between Movies and Photos
25
Switching Between Recording and Playback
25
Using the Touch Screen
26
Date, Time and Language Settings
27
Setting the Date and Time
27
Changing the Language
28
Changing the Time Zone
28
Using the MENU Button and Joystick
28
Using the FUNC. Menu and Setup Menus
29
Preparing Recording Media
31
Inserting a CFast Card
31
Removing a CFast card
32
Inserting and Removing an SD Card
33
Initializing the Recording Media
33
Recovering Data on a Recording Media
34
Using the Remote Controller
35
Inserting the Battery
35
Activating the Remote Sensor
35
Using the Remote Controller to Operate the Camcorder
35
3. Recording
37
Recording Video and Taking Photos
37
Preparing to Record
37
Basic Recording
38
Selecting the Photo Size
40
Shooting Continuous Photos (Drive Mode)
40
Remote Operation Using Browser Remote
41
Onscreen Icons and Displays
42
Using the Fan
47
Video Configuration: Resolution (4K/HD), Frame Rate and Bit Rate
48
Selecting the Resolution (Recording in 4K or HD)
48
Selecting the Frame Rate and Bit Rate
48
Shooting Modes
49
Setting the Shooting Modes
49
Manual Exposure
49
Aperture Priority AE
51
Shutter Priority AE
52
Program AE
52
Auto
52
Special Scene
52
Adjusting Shooting Mode Settings
54
Automatic Gain and ISO Limits
56
Exposure
58
Exposure Lock
58
Touch Exposure
58
AE Shift
59
Light Metering Mode
60
White Balance
61
Using Looks
63
Selecting a Pre-installed Look
63
Creating a User-defined Look
64
Zooming
65
Adjusting the Focus
66
Autofocus (AF) Mode
66
Manual Focus (MF)
68
Push AF
71
Detecting and Focusing On Faces (Face Detection & Tracking)
71
Image Stabilizer
73
Onscreen Markers and Zebra Patterns
74
Displaying Onscreen Markers
74
Displaying Zebra Patterns
74
Setting the Time Code
75
Selecting the Time Code Mode
75
Selecting Drop or Non-Drop Frame
76
User Bit
77
Setting the User Bit
77
User Bit Output
77
Recording Audio
78
Using Commercially Available Microphones
78
Audio Scenes (Built-in Microphone)
78
Audio Recording Level
79
Wind Screen (Built-in Microphone)
80
Microphone Attenuator (Built-in Microphone)
81
Audio Equalizer (Built-in Microphone)
81
Microphone Directionality (Built-in Microphone)
82
Microphone Attenuator (External Microphone)
82
Low Cut Filter (External Microphone)
83
Switching the Input
83
Audio Limiter
83
Audio Compressor
84
Monitoring the Audio with Headphones
84
Colors Bars/Audio Reference Signal
85
Recording Color Bars
85
Recording an Audio Reference Signal
85
Recording GPS Information (Geotagging)
86
Slow & Fast Motion Mode
88
Pre-recording Mode
89
Interval Recording Mode
90
Self Timer
91
Orientation Detection
92
Using an Optional Speedlite Flash
94
Attaching the Speedlite
94
Configuring an Attached Flash
94
4. Customization
96
Customizing the FUNC. Menu
96
Assignable Buttons
97
Using an Assignable Button
98
Saving and Loading Menu Settings
99
Saving Menu Settings to an SD Card
99
Loading Menu Settings from an SD Card
99
5. Playback
100
Playback
100
Playing Back Recordings
100
Changing the Index Screen
100
Onscreen Icons and Displays during Playback
102
Playback Controls during Clip Playback
104
Playback Controls during Photo Playback
105
Adjusting the Volume
105
Displaying Clip Information
105
Playing an HD-sized Clip from a 4K Clip
106
Capturing Photos from 4K Clips (4K Frame Grab) and HD Clips
106
Magnifying Photos during Playback
107
Deleting Recordings
108
Deleting Clips and Photos from the Index Screen
108
Deleting a Clip During Playback Pause
108
Deleting a Photo during Playback
109
6. External Connections
110
Video Output Configuration
110
Recording Video Signal Configuration and Video Output Configuration
110
Playback Video Configuration and Video Output Configuration
111
Connecting to an External Monitor
112
Connection Diagram
112
Saving Clips to a Computer
113
Installation
113
Saving Photos to a Computer
116
Installation
116
Connecting the Camcorder to a Computer
116
7. Wi-Fi Functions
118
About the Wi-Fi Functions
118
Wireless Connections Using Wi-Fi
119
Wi-Fi Protected Setup (WPS)
119
Searching for Access Points
120
Manual Setup
122
Viewing and Changing Wi-Fi Settings
123
Browser Remote: Controlling the Camcorder from a Network Device
125
Setting Up Browser Remote
125
Starting Browser Remote
125
Playback via Browser
129
Media Server
130
8. Additional Information
131
Menu Options
131
FUNC. Menu
131
Setup Menus
133
Troubleshooting
140
List of Messages
146
Handling Precautions
150
Maintenance/Others
153
Optional Accessories
154
Specifications
156
Reference Tables
159
Index
161
Search:
×
Search