Loading ...
Loading ...
Loading ...
Transport and practical equipment
Removing the net partition
●
Fold the rear seat backrests forward.
●
Press the left or right release catch
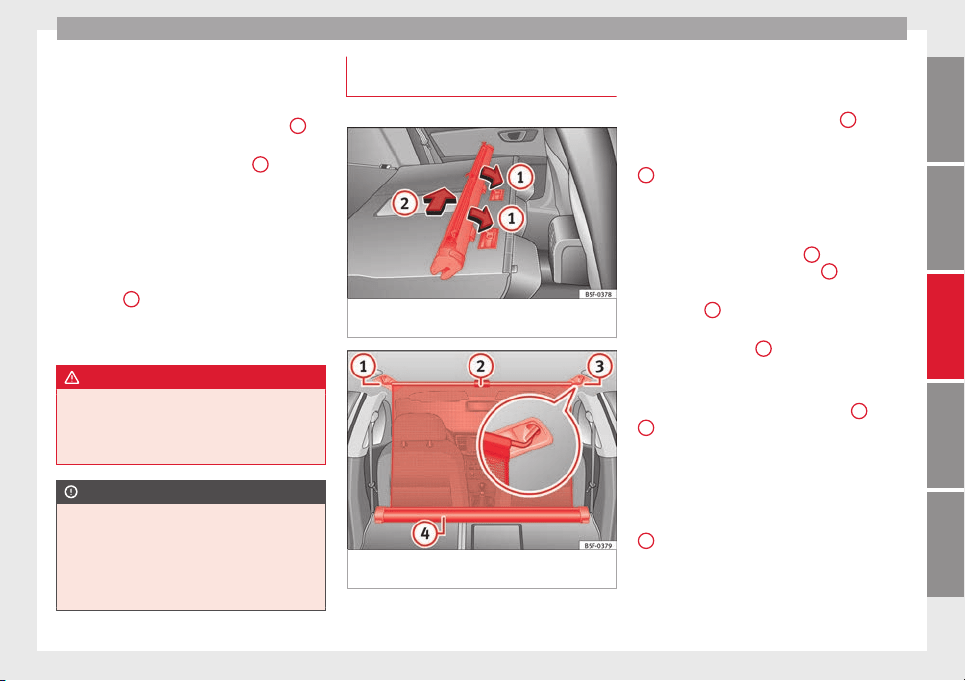
››› Fig. 125
in the direction of the arrow
1
.
●
Remove the casing from the support in the
direction of the arrow ››› Fig. 125
2
.
Fitting the net partition
●
Fold the rear seat backrests forward.
●
Fit the casing in the right and left supports.
●
Press the casing into the left and right sup-
ports in the opposite direction to the arrow
››› Fig. 125
2
until it engages.
The red markings on the release buttons
should no longer be visible.
WARNING
●
Always secure objects, even when the net
partition is properly assembled.
●
There should be nobody behind the assem-
bled partition when the vehicle is moving.
CAUTION
Incorrect handling of the net partition could
cause damage.
●
Do not “release” the net partition when
lowering it, as the net and other vehicle parts
could be damaged. Roll down the net parti-
tion by hand.
Use of the net partition with the rear
seat backrests lowered
3 Applies to the model: LEON ST
Fig. 126 Assembling the net partition in the
rear seat backrests.
Fig. 127 In the luggage compartment: net
partition hooked into the rear seat backrests.
Fitting the net partition
●
Fold the rear seat backrests forward.
●
Remove the net partition from the side sup-
ports.
●
Place the net casing in the rail slots in the
direction of the arrows ››› Fig. 126
1
.
●
Push the casing towards the left side of the
vehicle in the direction of arrow ››› Fig. 126
2
and as far as it will go.
●
Check that the net is secure.
Pulling out and securing the net partition
●
Pull up handle ››› Fig. 127
2
to remove the
net from the casing ››› Fig. 127
4
.
●
Hook in the net partition on the right side
››› Fig. 127
3
(magnified image).
●
Hook in the net partition in the left side
housing ››› Fig. 127
1
pulling the rod.
The net partition is properly assembled when
the T-shaped ends are firmly secured in the
corresponding housings ››› Fig. 127
3
and
1
.
Retracting the net partition
●
Remove the rod from the housings in the
trims of the roof side members.
●
Roll up the net into the casing ››› Fig. 127
4
lowering it with your hand.
»
117
Technical specifications
AdviceOperationSafetyThe essentials
Loading ...
Loading ...
Loading ...