Press this pad to cancel all programming except the clock and timer.
and pads
Press or press and hold these pads to enter the desired time or temperature or to select Hi or Lo broil.
TIMER
Press TIMER pad.
Set desired time using the and pads.
Press or press and hold either pad to change the time by 1 minute, 5 minutes or 10 minutes.
TIMER can be set from 1 minute (0 HR:01) up to 9 hours and 50 minutes (9 HR:50).
The timing operation wilt start automatically, Colon flashing in the display indicates a timing operation. One long continuous beep signals the end of the timing operation. The time of day will automatically reappear in the display. The TIMER does not control the oven.
To cancel: Press and hold TIMER pad. Time of day will reappear after a slight delay.
CLOCK
Press CLOCK pad.
Set the correct time of day using the and pads.
To change the time by one minute, press either pad once. To change the time in increments of 10 minutes, press and hold either pad.
When power is first supplied to the oven or if there has been a power failure, the display wil! flash.
Press CLOCK pad to recall time of day when another function is displayed.
Clock time cannot be changed when oven is set for a cook, timed bake, or self-clean operation. Cancel operation to set the clock.
OVEN TEMP
Press OVEN TEMP pad.
Press the and pad to set oven temperature.
See page 16 for additional information.
BROIL
Press BROIL pad.
Press and pad to select Hi broil or Lo broil.
See page 21 for additional information.
SELF - CLEAN
Close and lock oven door.
Press CLEAN pad.
Oven will automatically clean for 3 hours. Or press the and pad to select 2 to 4 hours.
"door" will appear in display until the door is properly locked. See pages 25 and 26 for additional information.
COOK TIME/OVEN STOP
Press COOK TIME pad. Enter desired cooking time with the and pad.
To delay the start of cooking: Press OVEN STOP pad. Enter time you wish the oven to turn off with the and pad.
Press OVEN TEMP pad. Enter oven temperature with the and pad.
The oven will automatically turn on and off at the preset times. Beeps will signal the end of cooking. Press CANCEL pad to cancel end-of-cooking beeps. See page 20 for additional information.
ADDITIONAL INFORMATION
A beep sounds each time a pad is pressed. The oven will automatically turn off if it is left on for 12 hours.If a fault cede (example: F 2) is displayed and beeps sound, press CANCEL pad. If fault code continues, see page 27.
SMOOTHTOP COOKTOP
SMOOTHTOP COOKTOP AREAS
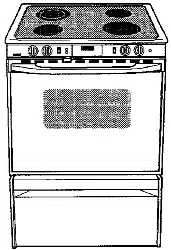
Thefourcookingareason yourrangeareidentifiedby permanentpatternsinthe cooktop.Therearetwo large(8-inch)andtwosmall (6-inch)areas.Thepatterns onyourcooktopmaynot looklikethecooktopinthis illustration but your cooktop will operate as described in this manual.
Before using the cooktop for the first time, clean it thoroughly as directed on the cleaning chart on page 24. This will protect the smoothtop and will guarantee a clean cooktop when the elements are turned on.
During the first few hours of use, you may notice that the cooktop emits a slight burning odor and a light smoke. Both of these conditions are normal.
When a cooking area is turned on, the coil element under the cooktop will heat up and glow red. To maintain the heat setting the element will cycle on and off. It is normal to see a red glow through the smoothtop when the element cycles on.
HOT SURFACE LIGHT
Your range is equipped with a HOT SURFACE light located at the center-back of the smoothtop. This red light will turn on to indicate that the smoothtop is hot and will remain on until the top has cooled.
RETAINED HEAT
The smoothtop cooking area retains heat for a period of time after the element has been turned off. Turn the element off a few minutes before food is completely cooked and use the retained heat to complete the cooking operation. After 30 minutes, the cooktop may be too cool to keep foods warm. However, the top may still be too warm to touch. When the HOT SURFACE light turns off, the top will be cool enough to touch.
COOKING TIPS
When cooking delicate foods which easily scorch or overcook, start with a lower heat setting then gradually increase until you find the optimum setting. Boilovers are more likely to occur if you start out on HIGH then reduce to the lower setting, if you do begin cooking on HIGH, reduce to a lower setting before liquids come to a full boil.
If food is cooking too fast or if a boilover occurs, remove lid or remove cookware from cooking area and reduce to a lower setting. Allow enough time for the cooking area to adjust to the new setting.
COOKWARE TIPS
Aluminum lob will damage the smoothtop if it melts onto the glass. Do not use foil-type disposable containers such as popcorn poppers. They may leave metal marks or may permanently melt onto the smoothtop. Do not use cooktop if metal or aluminum foil melts onto the smoothtop. Call an authorized servicer.
Aluminum cookware will cause metal marks on the glass if you slide them across the smoothop. Remove any metal marks immediately using Cooktop Cleaning Creme.
Glass ceramic, earthenware, porcelain over metal, heat-proof glass or glazed cookware may scratch the smoothtop cooktop if you slide them across the top.
TO PEOTECT SMOOTHTOP
Do not use the top as a work surface or as a cutting board. Do not cook food directly on the cooktop.
Do not use a trivet or metal stand (such as a wok ring) between the utensil and the cooktop. These items can mark or etch the surface and affect cooking efficiency.
Do not place plastics on a warm or hot cooking area. They will melt and adhere to the smoothtop. The smoothtop may chip or pit in attempting to remove melted plastic from the top.
To prevent scratching or damage to the smoothtop, do not leave sugar, salt, sand, soil, shortening or other fats on the cooking area. Be sure area is free from these before turning on cooking area.
Be sure the bottom of the cookware is smooth and free of nicks, scratches or rough areas as they may scratch the smoothtop.
Do not allow a pan to boil dry. This could cause permanent damage to the smoothtop.
CARE INFORMATION
To help keep cooktop clean, be sure cooking area and cookware bottom are clean and dry before each use.
To prevent possible damage to the cooktop, always rinse the bottom of cookware to completely remove any cleaning agent residue. This is especially important when using a copper or aluminum cleaner. In the presence of heat, the cleaning residue may stain, discolor or etch the smoothtop.
Carefully blot up spitlovers around the outside of the cooking area as they occur with dry paper towels. BE CAREFUL NOT TO BURN HANDS WHEN WIPING UP SPILLS. DO NOT USE A DAMP CLOTH WHICH MAY CAUSE STEAM BURNS.
CALITION: Do not use cooktop if the smoothtop is cracked, broken, or if metal melts onto the cooktop. Call an authorized servicer. Do not attempt to repair the ooktop yourself
When surface is cool, clean as directed in the chart on page 26. DO NOT USE the following cleaning agents:
Abrasives (metal scouring pads, cleansing powders, scouring cleaners or pads) will scratch the smoothtop.
Chemicals (oven cleaners, chlorine bleaches, rust removers or ammonia) may damage the finish of the smoothtop.
Glass cleaners containing ammonia may harm the smoothtop.
Soiled cloth or sponge will leave an invisible film on the cooktop which may scratch or cause discoloration the next time the cooktop is used.
IMPORTANT: Watch sugary or starchy solutions carefully to avoid boilovers. If a sugar solution (such as jam, jelly, candy) or a starch solution (such as potatoes, rice) boils over, it may pit or discofor the smoothtop. Turn element to LOW and clean sugary boilovers immediately. See page 24 for complete cleaning instructions.
PROBLEM SOLVING CHART
PROBLEM
CAUSE
TO PREVENT
Tiny scratches or abrasions
Coarse particles (dust, salt and sand) between cookware bottom and cooktop. Incorrect cleaning materials. Sliding glassware or metal across top or using cookware with rough bottoms.
Tiny scratches are not removable and do not affect cooking. In time, the scratches will become smoother and less visible. Be sure cookware bottoms and cooktop are clean before use. Use cookware with a smooth, non-scratching bottom. Do not slide cookware across cooktop.
Metal-marking
Sliding or scraping metal utensils or oven racksacrosscooktop
Do not slide metal object across cooktop. When cool, clean with Cooktop Cleaning Creme
Brownstreaksand specks
Boilovers, incorrect cleaning materials, used soiled clothor sponge, soiled cookware
Remove boilovers before reusing the cooktop. Use a clean cloth or sponge, Be sure cookware, especially bottoms, are clean and dry
Areas of discoloration with a metallic sheen
Mineral deposits from waterand foods.
Use cookware with bottoms that are clean and dry. Use correct heat setting to prevent boilovers
Pittingorflaking.
Sugary boilovers from sugar syrups, candy, jams, jellies, dessert sauces, etc.
Use correct heat setting and large enough utensil. Watch cooking operation to prevent boilovers or spattering.
COOKTOP USE .
Control knobs
Your cooktop is equipped with control knobs that provide an infinite choice of settings from LOW to HIGH. The knob can be set on or between any of the numbered settings.
To operate push in and turn the knob in either direction to the desired setting. An indicator light will glow when a surface element is turned on, The indicator light will remain on until the element is turned off. After a cooking operation, be sure the element and indicator light are off.
To operate dual element:
Press the rocker switch marked COIL SIZE to select either the 9" or 6" size element. NOTE: If the 9" size is selected, both the inner and outer circles will heat. if the 6" size is selected, only the inner circle witl heat.
Push in and turn the LEFT REAR surface control knob to the desired heat setting.
General cooking tips
To prevent damage to the range or utensil, never operate surface unit without a pan in place, never allow a pan to boil dry and never operate an element on HIGH for extended periods of time.
Food will not cook any faster at a higher setting than needed to maintain a gentte boil. Water boits at the same temperature whether boiling gently or vigorously. If a high setting is used, excessive spattering will occur and food may stick or burn onto the bottom of the pan.
If a higher heat setting is used to bring liquid to a boil or to begin cooking, always reduce to a lower setting once liquid comes to a boil or food begins cooking. Never leave food unattended during a cooking operation.
Fit the size of the cookware to the size of the element. This conserves energy.
Canning
Use HIGH just until water comes to a boil or pressure is reached in the pressure canner. Then, reduce to the lowest heat setting that maintains the boil or pressure. Prolonged use of HIGH or the use of incorrect canning utensils will produce excessive heat. Excessive heat can cause permanent damage to the cooktop.
Suggested heat setting guide
Refer to cookware manufacturer's recommendations for suggested heat settings. Some manufacturers do not recommend the use of HIGH, or the use of HIGH for extended cooking operations.
HEAT SETTINGS
USES
HIGH
To bring liquid to a boil, blanch, preheat skillet, or reach pressure in a pressure cooker. Always reduce to a lower heat setting when liquids just begin to boil or foods begin to cook.
Medium-High 7-9
To brown or sear meat; heat oil for deep fat frying; scald; to saute or fry. Maintain fast boil for large amounts of liquids.
Medium
To maintain moderate to slow boil for large amounts of liquids.
To continue cooking uncovered foods and for most frying operations.
Medium-Low
To continue cooking covered foods and to maintain pressure in most pressure cookers.
Stew, braise or steam operations.
To maintain boil for small amounts of liquid* poach, steam or simmer.
LOW
To keep foods warm before serving. Melt chocolate.
OVEN USE
OVEN LIGHT
To turn on oven light: Push the rocker switch located on the control panel.
To replace oven light: Be sure bulb is cool. Use a dry potholder, to prevent possible harm to hands, and very carefully unscrew bulb cover and bulb.
Replace with a 40 watt appliance bulb. Replace bulb cover and reconnect power to range. Reset the clock.
OVEN VENT
The oven vent is located at the rear of the cooktop. When the oven is in use, this area may feel warm or hot to the touch. To prevent baking problems, do not block the vent opening in any way.
OVEN CHARACTERISTICS
Because each oven has its own personal baking characteristics, do not expect that your new oven will perform exactly like your previous oven. "Youmay find that the cooking times, oven temperatures, and cooking results differ somewhat from your previous range. Allow a period of adjustment. If you have questions concerning baking results, please refer to pages 18, 19, and 28 for additional information.
FAN
A fan will automatically turn on whenever the oven is set for a cooking or a cleaning operation. After the operation, the fan will automatically turn off when the oven has cooled.
PREHEATING
Preheating is necessary for baking. To preheat, set the oven to the desired temperature and allow about 10 to t 5 minutes for the oven to preheat. A single beep will indicate that the oven is preheated. It is not necessary to preheat for roasting.
Selecting a temperature higher than desired will NOT preheat the oven any faster, and may have a negative effect on baking results.
HOW TO SET OVEN
Press the OVEN TEMP pad.
000 ° and BAKE indicator words wilt appear in the display.
Press the and pad. Then press either pad until the desired oven temperature is displayed.
350 ° will appear in the display when either pad is pressed once.
The oven temperature can be set from 170° to 550 °. ° The ON indicator word and 75° or the actual oven temperature, whichever is higher, will appear in the display.
The temperature in the display will increase in 5° increments until the oven reaches the preset temperature.
Allow 10 to 15 minutes for the oven to preheat. A single beep will sound when the oven is preheated.
Place the food in the center of the oven allowing a minimum of 1 to 2-inches between the utensil and the oven walls.
Check food for aloneness at the minimum cooking time. Cook longer if needed. Cooking time may vary from oven to oven.
At the end of cooking, turn the oven off by pressing the CANCEL pad. Remove food from the oven.
ADDITIONAL INFORMATION
If you press the OVEN TEMP pad and do not set an oven temperature within 30 seconds, the program wilt automatically cancel and the time of day will reappear in the display.
To recall the preset temperature during preheat, press the OVEN TEMP pad.
To change the oven temperature during cooking, press the and pad until the desired temperature is displayed. ° The oven features an automatic shut-off. If the oven is left on for 12 hours it will automatically turn off.
OVEN RACKS
The two oven racks are designed with a safety lock-stop position to keep the racks from accidently coming completely out of the oven when pulling the rack out to add or remove food.
CAUTION: Do not attempt to change the rack positions when the oven is hot
To remove: Be sure the rack is cool. Pull the rack straight out until it stops at the lock-stop position. Tilt the front end of the rack up and continue pulling the rack out of the oven
To replace: Place the rack on the rack supports and tilt the front end of the rack up slightly. Slide it back until it clears the lock-stop position. Lower the front and slide the rack straight in. Pull the rack out to the lock-stop position to be sure it is positioned correctly and then return it to its normal position.
It is important that air can circulate freely within the oven and around the food. To help ensure this, place food on the center of the oven rack. Allow two inches between the edge of the utensil(s) and the oven walls.
For optimum baking results of cakes, cookies or biscuits, use one rack. Position the rack so the food is in the center of the oven. Use either rack position 2 or 3.
If cooking on more than one rack, stagger the food to ensure proper air flow.
If cooking on two racks, use rack positions 2 and 4 for cakes and rack positions 1 and 4 when using cookie sheets. Never place two cookie sheets on one rack.
If roasting a large turkey, place the turkey on rack 1 and the side dishes on rack 5.
RACK POSITIONS
RACK 5 (highest position)
Used for toasting bread, or for two-rack baking.
RACK 4
Used for most broiling and two-rack baking.
RACK 3
Used for most baked goods on a cookie sheet or jelly roil pan, or frozen convenience foods, or for two-rack baking.
RACK 2
Used for roasting small cuts of meat, large casseroles, baking loaves of bread, cakes (in either tube, bundt, or layer pans) or two-rack baking.
RACK 1
Used for roasting large cuts of meat and large poultry, pies, souffles, or angel food cake, or for two—rack baking.
GENERAL BAKING TIPS
Use a reliable recipe and accurately measure fresh ingredients. Carefully follow directions for oven temperature and cooking time.
Preheat oven if recommended in the recipe or package directions. Selecting a temperature higher than the desired temperature wilt not preheat the oven any faster. In fact, this may have a negative effect on baking results.
Use the correct rack position. Baking results may be affected if the wrong rack position is used. For optimum results, bake foods on one rack. Select a rack position that locates the food in the center of the oven. If baking on two racks, select rack positions #2 and 4, #1 and 4 or #2 and 5.
Top browning may be darker if food is located toward the top of the oven.
Bottom browning may be darker if food is located toward the bottom of the oven.
When using two racks for baking, allow enough space between the racks for proper air circulation. Browning and cooking results will be affected if air flow is blocked.
Cookware material plays an important part in baking results. Always use the type and size of pan called for in the recipe. Cooking times or cooking resutts may be affected if the wrong size is used.
A shiny metal pan reflects heat away from the food. This type of pan produces lighter browning and a softer crust. Use shiny pans for baking cakes or cookies.
A dark, dull, anodized or satin-finish metal pan absorbs heat and produces darker browning with a crisper crust. Use dark pans for pies, pie crusts or bread.
For optimum baking results, bake cookies and biscuits on a flat cookie sheet. If the pan has sides, such as a jelly rotl pan, browning may not be even.
If using heat-proof glassware, or dark pans such as Baker's Secret or Wilton reduce the oven temperature by 25°F except when baking pies or bread. Use the same baking time as called for in the recipe.
Use of aluminum foil: Do not cover the oven bottom or an entire rack with foil or place foil directly under cookware. To catch spillovers, place a piece of foil a little larger than the pan, on the rack below the pan.
Allow hot air to flow freely through the oven for optimum baking results. Improper placement of pans in the oven will block air flow and may result in uneven browning. For optimum browning and even cooking results:
Do not crowd a rack with pans. Never place more than one cookie sheet, one 13x9x2-inch cake pan or two 9-inch round cake pans on one rack.
Stagger pans when baking on two racks so one pan is not directly over another pan.
Allow one to two inches between the pan and the oven walls.
Check the cooking progress at the minimum time recommended in the recipe. If necessary, continue checking at intervals until the food is done. If the oven door is opened too frequently, heat will escape from the oven; this can affect baking results and wastes energy.
If you add additional ingredients or alter the recipe, expect cooking times to increase or decrease slightly
COMMON BAKING PROBLEMS AND WHY THEY HAPPEN
PROBLEM
CAUSE
Cakes are uneven.
• Pans too close or touching each other or oven wails. • Batter uneven in pans.
• Temperature set too low or baking time too short • Oven not level. • Undermixing. • Too much liquid.
Cake high in middle
• Temperature see too high. • Overmixing. • Too much flout • Pans touching each Other or oven walls. • Incorrect rack position
Cake falls.
• Too much shortening or sugar. • Too much or too little liquid. • Temperature set too low. • Old or too little baking powder. • Pan too small. • Oven door opened frequently. • Added incorrect type of oil to cake mix. • Added additional ingredients to cake mix or recipe,
Cakes, cookies, biscuits don't brown evenly
• Incorrect rack position. • Oven door not closed gasket not sealing properly or property attached to door. • Incorrect use of aluminum foil • Oven not preheated e Pans
For optimum results, bake on one rack. If baking cakes on two rack, place, pans toward the front of the oven the upper rack and toward the back of the Oven on the rack
Cakes, cookies, biscuits too brown on bottom,
• Oven not preheated. • Pans touching each other or oven walls. Incorrect rack position. • Incorrect use of aluminum foil. • Placed 2 cookie sheets on one rack. • Used glass, dark, stained warped or dull finish metal pans. (Use a shiny cookie sheet.)
Follow cookware manufacturer's instructions for oven temperature. Glassware and dark cookware such as Ecko's Baker's Secret may require lowering the oven temperature by 250°F
Cakes don't brown on top,
• Incorreetfack position.' Temperaturesettoolow: Overmixling. Too much liq uid •Pan sizetoolarge orltoo liitde batterin. pan. Oven door opened too often,
Excessive shrinkage.
• Too little leavening. • Overmixing. • Pan too large. • Temperature set too high. • Baking time too long. • Pans too close to each other or oven walls.
Uneven texture
• Too much liquid • Undermixing. • Temperature settoo. • Baking time too Short
Cakes have tunnels.
• Not enough shortening. • Too much baking powder. • Overmixing or at too high a speed. • Temperature set too high.
Cake not done in middle
• Temperature set too high • Pan too-small • Baking timetoo short
If additional: ingredients were added to mix or recipe, expect cooking time to increase,
Pie crust edges too brown.
• Temperature set too high. • Pans touching each other or oven walls. • Edges of crust too thin; shield with foil.
Pies don't brown on
• Used shiny metal pans. • Temperatureset too low. • Incorrect rack. position.
• Somefrozen pies should be placed on a cookiesheei, check packagedirecüons-
Pies have soaked crust
• Temperature too low at start of baking. • Filling too juicy. • Used shiny metal pans.
AUTOMATIC OVEN COOKING
The Automatic Oven Cooking feature is used to turn he oven on and off at a press time of day.This feature can be used to:
Turn the oven on immediately (immediate start).
Delay the start of cooking (delay start).
The feature can be used with either oven cooking or the self-cleaning oven feature. See page 26 for instructions on delaying the start of a clean cycle.
The clock must be functioning and set at the correct time of day for the Automatic Oven Cooking feature to operate properly.
To recall the preset cook time or stop time, press the corresponding pad.
To cancel the Automatic Oven Cooking operation, press the CANCEL pad.
At the end of the Automatic Oven Cooking operation, the oven will automatically turn off and continuous beeps will sound to remind you to remove food from the oven, Press the CANCEL pad to cancel the beeps.
This feature will only delay cooking up to eleven hours and fifty five minutes (11:55).
If you delay more than 30 seconds behveen pressing a pad and the and pad, the display will either:
Return to the previous setting.
Beep and flash to indicate the next entry.
Return to the current time of day and cancel the operation.
To set oven:
Place food in the oven.
Press the COOK TIME pad.
The words SET COOK TIME will flash in the display.
Press the and pad to enter the cooking time.
To delay the start of cooking:
Press the OVEN STOP pad. The words SET STOP TIME will flash in the display.
Press the and pad to enter the time you wish the oven to turn off. NOTE: The control will automatically determine when to turn the oven on based on the COOK TIME and OVEN STOP TIME you set. tt is NOT necessary to set a start time.
Press the OVEN TEMP pad.
The words BAKE and 000 ° will appear in the display.
Press the and pad to enter the oven temperature.
At the end of the preset cooking time, the oven will automatically turn off and END will appear in the display. Continuous beeps will remind you to remove the food from the oven.
Press the CANCEL pad to cancel the beeps. The current time of day will reappear in the display when the CANCEL pad is pressed. Remove the food from the oven.
BROILING
Broiling is a method of cooking tender meats by direct heat. The cooking time is determined by the distance between the meat and the broil element, the desired degree of doneness and the thickness of the meat.
Broiling requires the use of the broiler pan and insert. The broiler insert must be in place to allow fat and liquid to drain to the pan below to prevent spatters, smoke and flare-ups. Improper use may cause grease fires.
For easier clean up, line the broiler pan with foil and spray the insert with a non-stick vegetable spray. Do not cover the broiler insert with aluminum foil as this prevents fat from draining into pan below.
Trim excess fat and slash remaining fat to help keep meat from curling and to reduce smoking and spattering. Season meat after cooking.
Place oven rack in the correct rack position when oven is cool. For darker browning, place meat closer to the broil element. Place meat further down if you wish meat to be well done or if excessive smoking or flaring occurs.
See Care and Cleaning Chart on page 23 for instructions on cleaning the broiler pan and insert.
To set oven to broil:
Press the BROIL pad. 000° and BROIL indicator words will appear in the display
Press the pad to select HI for normal broiling or press the pad to select Lo for low temperature broiling.
For optimum browning results, remove the broiler pan and preheat the broil element for 3 minutes.
Broil with the oven door opened to the broil stop position (opened about 6-inches). Turn meat once about half way through cooking. Check for doneness by cutting a slit in the meat near the center for desired color.
At the end of cooking, remove the broiler pan and press the CANCEL pad to cancel the broil operation. The current time of day will reappear in the display.
Use HI BROIL for most broil operations. Select Lo BROIL when broiling longer cooking foods such as poultry. The lower temperature allows food to cook to the well done stage without excessive browning. Cooking time will increase if Lo BROIL is selected.
Broil times will increase if oven is installed on a 208-volt circuit.
BROILING CHART
MAINTENANCE
OVEN DOOR
Do not place excessive weight on an open oven door or stand on an open oven door as,in some cases,it could cause the range to tip over,break the door or cause serious injury to the user.
When opening the oven door, allows team and hot air to escape before reaching in oven to check, add or remove food. Do not attempt to open or close door until the door is completely seated on the hinge arms.Never turn on the oven unless door is properly in place.When baking, be sure the door is completely closed. Baking results will be affected if the door is not securely closed
CAUTION: Hinge arms are spring mounted and will slam shut against the range if accidently hit. Never place hand or fingers between the hinges and the front oven frame. You could be injured if hinge snaps back.
To remove lilt-off door: When cool, open the door to the "stop" position (opened about 6 inches) and grasp the door at each side, Do not use the door handle to lift the door. Lift up evenly until the door clears the hinge arms.
To replace door: Grasp the door at each side, align slots in the door with the hinge arms and slide the door down onto the hinge arms until it is completely seated on hinges.
DOOR LOCK LEVER
The oven door is locked for a self-clean operation only. Do not move the door lock lever to the right or locked position during a cooking operation.
If the door is locked, the operation wil! automatically be cancelled and "door" will appear in the display. If the oven is hot enough to engage the internal lock, the oven door will not open. Allow the oven to cool for up to an hour, then unlock and open the door.
STORAGE DRAWER
On slide-in models only, the storage drawer at the bottom of the range is safe and convenient for storing metal and glass cookware. DO NOT store plastic, paperware, food or flammable material in this drawer. Remove drawer to clean under range. NOTE: Drop-in ranges do not feature a storage drawer.
To remove: Empty drawer then pull drawer out to the first stop position. Lift up front of drawer and pull to the second stop position. Grasp sides and lift up and out to remove drawer.
To replace: Fit the ends of the drawer glides onto the rails. Lift up drawer front and gently push in to first stop position. Lift up drawer again and continue to slide drawer to the closed position.
LEVELLING LEGS
Some floors are not level. For proper baking, your range must be level. Leveling legs are located on each corner at the base of the range. Level by turning the legs. To prevent range from accidently tipping, range should be secured to the floor by sliding a rear leveling leg into the anti-tip bracket supplied with the range.
CARE AND CLEANING
ABOUT CLEANING PRODUCTS
READ THE MANUFACTURER'S INSTRUCTIONS to be sure the cleaner can be safely used on this appliance. Also, read and carefully follow the manufacturer's directions when using any cleaning product.
To determine if a cleaning product is safe. test a small inconspicuous area using a very light pressure to see if the surface may scratch or discolor. This is particularly important for porcelain enamel. metal, plastic or highly polished. shiny. or painted surfaces.
The following brands may help you to make an appropriate selection:
Mild Liquid Spray Cleaners- Fantastik, Formula 409.
Non-Abrasive Cleaners- Bon Ami, paste of baking soda and water. Mildly Abrasive Powder or Liquid Cleansers - Ajax, Barkeepers Friend, Cameo, Comet, Soft Scrub.
Non--Abrasive or Scratchless Plastic or Nylon Scouring Pads or Sponges - Chore Boy Plastic Cleaning Puff, Scrunge Scrub Sponges, or Scotch-Brite No Scratch, Cookware or Kitchen Sponge.
(Brand names for the above cleaning products are registered trademarks of the respective manufacturers.)
NOTE: Be sure appliance is off and all parts are cool before handling or cleaning to avoid damage and possible burns. If a part is removed, be sure it is correctly replaced.
To prevent staining or discoloration, clean cooktop after each use.
CARE AND CLEANING CHART
PARTS
CLEANING •AGENTS
DIRECTIONS
Baked Enamel:
Side panels
Storage drawer
Oven door
Backguard
Detergent and water
Mild liquid cleaner
Glass deaner
Use a dry paper towel or cloth to wipe up spills, especially acid spills, as soon as they occur. This is especially important for white surfaces. When surface is cool, wash with detergent and water. Do not use abrasive or harsh cleaning liquids and powders or oven cleaners. These will scratch and permanently damage the finish. Dry with a soft cloth, On smoothtop cooktops, clean vent 0*ning area after each oven use.
Broller Pan and Insert
Detergent and:water
Plastic or soap filled scouring pad
Dishwasher
Pretreat the broiler pan and insert With a non-stick vegetable coating such as Pam or Mazola:ia nuke c!eaning easier.
Remove from oven after use Cool-then. pour off grease. Place cloth over insert and pan;let soak to loosen soil, Wash in warm soapy water. Use soap filled scouring pad to remove stubborn soil Broiler pan and insert can be cleaned in the dishwasher.
Control Knobs
Detergent and water
Mild liquid sprays
Glass cieaners
For ease of cleaning, turn off knob and remove by pulling forward. Wash, rinse, and dry. Do not use abrasive cleaning agents as they may scratch the finish and remove the markings. Tum on each element to be sure knobs have correctly replaced.
Elemmte, Oven
Eierrents are self-cleaning, Soil will burn off as elements are used. Do not spray oven cleaner on elenpnts, electrical hook up or connection.
Glass
Oven window
Detergent and water
Glass cleaner
To prevent staining of the oven window, avoid using excessive amounts of water which may seep under or behind glass, Wash with detergent and water. Remove stubborn soil with paste of baking soda and water. Do not use abrasive materials such as scouring pads, steel wool or powdered cleaning agents. They will darnge glass. Rinse with clear water and dry.
Metal Finished
Trim
Deterpnt and water Glass cleaner
Do not use oven cleaner or abrasive as they will damage the finish. Retrove stubborn soil with detergent and water. Polish with a soft cloth.
Oven Interior
Follow instructions on pages 25-26 for Self-Cleaning Oven.
Wipe up all spills immediately with a dry cloth — especially acid spills (milk, fruits, tomato, etc.). Never wipe a warm or hot surface with a damp cloth as cracking and chipping may result.
Oven Racks
Detergent and water
PlastE scouring pad
Cleansing powders
Soap-filted scouring pads
Clean with soapy water. Remove stubborn soil with cleansing powder or soap filled scouring pad. Rinse and dry. Racks will permanently discolor and may not slide smoothly if left in the oven during a self-dean operation. If this occurs, wipe the rack and erüssed rack supports with a small anmount of vegetable oil to restore ease of movement, then wipe off excess oil
Plastic Finishes
Door handies
Backguard trim
Knobs
End caps
Soap and water
Non-abrasive plastic pad or sponge
Glass cleaner
When surface is cool, clean with soap and water; rinse, and dry. Use a glass cleaner and a soft cloth. NOTE: Never use oven cleaners, abrasive or caustic liquid or powdered cleansers on plastic finishes. These cleaning agents will scratch or marr finish. NOTE: To prevent staining or discoloration, wipe up fat, grease or acid (tomato, lemon, vinegar, milk, fruit juice, marinade) immediately with a dry paper towel or cloth.
Poreekin Enante!
Coolqop trim, smoothtop
Detergent and water
Paste of baking soda and water
Non-abrasive plastic pad or sponge
Porcelain enamel, is glass fused on meta} and may crack or chip with misuse. Porcelain enamel is acid-resistant, not acid-proof. All spillovers, especially. acidic or sugar spillovers. should be wiped up immediately with a dry cloth. This is especially important around the vent opening for smooth top cooktop Surface may discolor or dull if soil, especially acidic soil, is not removed. Never wipe off a warm or hot surface with a damp cloth- This may cause cracking and chipping. Never use oven cleaners,. abrasive or caustic cleaning agents on exterior finish of range Orin the Self-Ciean Oven.
Smoothtop Cooktop
Light to moderate soil
Heavy soil or brown/ gray stains from hard water or metal marks
Bumed-on or crusty soils or residue
Sugar, plastic. aluninum foil
Cooktop Cleaning Creme e Detergent and water
Paste of baking soda and water
Cooktop Cleaning Creme
Single-edge safety razor blade
Cooktop Cleaning Crerne
Singieædge safety razor blade held with a potholder or a wooden handled stainless steel spatula
Wait until cooktop has cooled before cleaning. Gently apply cleaning agent with a non—abrasive plastic brush, nylon or plastic pad, paper towel or clean cloth. Rinse thoroughly and completely dry.
Gently scrub with cleaning creme and clean cloth or paper towel. Reapply cleaner. Cover with damp pape towels to keep cleaner moist. Let stand for 30 to 45 minutes, Scrub to remove remaining stain. Rinse and dry.
Hold razor blade scraper at 30' angle and very carefully scrape off soil. Clean remaining soil with cleaning creme.
Immediately tum element to LOW and from hot surface to a cool area Then tum elenent OFF and cool. Clean residue with razor Bade scraper and cleaning creme.
NOTE: Call an authorized servicer if the smooth top should crack, break or if metal or aluminum foil should melt on the cooktop.
SELF-CLEAN OVEN
SELF-CLEAN OVEN
The self-clean oven uses temperatures above normal cooking temperatures to automatically clean the entire oven interior.
CAUTION: It is normat for parts of the range to become hot during a clean cycle. Therefore, during a clean cycle, avoid touching the cooktop, oven vent area, oven door and window.
It is better to clean the oven regularly rather than to wait until there is a heavy build-up of soil in the oven.
Turn off the oven light before a clean cycle. If the oven light is left on, the light bulb will burn out during the clean cycle.
Before Self-Cleaning
Remove broiler pan, all pans and the oven racks from the oven. The racks will discolor and may not slide easily after a clean cycle.
Clean oven frame, door frame and around the oven vent with a non-abrasive cleaning agent such as Bon Ami or detergent and water. These areas are not exposed to cleaning temperatures and shouJd be cleaned to prevent soil from baking on during the clean cycle.
Wipe up excess grease or spillovers from the oven bottom to prevent excessive smoking and flare-ups during the clean cycle.
Wipe up sugary spfllovers and acid spillovers such as lemon juice, tomato sauce or milk-based sauces. Porcelain enamel is acid resistant, not acid proof. The porcelain finish may discolor if acid spills are not wiped up immediately.
Do not use oven cleaners on the self-clean oven finish or around any part of the oven as they will damage the finish or parts.
To prevent damage, do not clean or rub the gasket around the oven door. The gasket is designed to seal in heat during the clean cycle.
During Self-Cleaning
When the door is locked and the CLEAN pad is pressed, the oven wilt automatically begin to heat to cleaning temperatures.
NOTE: A fan will automatically turn on during the self-clean cycle and will automatically turn off after the clean cycle when the oven has cooled.
As the oven reaches cleaning temperatures, the LOCK indicator will appear in the display to show that an internal tock mechanism has engaged. At this point, the oven door can not be unlocked and opened.
To prevent damage to the door and lock lever, do not force the door open when the LOCK indicator is displayed.
The first few times the oven is cleaned, some smoke and odor may be detected. This is norma] and will lessen or disappear with use. If the oven is heavily soiled, or if the broiler pan was accidently left in the oven, smoke and odor may occur.
As the oven heats and cools, you may hear sounds of metal parts expanding and contracting. This is normal and wili not damage your appliance.
After Self-Cleaning
About one hour after the end of the clean cycle, the internal lock wilt disengage and the LOCK indicator will turn off. At this point, the door can be unlocked and opened. Move the door lock lever to the left or unlocked position and open the door. The oven may still be hot.
Some soil may leave a light gray, powdery ash which can be removed with a damp cloth. If soil remains, it indicates that the clean cycle was not long enough. The soil will be removed during the next clean cycle.
if the oven racks were left in the oven and do not slide smoothly after a clean cycle, wipe racks and embossed rack supports with a small amount of vegetable oil to restore ease of movement.
Clean around the oven vent opening at the rear of the cooktop if there is a deposit from the fumes vented during the clean cycle. Use detergent and water and a cloth or non-abrasive pad.
Fine, hair-like lines may appear in the oven interior or oven door. This is a normal condition resulting from heating and cooling of the porcelain finish. These lines do not affect the performance of the oven.
Immediate Start
To set oven for a self-clean cycle:
Remove the oven racks and close the door.
Move the door lock lever to the right until it rests in the locked position.
Press the CLEAN pad.
"door" will appear in the display and beeps will sound if the door is not locked.
3 HR:00 wilt appear in the display and SET CLEAN TIME will flash inthe display.
After a few seconds delay, the oven and fan will automatically turn on. CLEAN TIME and ON will remain in the display.
The oven wilf automatically clean for 3 hours. Or, select 2 hours for light soil up to 4 hours for heavy soil by pressing the or pad.
Press the CLOCK pad and the current time of day will reappear in the display. CLEAN and ON will remain in the display to show that the oven is in a clean cycle.
If the door is not locked or the clean time is not entered within 30 seconds of pressing the CLEAN pad, the program will automatically be cancelled.
About one hour after the clean cycle ends, the LOCK indicator will turn off and the oven door can be unlocked and opened.
The oven door and door lock lever will be damaged if the oven door is forced to open when the LOCK indicator is still displayed.
Delay Start
To delay the start of a clean cycle:
Remove the oven racks and close the door.
Move the door lock lever to the right or locked position.
Press CLEAN pad.
Press the or pad to select the cleaning time.
Press OVEN STOP pad and press the or pad to select the time of day you wish the oven to turn off. The stop time and CLEAN DELAY STOP TIME will appear in the display.
Press the CLOCK pad and the current time of day will reappear in the display. CLEAN DELAY will remain in the display to show that the oven is set for a delayed clean operation.
At the end of the clean cycle, continuous beeps will sound. Press the CANCEL pad to cancel the beeps.
To cancel clean cycle:
Press the CANCEL pad.
If the LOCK indicator is displayed, allow the oven to cool for up to one hour. Once the LOCK indicator turns off, the door can be unlocked and opened.
If the LOCK indicator is not displayed, the oven door can be unlocked and opened.
SERVICE INFORMATION
HOW TO OBTAIN SERVICE
Before you call for service, review the information in this section to be sure a service call is really necessary. A quick reference of this manual may prevent an unneeded service call. If you do have a problem you can not fix yourself, call 1-800-473-7247 for help. When requesting service, have this manual handy. You will also need:
A clear description of the problem.
The model and serial numbers. NOTE: These numbers are found on the rating plate which is located on the range front frame. Open the storage drawer or oven door to see the rating plate.
The purchase date. NOTE: Save your sales receipt as proof of purchase should warranty service be needed.
EXPLANATION OF FAULT CODES
Your appliance is equipped with self-diagnostic software which continuously monitors the control to ensure safe and proper operation. If the software detects a questionable situation, a FAULT CODE (F plus a number) will appear in the display, continuous beeps may sound and as a safety precaution, the operation will be cancelled. If a fault code appears in the display and continuous beeps sound, press the CANCEL pad. Then, reprogram the cooking operation.
If the fault code reappears in the display, call an authorized servicer. Do not use the oven until the appliance has been serviced.
NOTE: If the oven is heavily soiled, excessive smoke and flaring may result in a fault code during a self-clean cycle. If this occurs, press the CANCEL pad and allow the oven to cool for an hour.
ADJUSTING OVEN TEMPERATURE
If you have carefully followed the recipe, reviewed the baking tips in this manual and still feel cooking results do not meet your expectations, you can adjust the oven temperature. DO NOT ADJUST THE TEMPERATURE if only one or two items are not baking properly.
If you think the oven should be hotter or cooler, you can adjust it yourself. To decide how much to change the thermostat, set the oven temperature 25°F higher or lower than the temperature in your recipe, then bake. The results of the "test" should give you an idea of how much to adjust the thermostat.
To adjust the thermostat:
Press the OVEN TEMP pad.
Press the pad until 550 ° is displayed.
Press and hold the OVEN TEMP pad for several seconds.
The display will show the ambient oven temperature for a few seconds then 00° will appear in the display.
If 00° does not appear in the display, press the CANCEL pad and begin again.
If the oven temperature was previously adjusted, the change will be displayed. For example, if the temperature was reduced by 15°, -15 ° will be displayed.
Press the or pad to select the temperature change desired.
The oven temperature can be increased up to 35° or reduced by as much as 35 ° (-35 °) in 5° increments.
If you delay in selecting a temperature, the program will automatically cancel and 00° will disappear. Begin again if the program cancels.
Press the CANCEL pad and the time of day will reappear in the display.
The oven will now bake at the adjusted temperature.
NOTE: It is not necessary to readjust the oven temperature if there is a power interruption. This adjustment will not affect broil or clean temperatures.
TROUBLESHOOTING CHART
1. Part or all of your electric range does not operate
Is the range plug loose or disconnected from the electrical outlet?
Are any house fuses blown or circuit breakers tripped?
Has the power supply to the home been interrupted?
Are the oven controls property set?
Was the electronic control correctly set?
Was the door left in the locked position following a self-clean cycle?
Is the oven set for automatic oven cooking?
2. Surface elements fail to turn on or heat the food properly.
Is the range plug loose or disconnect from the electrical outlet?
Are the surface element controls properly set?
Is voltage to the house reduced?
3. Food not baking or cooking correctly
Are the oven racks properly placed for baking?
Have you used aluminum foil correctly?
Was the oven preheated as recommended?
Are the controls properly set?
Is there 1 to 2 inches of space between pans and the oven walls?
Are the range and oven racks level?
Was good cookware/bakeware of the proper size used?
Was the oven vent covered or blocked on the range surface?
Are you using a tested recipe from a retiabie source?
Have you used aluminum foil correctly?
4. Baking results differ from previous oven
Oven thermostat calibration may differ between old and new oven. The newer oven thermostat may be more accurate than the one on your previous oven. Follow a reliable recipe and review baking information on pages 18 to 19. If you still feel the oven temperature is incorrect see page 27 for information on adjusting the oven thermostat.
5. Food does not broil correctly
Was the control set properly for broiling? (See page 23)
Was the proper rack position used? (See page 21.)
Did you allow time for the broil element to preheat?
Did you use the broiler pan that came with the range?
Was aluminum foil used on the broiler insert, blocking the slits for fat drainage?
Was the oven door opened to the broil stop position?
6. Oven light does not operate
ls the bulb loose or burned out?
ls the light switch in the On position?
7. Oven will not self-clean
Is the self-clean control set properly? (See pages 25-26.)
Is the oven set for a delayed clean operation?
Is the oven door properly locked?
Was the oven heavily soiled?
8. Oven door will not lock
Are the controls properly set for the self-clean cycle?
9. Oven door will not unlock
Has the self-clean cycle been completed for at least one hour?
Was the door correctly unlocked?
Is the LOCK indicator word in the display?
10. "F" plus a number appears in the display
This is a fault code. If a fault code appears in the display and a continuous beep sounds, press the CANCEL pad. If the beeps continue, call an authorized servicer. See page 27 for additional information.

 and
and  pads
pads


 pad to select HI for normal broiling or press the
  pad to select Lo for low temperature broiling.


