Loading ...
Loading ...
Loading ...
16
English
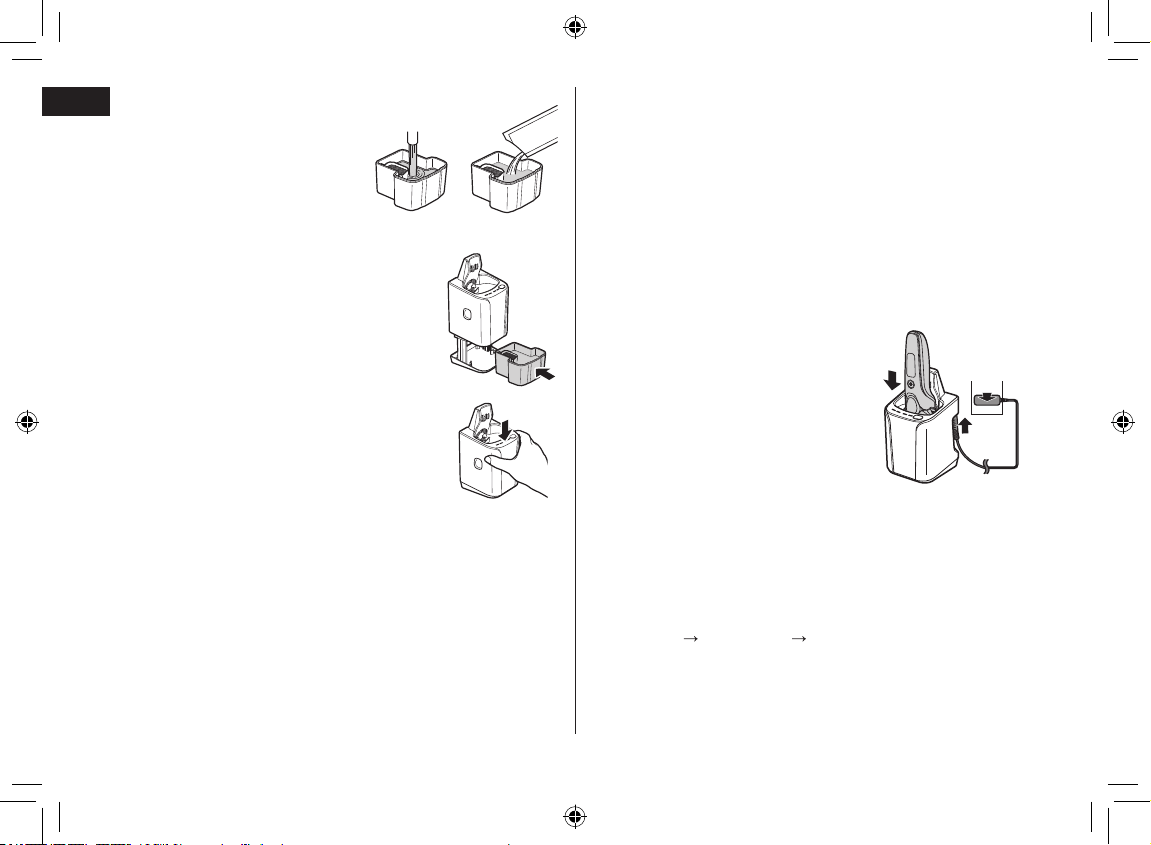
4
4
Pour tap water (
1
) and
detergent (
2
) into the
cleaning liquid unit.
• Do not let the water rise
above the maximum water
line. This may cause the
cleaning liquid to spill.
• Pour the entire packet of detergent (approximately 15 mL).
5
5
Attach the cleaning liquid unit.
• Immediately wipe up any cleaning liquid
that has been spilt.
Be careful not to drop cleaning liquid
onto leather products or wooden floors
as it may cause discoloration.
6
6
Press the top of the self-
cleaning recharger down and
securely attach until it clicks.
► Notes
• The water and detergent will mix after cleaning begins, making
cleaning liquid.
• If the LOW lamp or the STATUS lamp glows for 5 seconds when
the SELECT button is pressed, the cleaning liquid needs to be
replaced. Replace the cleaning liquid.
• After the LOW lamp glows, you can clean the shaver with the
self‑cleaning recharger for approximately 7 days.
• When replaced, the cleaning liquid will last for approximately
30 days if used once per day. (This will differ depending on beard
thickness and the ambient temperature.)
• Use the detergent within approximately 6 months after opening the
package. When 6 months have passed, discard the cleaning liquid,
and then pour new water and detergent into the cleaning liquid unit.
• Replace the water and detergent at the same time.
Otherwise the cleaning function may deteriorate.
• Only use self‑cleaning recharger detergent for Panasonic shavers.
Failure to do so may cause damage or malfunction.
►Cleaning the shaver
• Rinse the shaver in water if there is some soap or shaving gel on it.
• When the shaver is wet, shake off excess moisture and then
wipe off any remaining droplets.
Constituent of the cleaning liquid may alter, which could cause
damage or bacterial contamination.
1
1
Insert the appliance plug into
the self-cleaning recharger.
2
2
Remove the protective cap
and then attach the shaver.
• Slowly insert the shaver into the
self‑cleaning recharger taking care
not to damage the system outer foil.
• Wipe off any water droplets on the
main body rear terminals.
1
2
3
3
3
Plug in the adaptor into a household outlet.
4
4
Press the SELECT button to select the mode.
• The “Charge” mode starts when attaching the shaver.
• Each time you press the SELECT button, the mode changes
from “AUTO” “Dry/Charge” “Charge”.
• The modes start approximately 6 seconds after they are selected.
• The mode will be aborted if the power is cut off. In this case,
perform the mode again from the beginning.
• Do not press the cleaning liquid unit removal button as the
cleaning liquid may spill causing a malfunction.
ES-LT7N_US.indb 16 2015/04/17 17:45:28
Loading ...
Loading ...
Loading ...