Loading ...
Loading ...
Loading ...
9
Installation Cont.
Unpacking
• This product has been packaged to protect it against transportation damage. Unpack the appliance
and remove all packaging materials from around the rangehood. Keep all packaging materials until you
have made sure your new rangehood is undamaged and in good working order. The carton is recyclable.
Whenever possible, reuse the carton and recycle it when disposing of the packaging materials.
• Plastic wrapping can be a suffocation hazard for babies and young children, so ensure all packaging
materials are out of their reach, and dispose of them safely.
Important installation advice
WARNING!
• All electrical work associated with the installation of this rangehood must be carried out by a licensed
electrician.
• This rangehood must be correctly installed by a suitably qualied person in strict accordance with all
applicable rules and regulations and following the instructions in this manual.
• Do not try to install the rangehood yourself; doing so will expose you to danger and void the warranty.
Improper installation, adjustment, alteration or service can cause injury or damage. We decline any
responsibility for injury or damage, to persons or property, as a result of improper installation.
Before Installation:
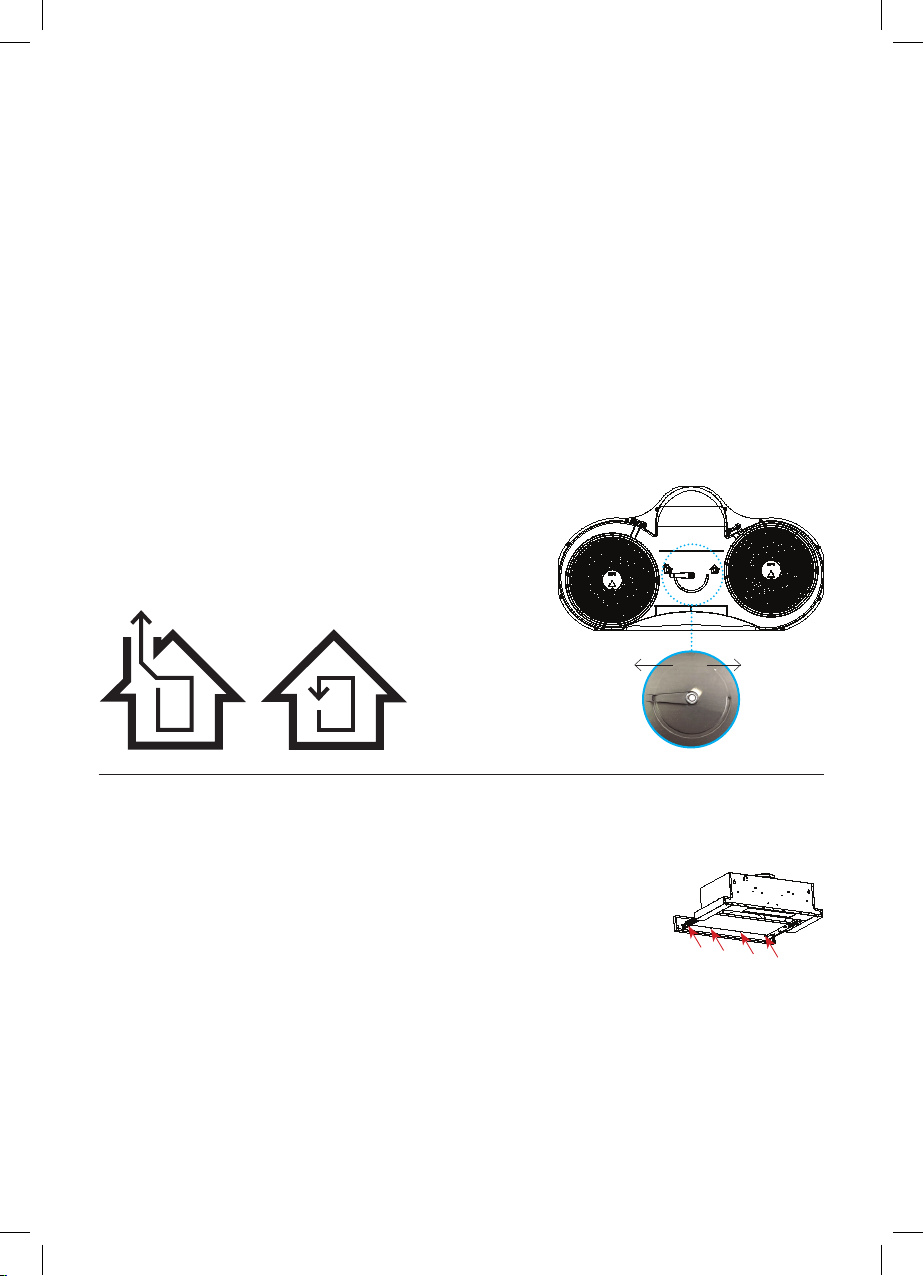
Before Installation, please decide the extraction mode with the
adjuster on the motor (Fig. 1).
Rangehood standard configuration
This product has been supplied with “recirculation mode” as the
default setting. The rangehood is suitable for both recirculation
(Fig 3.) and external ducting (Fig. 2) modes
External Outdoor Ducting Mode
—Recommended wherever possible for optimal performance
If you have chosen to operate your rangehood in “External Outdoor Ducting Mode”
you will need to follow the steps below:
1. Unscrew the 80mm fascia rail which is already installed on the rangehood (Fig. 4)
2. Using the same screws, attach the 40mm fascia rail (part ID 3, Installation Kit)
supplied in the box
3. Remove the aluminium grease lters (Fig 6. on page 10) from the underside of
the rangehood. Turn the switch in the centre of the motor housing to “External
Outside Ducting” position (Fig. 1)
4. Remove the charcoal lters by twisting anti-clockwise (Fig. 8 on page 11). The
charcoal lters are not required for “external outdoor ducting mode”
5. Clip in the plastic Front Vent Cover (part ID 9, installation kit) over the vent holes
on the front of the rangehood.
6. Using the screws provided, install the Flu Outlet Adaptor (Part ID 10, Installation kit)
to the top of the rangehood
7. Install the ducting pipe (not supplied) to the outlet on the top of the rangehood and
vent to external air. It is recommended that the ducting pipe is 120mm in diameter.
Fig. 2 Fig. 3
Fig. 1
DUCTING RECIRCULATING
Fig. 4
Loading ...
Loading ...
Loading ...