Loading ...
Loading ...
Loading ...
13
Installation Cont.
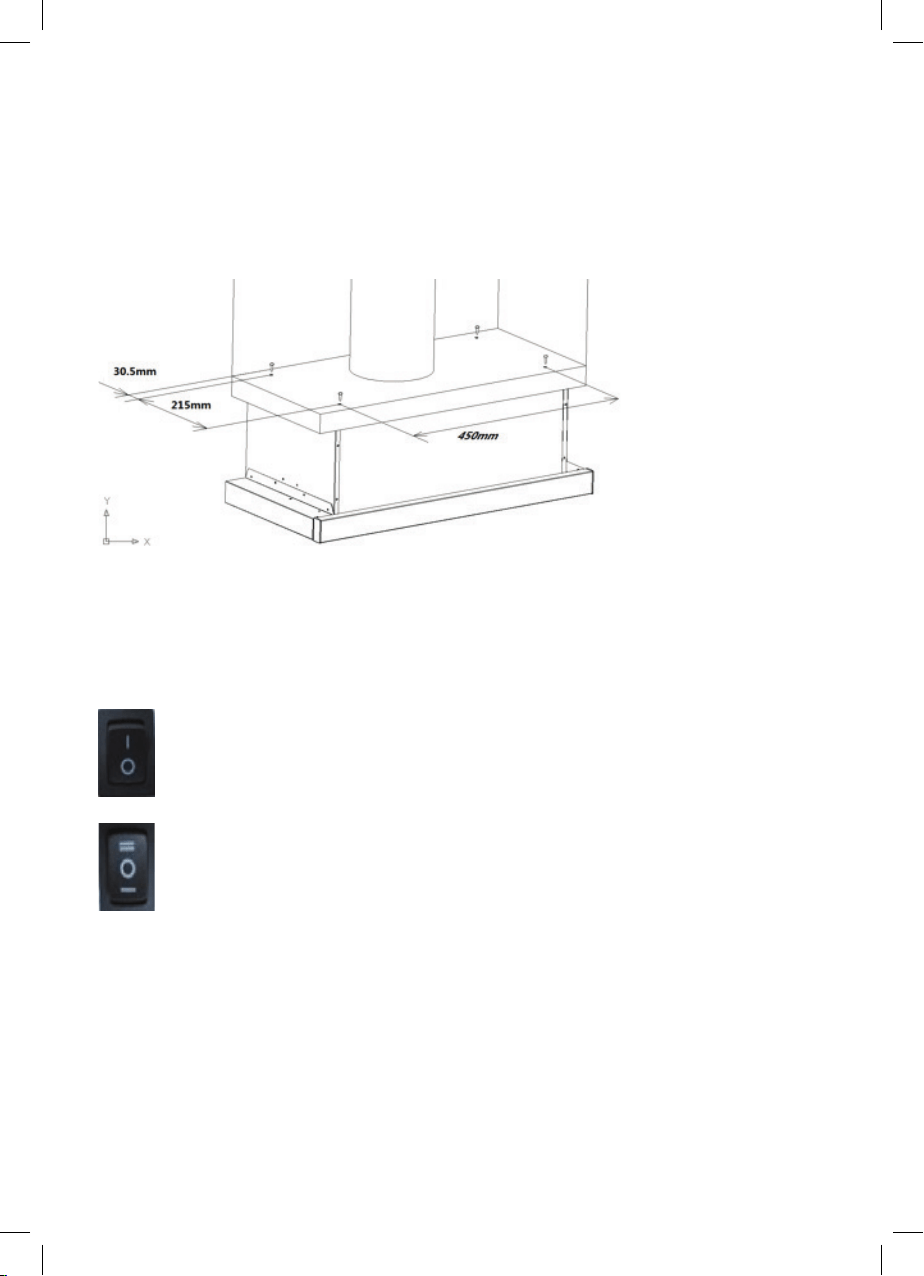
• Install the rangehood onto the bottom of the cupboard and secure it in place with four ST4x30mm
screws (Fig 13).
• If there is a space between the wall and the rear of the rangehood, install the rear-underside support
mounting bracket (Part ID 2, Installation kit) using the two ST4x8mm screws.
WARNING: Failure to install the screws or xing device in accordance with these instructions may result in
electrical hazards!
Instructions
NOTE: After the rangehood has been properly installed, insert the power plug into an appropriate electrical
outlet and let the unit run for a few minutes prior to using it while cooking.
This switch is to turn the rangehood either on or off.
I Turns the rangehood ON
O Turns the rangehood OFF
This button toggles between fan speed high, fan speed low and off setting
= Turns on the fan motors to high speed for maximum extraction
o Turns off the fan motors for no extraction, the fan motors are off
– Turns on the fan motors to low speed minimum extraction
NOTE:
• The rangehood will only operate once the slide-out rail is pulled outwards towards the kitchen.
• Close the front panel and the rangehood will stop working.
• The next time the front panel is pulled back out, the rangehood will start working at the previously set level.
Fig. 13
Loading ...
Loading ...
Loading ...