Loading ...
Loading ...
Loading ...
Self-help
Check after 10 minutes of driving
Screw the inflator tube
››
›
Fig. 31
5
again
and check the pressur
e on the gauge
6
.
1.3 bar (19 psi / 130 kPa) and l
ower:
●
Stop the vehicle! The tyre cannot be
sealed sufficiently with the tyre mobility set.
●
You should obtain professional assistance
›››
.
1.4 bar (20 psi / 140 kPa) and higher:
●
Set the t
yre pressure to the correct value
again.
●
Carefully resume your journey until you
reach the near
est specialised workshop with-
out exceeding 80 km/h (50 mph).
●
Have the damaged tyre replaced.
WARNING
Driving with an unsealed tyre is dangerous
and can cause accidents and serious in-
jury.
●
Do not continue driving if the tyre pres-
sure is 1.3 bar (19 psi / 130 kP
a) and lower.
●
Seek specialist assistance.
Changing a wheel
What t
o do first
●
Park the vehicle on a horizontal surface and
in a safe pl
ace as far away from traffic as
possible.
●
Apply the handbrake.
●
Switch on the hazard warning lights.
●
Manual transmission: select the 1st gear.
●
Automatic transmission: Mov
e the selector
lever to position P.
●
If you are towing a trailer, unhitch it from
your vehicle.
●
Have the vehicle tool kit
›››
page 40 and
the spare wheel* ready
›››
page 284.
●
Observe the applicable legislation for each
country (reflective vest, warning triangles,
etc.).
●
All occupants should leave the vehicle and
wait in a safe place (for instance behind the
roadside crash barrier).
WARNING
●
Alw
ays observe the above steps and pro-
tect yourself and other road users.
●
If you change the wheel on a slope, block
the wheel on the opposite side of the car
with a stone or similar to prevent the vehi-
cle from moving.
Wheel central trim*
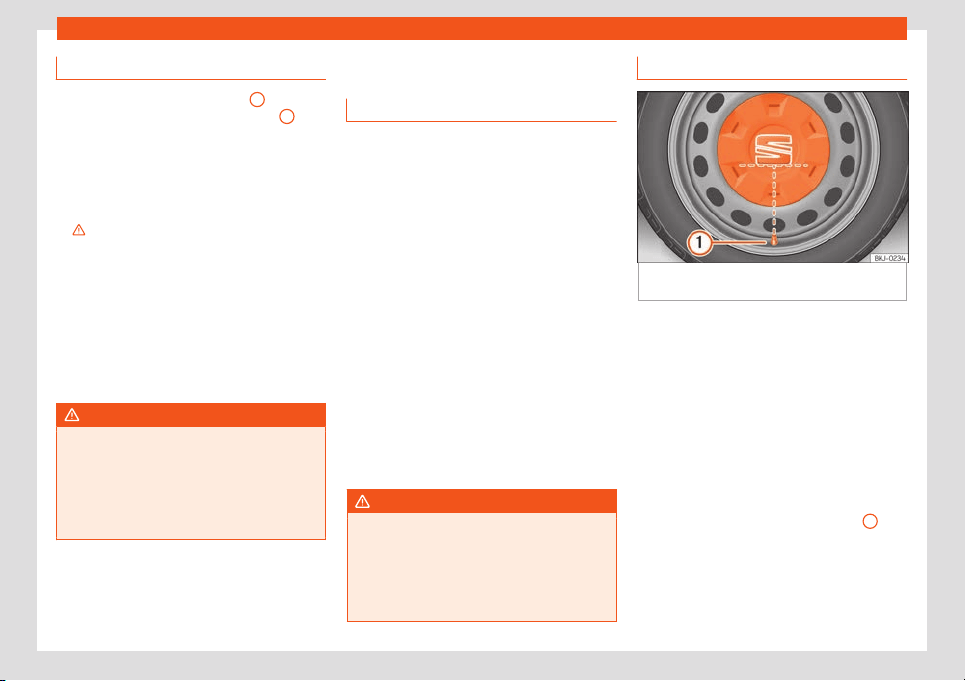
Fig. 32
Correct positioning of the central
wheel trim f
or st
eel rims.
The central trims must be removed for access
t
o the wheel nuts.
R
emoving
●
Attach the wire hook (vehicle tools
›››
page 40) to one of the recesses of the
central wheel trim and remove it.
Fitting
●
Fit the central wheel trim onto the rim. The
bottom of the “S” of the SEAT badge should
align with the inflation valve
›››
Fig. 32
1
.
●
Press the central trim firmly until it locks in
with an audibl
e click
.
»
43
Loading ...
Loading ...
Loading ...