Loading ...
Loading ...
Loading ...
Installation en
21
5Installation
Instal l ation
Preparing for installation
■ We recommend a distance of at least 700 mm and a
maximum of 1500 mm. The cooking vapours are
more difficult to draw in the further away they are
from the hob.
■ So that cooking vapours are optimally drawn in,
install the extractor hood in the middle of the hob.
■ The installation site must be easily accessible, so
that the appliance can be accessed freely for
servicing.
Checking the ceiling
■ The ceiling must be flat, horizontal and adequately
load-bearing.
■ The max. weight of the appliance is 40 kg.
Notes
■ Check the cut-out area for existing cables of other
appliances.
■ When mounting the extractor hood, a suitable
substructure is required that is securely fastened to
the concrete ceiling.
■ Do not fit the appliance directly onto plasterboard (or
similar lightweight materials) in a suspended ceiling.
■ To ensure correct installation, you must use a
material which is sufficiently stable and suitable for
both the structural conditions and the weight of the
appliance.
Preparing the ceiling
The ceiling must still be sturdy after the cut-outs have
been made.
1. Cover the hob to protect it from damage.
2. Make the cut-out in the ceiling.
3. After making the cut-outs, remove any shavings.
Installing the appliance
:Warning – Risk of injury!
Components inside the appliance may have sharp
edges. Wear protective gloves.
:Warning – Risk of injury!
Risk of trapping body parts when opening and closing
the hinges. Keep your hands away from the hinges.
1. Tilt the transport lock slightly upwards and carefully
pull it upwards and out at an angle.
2. Remove residues from polystyrene from the interior
of the appliance.
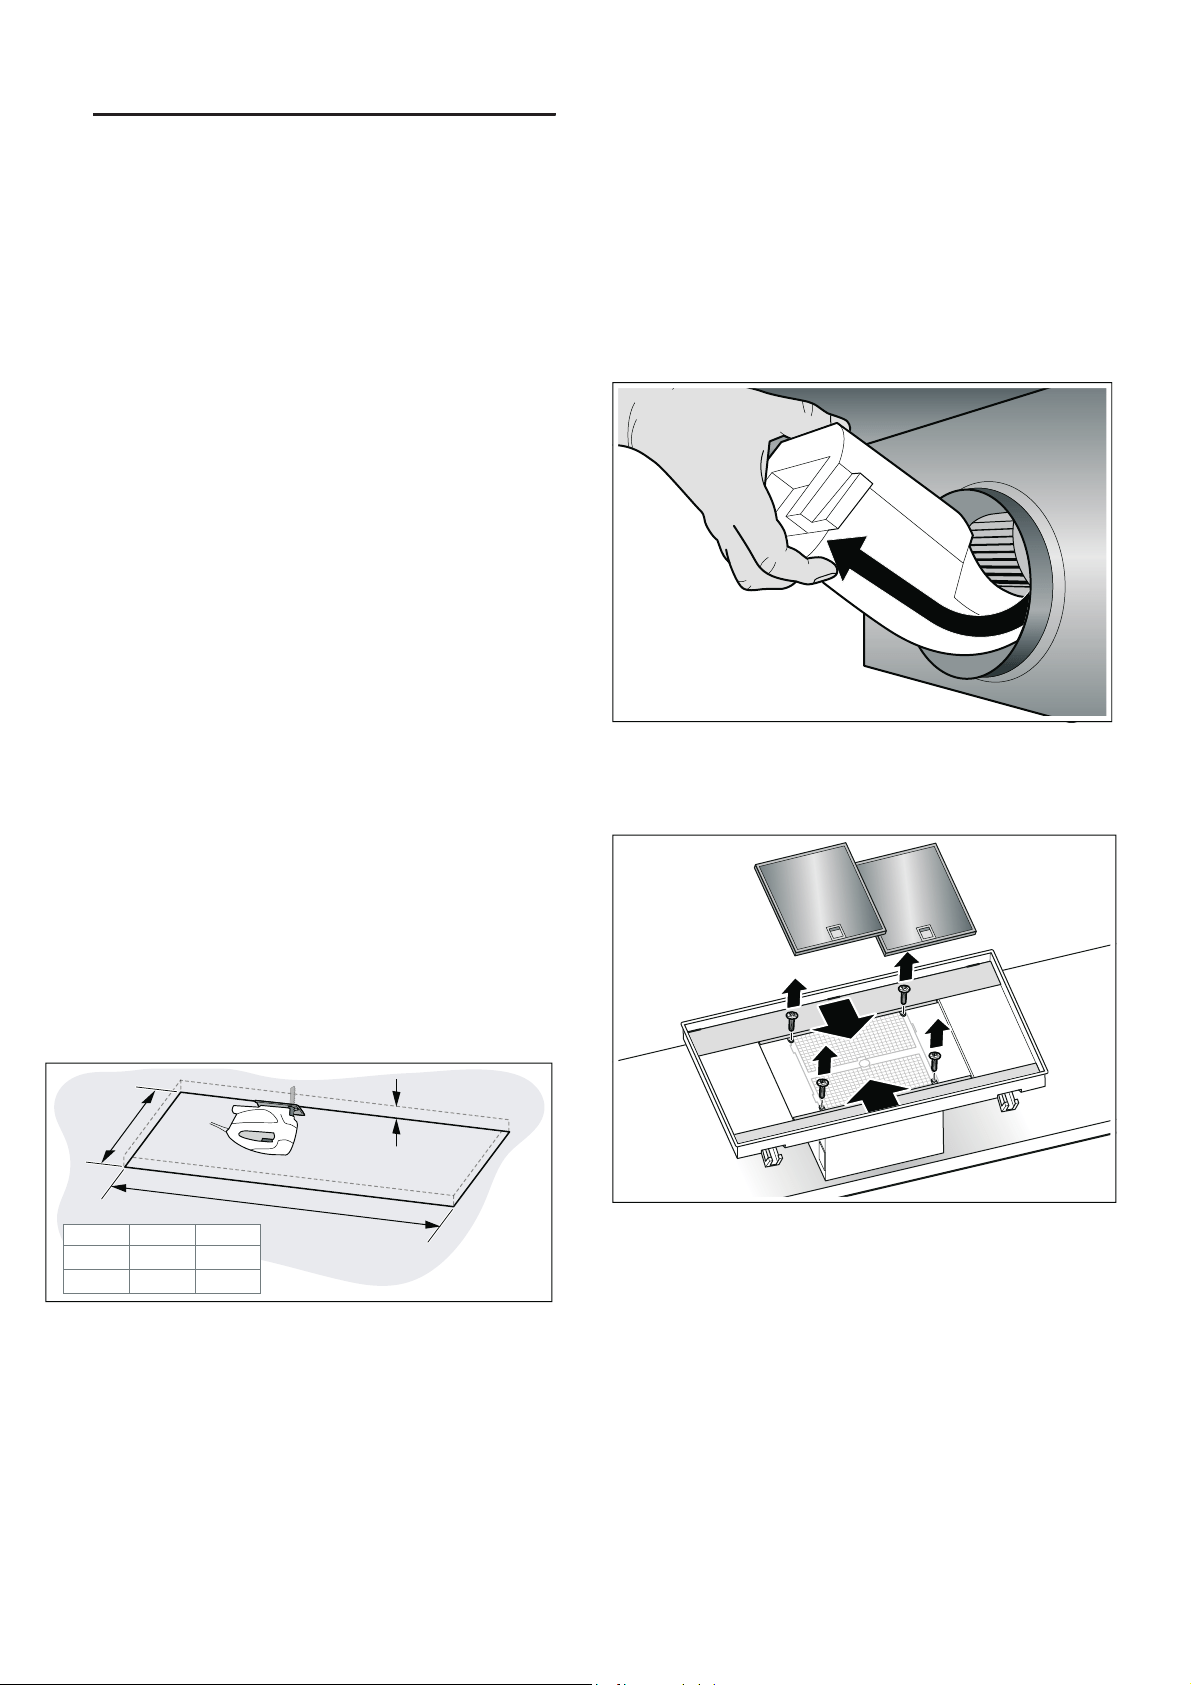
3. Remove the grease filter.
4. Remove the side covers.
Note: Avoid scratching the side covers as they are
within view.
[
\
]
[\]
²
²
Loading ...
Loading ...
Loading ...