Loading ...
Loading ...
Loading ...
4EN
English
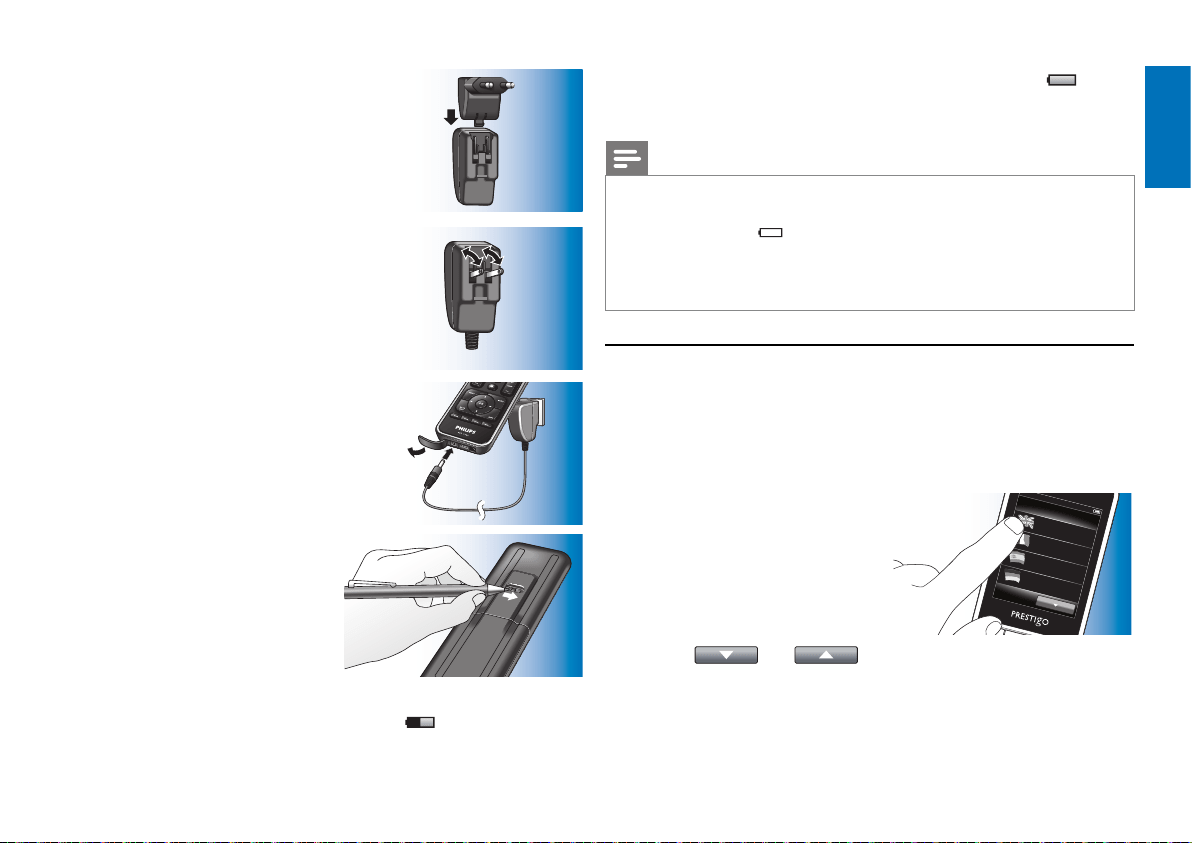
1 Select the adapter plug for your
country and slide it over the power
plug of the charging cable.
OR:
Fold out the contact blades.
2 Insert the power plug into a wall
outlet.
3 Turn the protective cap, covering the
connectors, to the left.
4 Insert the plug at the other end of
the charging cable into the remote
control power supply jack.
5 If desired, set the On / Off switch
to the right (On).
The On / Off switch is located at the
rear of the remote control.
Use a pen or small screwdriver to
set the switch.
• The Philips Startup screen appears, followed by the Language
Selection screen. The progress animation (
) in the top right
corner of the screen indicates the charging status.
• When the battery is fully charged the battery full icon (
)
appears at the top right corner of the screen.
Notes
• Operation time of a fully charged battery is approximately 1 month but also
depends on the intensity of usage. When the battery is almost empty the
battery low icon (
) flashes in the top right corner of the screen.
Recharge the battery as described above.
• When the battery cannot be recharged anymore it needs to be replaced.
For this, refer to chapter 7.2.2 ‘Replacing the battery’.
2.2 Setting up the remote control
Make sure the remote control is fully charged and turned on (for this refer
to chapter 2.1 ‘Charging the battery’).
Avoid turning off the remote control with the On / Off switch at the rear
for this will shorten battery life time.
1 Select your preferred language by
Setup
English
Français
Español
Deutsch
touching the language (flag) in the
Language Selection screen.
• Use the
and buttons, at the bottom of the screen,
to scroll through the list of available languages.
• A welcome message appears.
Getting started
Loading ...
Loading ...
Loading ...