Loading ...
Loading ...
Loading ...
• 5 •
For your safety and the safety of oth-
ers, carefully follow the instructions
provided in the "Safety Regulations"
section.
Machine Packaging
The original packaging has been designed
and constructed to protect the machine
during transport. We recommend keep-
ing the packaging material for possible
future transport.
Preliminary Operations
• Remove the co ee bean hopper cover,
the drip tray with grill and the milk
container from the packaging.
• Remove the co ee machine from the
packaging and position it in a place
that meets the requirements described
in the safety regulations.
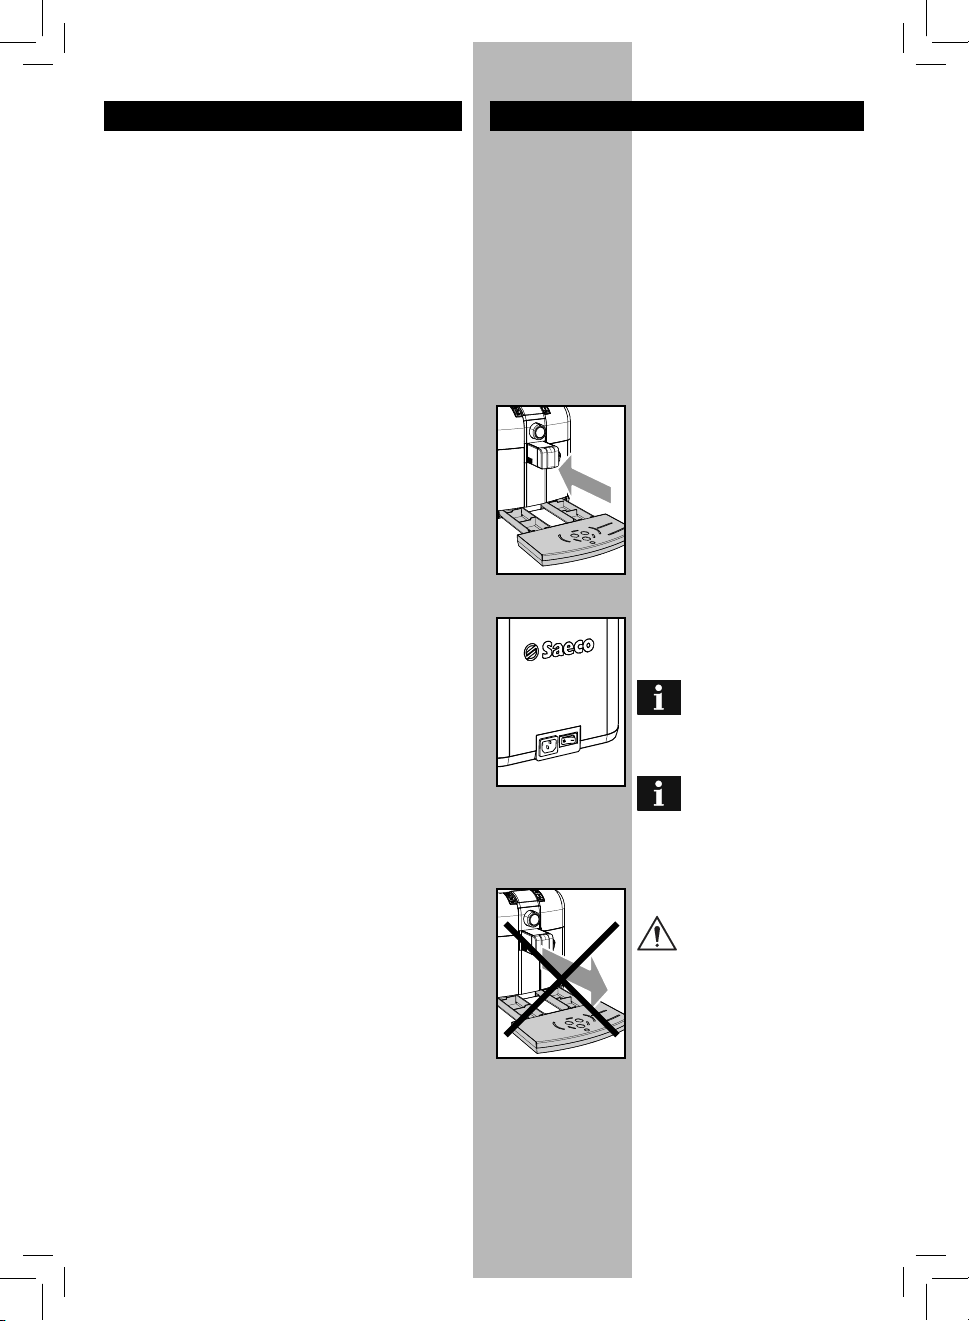
• Place the drip tray with grill into its
appropriate seat on the machine. Make
sure it is fully inserted to its limit stop.
• Insert the co ee bean hopper cover.
Note: Insert the plug into the
socket only when indicated
and check that the general switch is
in "0" position.
Important note: Carefully
read the explanations of all
the warnings the machine displays
to the user on the control panel
LCD display (section "LCD Display
Warnings").
NEVER remove the drip tray
when the machine is turned
on. Wait a couple of minutes after
turning on/o , as the machine will be
carrying out a rinse/self-cleaning cy-
cle (see section "Rinse/Self-cleaning
Cycle").
TABLE OF CONTENTS INSTALLATION
• GENERAL INFORMATION ......................................... 2
• SAFETY REGULATIONS ............................................ 2
• INSTALLATION ........................................................ 5
Machine Packaging ..............................................................5
Preliminary Operations ........................................................5
• RINSE/SELFCLEANING CYCLE ................................. 6
• USING THE MACHINE FOR THE FIRST TIME OR
AFTER A LONG PERIOD OF INACTIVITY. .................... 7
• “INTENZA” WATER FILTER. ...................................... 8
• WATER HARDNESS MEASUREMENT ......................... 9
• MILK CONTAINER ...................................................9
• COFFEE BREWING ................................................. 10
Dispensing Spout Adjustment ............................................10
'Aroma' Adjustment ...........................................................10
Using Co ee Beans .............................................................10
Using Pre-ground Co ee ....................................................11
• CAPPUCCINO ....................................................... 12
• HOT MILK BREWING ............................................. 12
• CLEANING OF THE MILK BREWING SYSTEM ........... 14
Automatic cleaning functions ............................................14
Fast cleaning ......................................................................14
Periodic cleaning ................................................................15
• HOT WATER DISPENSING ...................................... 18
• ADJUSTMENTS ..................................................... 19
Saeco Adapting System ......................................................19
Co ee Grinder Adjustment .................................................19
Adjusting the Co ee Length ...............................................19
Cappuccino Adjustment .....................................................20
Adjusting the amount of frothed milk ................................21
Stand-by ............................................................................21
• PROGRAMMING ................................................... 22
Enter the “menu” ................................................................22
Programming controls .......................................................22
Exit Programming Mode ....................................................22
Functions ...........................................................................22
Programming Example ......................................................23
• CLEANING AND MAINTENANCE ............................. 24
General Cleaning ................................................................24
Brew Group ........................................................................24
• DESCALING .......................................................... 26
• CONTROL PANEL DISPLAY ..................................... 28
Ready Signals .....................................................................28
Alarm Signals .....................................................................29
Warning Signals .................................................................30
• TECHNICAL SPECIFICATIONS ................................. 30
• TROUBLESHOOTING ............................................. 31
Loading ...
Loading ...
Loading ...