Loading ...
Loading ...
Loading ...
27_ Operating the oven
operating the oven
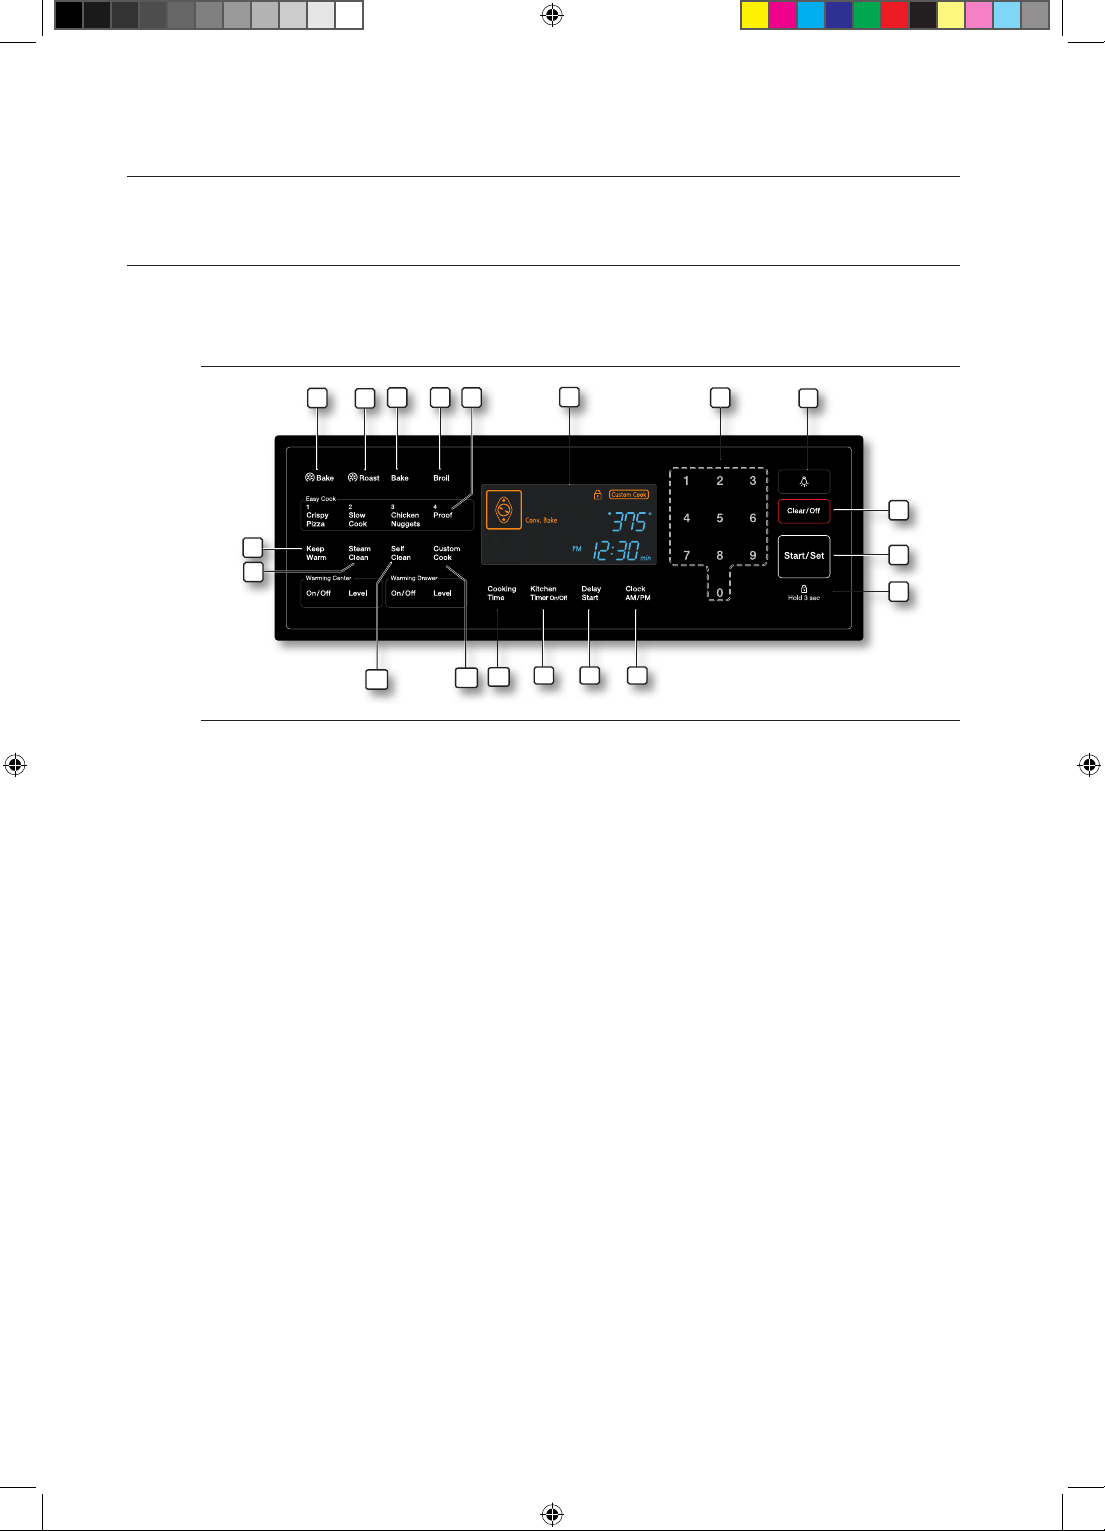
THE OVEN CONTROL PANEL
READ THE INSTRUCTIONS CAREFULLY BEFORE USING THE OVEN. For satisfactory use
of your oven, become familiar with the various features and functions of the oven as described
below. Detailed instructions for each feature and function follow later in this user manual.
11
10
7
65 8
1
13
12
14
2
9
1516
18
17
3
19
4
1. DISPLAY: Shows the time of day, oven temperature, whether the oven is in the bake, broil or
self-cleaning mode, and the times set for the timer or automatic oven operations.
2. NUMBER PAD: Use to set any function requiring numbers such as the time of day on the
clock, the timer, the oven temperature, the start time and length of operation for timed baking.
3. START/SET: Must be pressed to start any cooking or cleaning function.
4. CLEAR/OFF: Press to cancel all oven operations except the clock and timer, warming center,
and warming drawer.
5. KITCHEN TIMER ON/OFF: Press to select the timer feature.
6. DELAY START: Use along with Bake, Conv. Bake, Conv. Roast, Cooking Time, and Self
Clean pads to set the oven to start and stop automatically at a time you set.
7. COOKING TIME: Press and then use the number pad to set the amount of time you want
your food to cook. The oven will shut off when the cooking time has run out.
8. CLOCK AM/PM: Press to set the time of day.
9. OVEN LIGHT: Press to turn the oven light on or off.
10. CUSTOM COOK: Press to record and recall your favorite recipe setting.
11. SELF CLEAN: Press to select the self-cleaning function.
12. STEAM CLEAN: Press to select the steam-cleaning function.
13. PROOF: Press to select a warm environment useful for rising yeast-leavened products.
14. KEEP WARM: Press to keep cooked foods warm.
15. BROIL: Press to select the broil function.
16. BAKE: Press to select the bake function.
17. CONVECTION BAKE: Press to select baking with the convection function.
18. CONVECTION ROAST: Press to select roasting with the convection function.
19. CONTROL LOCKOUT: Press to lock the buttons on the touch pad so they cannot be
activated accidentally.
NE597R0ABSR_AA_DG68-00431A-04_EN.indd 27 02/01/2014 13:08:32
Loading ...
Loading ...
Loading ...