Loading ...
Loading ...
Loading ...
24
Installation Instructions
ELECTRICAL CONNECTIONS (CONT.)
4-WIRE CONDUIT INSTALLATION7
A
B
C
8
Proceed to Step 8.
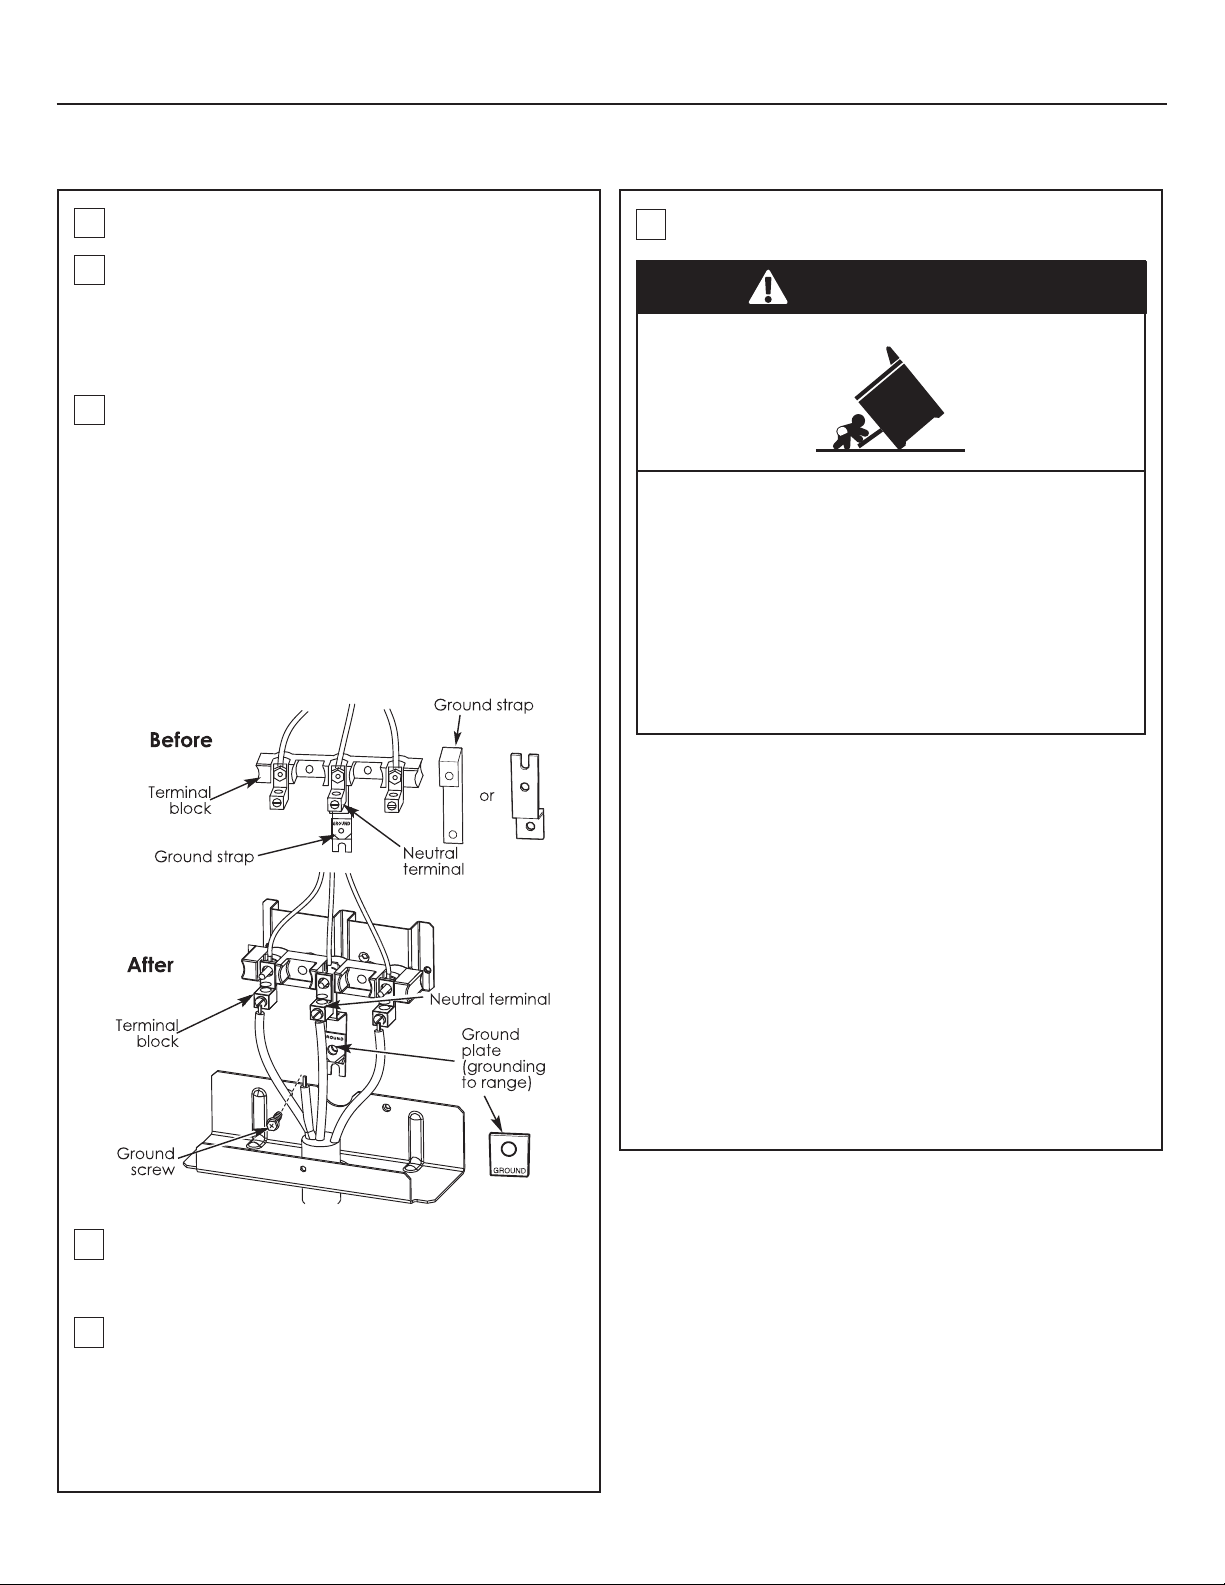
Loosen the three lower terminal screws from the
terminal block. Remove the ground screw and
ground plate and retain them.
Cut and discard the ground strap.
DO NOT DISCARD ANY SCREWS.
Insert the ground bare wire tip between the range
frame and the ground plate (removed earlier) and
secure it in place with the ground screw (removed
earlier). Insert the bare wire (white/neutral) tip
through the bottom center of the terminal block
opening. Insert the two side bare wire tips into the
lower left and the lower right terminal block open-
ings. Tighten the screws until the wire is firmly secure
(approximately 20 inch-lbs.).
Wire used, location and enclosure of splices, etc.,
must conform to good wiring practices and local
codes.
Replace the wire cover on the range back by slid-
ing its two lower retaining tabs into the slots and re-
placing the screw removed earlier. Make sure that
no wires are pinched between the cover and the
range back.
REPLACE THE WIRE COVER
ANTI-TIP DEVICE INSTALLATION9
WARNING
Tip-Over Hazard
A child or adult can tip the range and be killed. Verify
the anti-tip bracket has been properly installed and
engaged.
Ensure the anti-tip bracket is re-engaged when the
range is moved.
Do not operate the range without the anti-tip bracket in
place and engaged.
Failure to follow these instructions can result in death or
serious burns to children or adults.
To reduce the risk of tipping the range, the range must
be secured by a properly installed anti-tip bracket. See
installation instructions shipped with the bracket for
complete details before attempting to install.
To check if the bracket is installed and engaged prop-
erly, look underneath the range to see that the anti-tip
arm attached to the side panel is engaged in the
bracket. On some models, the storage drawer or kick
panel can be removed for easier inspection. If visual in-
spection is not possible, slide the range forward, con-
firm the anti-tip bracket is securely attached to the floor
or wall, and slide the range back so the anti-tip arm
slides just under the anti-tip bracket. If the range is
pulled from the wall for any reason, always repeat this
procedure to verify the range is properly secured by
the anti-tip bracket.
Loading ...
Loading ...
Loading ...