Loading ...
Loading ...
Loading ...
17INSTALLATION
ENGLISH
4
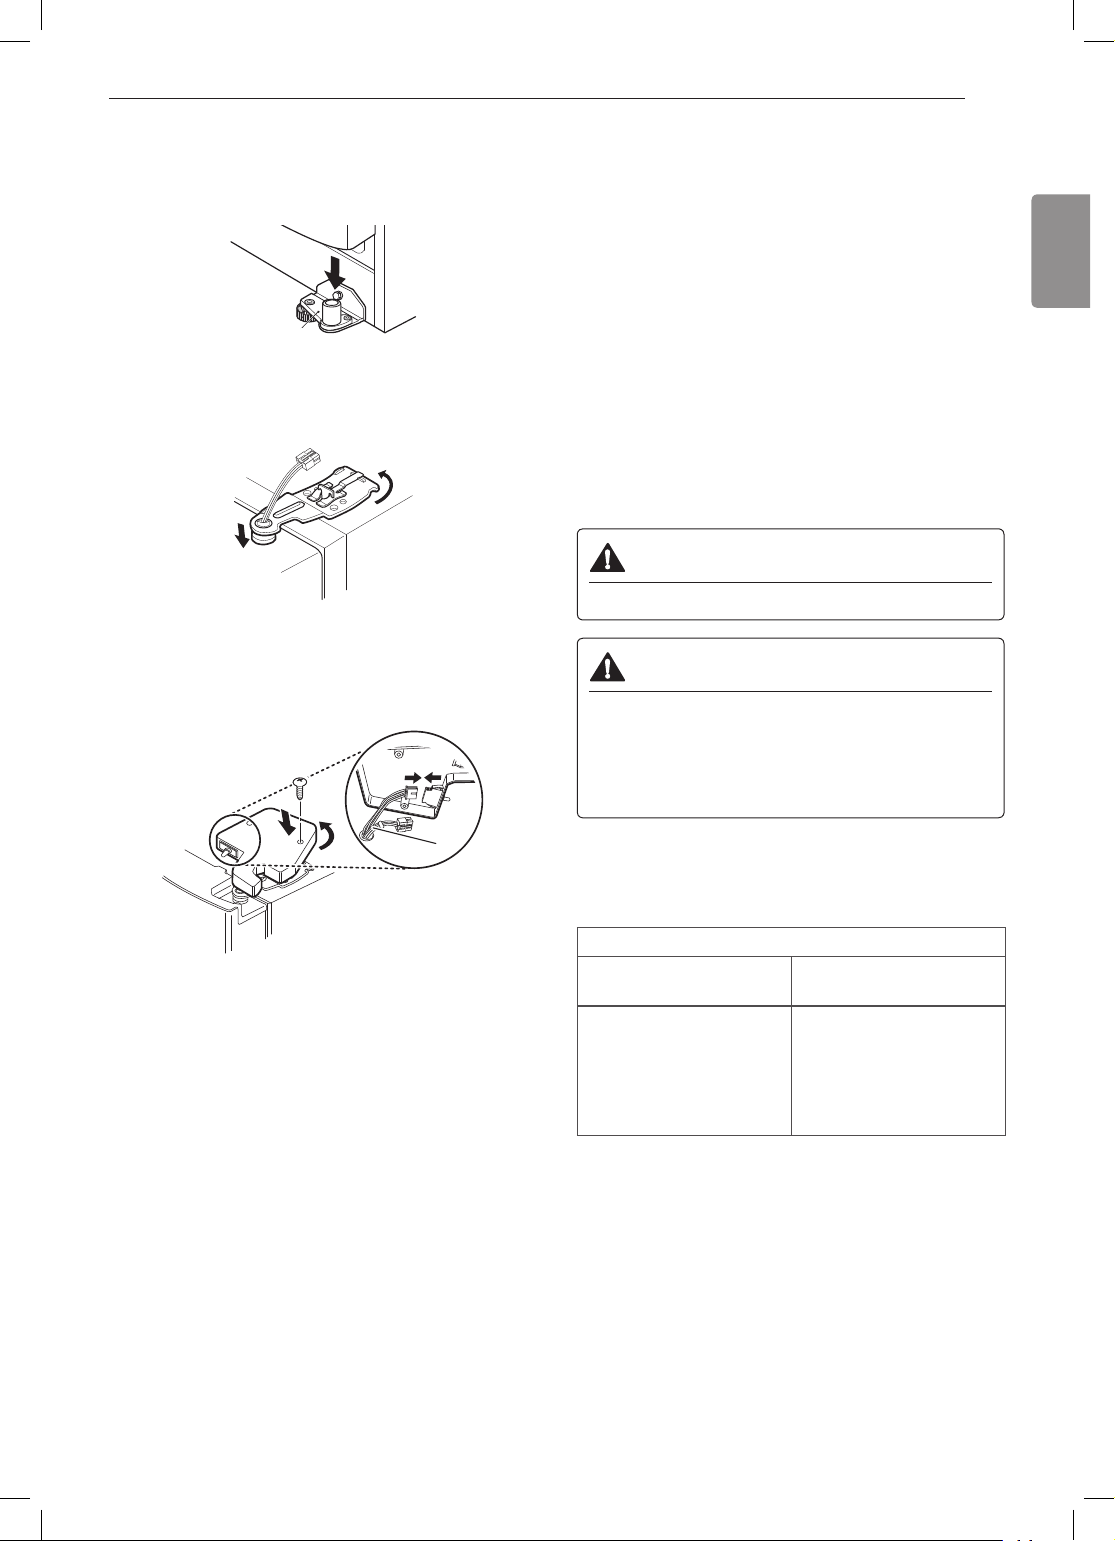
Lift the door from the lower hinge pin.
Lower Hinge
CAUTION
• When lifting the hinge free of the latch, be careful
that the door does not fall forward.
• Place the door, inside facing up, on a
nonscratching surface.Be careful not to damage
the water lines.
NOTE
• Do not remove the grease on the surface of the
gasket or hinge.
• Do not remove the sensor assembly in the right
upper hinge cover.
Assembling the Freezer Door
1
Feed the water tubes through the lower hinge
pin and place the door onto the lower hinge pin.
Make sure the water hoses are behind the leg to
prevent damage.
NOTE
• Open the door and turn the hose toward the inside.
Water hoses should be behind the leg to prevent
damage.
Correct Incorrect
Disassembling/Assembling the Water Lines
Collet
Tube
Insert line
Clip
(Correct)
2
Gently press the collet and insert the tube until
only one line shows on the tube.
Correct Incorrect
NOTE
• Water hoses should be cut with a clean, straight
edge to avoid leaks.
3
Fit the top over the hinge lever latch and into
place. Rotate the lever clockwise to secure the
hinge.
4
Install the grounding screw and connect all the
wire harnesses.
5
Hook the tab on the door switch side of the cover,
under the edge of the wire opening in the cabinet
top. Position the cover into place. Insert and
tighten the cover screw.
6
Reconnect the water tubes by inserting the tubes
into the connectors. The tube is inserted correctly
when only one guide line is showing out of two.
Assembling the Refrigerator Door
1
Place the door onto the lower hinge pin.
Lower Hinge
2
Fit the upper hinge over the hinge lever latch and
into place. Rotate the lever counterclockwise to
secure the hinge.
(1)
(2)
3
Reconnect all wire harnesses. Hook the tab on
the switch side of the cover under the edge of the
wire opening in the cabinet top. Position the cover
and replace the screw.
Connecting the Water Line
Before Beginning
This water line installation is not covered by the
refrigerator warranty. Follow these instructions
carefully to minimize the risk of expensive water
damage.
If necessary, call a qualied plumber to correct water
hammer before installing the water supply line to
the refrigerator. Water banging in the pipes, or water
hammer in residential plumbing can cause damage
to refrigerator parts and lead to water leakage or
ooding.
• Turn the icemaker OFF if the refrigerator will be
used before the water line is connected.
• Do not install the icemaker tubing in areas where
the ambient temperatures fall below freezing.
WARNING
• Connect to a potable water supply only.
CAUTION
• To prevent burns and product damage, only
connect the refrigerator water line to a cold water
supply.
• Wear eye protection during installation toprevent
injury.
Water Pressure
You will need a cold water supply.
Water Pressure
models with water lter
20–120 psi
(138 - 827 kPa)
where reverse osmosis
water ltration system is
connected to a cold water
supply
40–60 psi minimum to
reverse osmosis system
(2.8 kgf/cm
2
– 4.2 kgf/
cm
2
,or less than 2–3
seconds to ll a cup of 7
oz capacity)
Loading ...
Loading ...
Loading ...